This article was co-authored by wikiHow staff writer, Amber Crain. Amber Crain has been a member of wikiHow’s writing staff for the last six years. She graduated from the University of Houston where she majored in Classical Studies and minored in Painting. Before coming to wikiHow, she worked in a variety of industries including marketing, education, and music journalism. She's been a radio DJ for 10+ years and currently DJs a biweekly music program on the award-winning internet radio station DKFM. Her work at wikiHow supports her lifelong passion for learning and her belief that knowledge belongs to anyone who desires to seek it.
This article has been viewed 18,249 times.
Learn more...
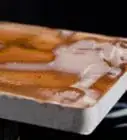
Gel stain is a great option for finishing a wood-based project. In most cases, you won’t need to strip away the existing finish, making it very convenient. Because gel stain is so much thicker than traditional wood stains, it’s also very easy to apply. Start off by cleaning and sanding the surface. Apply the gel stain with a foam brush or pad, then wipe the excess away after 30 seconds. Once the stain is completely dry, apply a gel stain top coat to lock in the color and protect the finish.
Steps
Prepping the Surface
-
1Strip the surface if you’re going from a dark color to a lighter stain. To go from a dark surface to a lighter stain, you’ll need to apply a chemical wood stripper first. You can buy stripper at any home improvement store. Brush a thick coat of stripper onto the surface, then let it sit for 30 minutes to dissolve the finish. Use a plastic scraper or stiff-bristled brush to scrape off the dissolved finish.[1]
- Work in a well-ventilated room. Wear goggles and protective gloves when using stripper.
- Scrub the surface thoroughly with a mild detergent solution and steel wool before proceeding.[2]
- Refer to your stripper product’s instructions for additional details.
-
2Clean the surface thoroughly. Use a mild soap solution and microfiber cloth to wipe down a raw wood surface. If you’re applying gel stain over an existing finish, mix equal parts water and denatured alcohol to create a cleaning solution. Dip a microfiber cloth into it and wipe the surface down. Wipe off excess liquid with a paper towel.[3]
- Create a mild soap solution by combining 1 cup (240 ml) water with 1 teaspoon of mild dish detergent.[4]
- Let the surface air-dry completely before proceeding.
Advertisement -
3Sand the surface using 120-grit sandpaper. Start off using a medium grit sandpaper, such as 120-grit. Sand the surface thoroughly, taking care to get into the nooks and crannies of the piece. Start on 1 side and work your way systematically to the other side to ensure an even and thorough job.[5]
-
4Follow up by using a 320-grit sandpaper. After using medium grit sandpaper, sand the surface again using a fine grit, like 320-grit or 400-grit. The fine grit sandpaper gets rid of any remaining imperfections in the wood and gives you a perfectly smooth surface for applying the gel stain.[6]
- If you’re working with a raw wood finish, follow up with 150-grit sandpaper. Using anything finer than that may prevent the surface from holding the stain well.[7]
-
5Wipe down the surface to remove lingering dust and debris. Any dirt or sanding dust left on the surface of the wood will prevent you from getting an even stain and be visible once the stain dries. Use a dampened tack cloth or microfiber cloth to wipe down the entire surface. Be sure to get into the nooks and crannies.[8]
-
6Protect glass and hardware with paper and blue painter’s tape. Gel stain can permanently stain both glass and metal, so mask off these areas before you apply it. For glass, cut thick paper down to size and use painter’s tape to attach it to the glass. Cover up hardware like knobs and hinges with painter’s tape.[9]


Applying the Gel Stain
-
1Protect the floor with a tarp and put on gloves. Gel stain can ruin concrete, carpet, and pretty much any other surface it touches. Before you get started, lay down a tarp or a large piece of cardboard. Situate your item right in the middle. Your hands can also get stained, so pull on some protective gloves before you open the gel stain.[10]
-
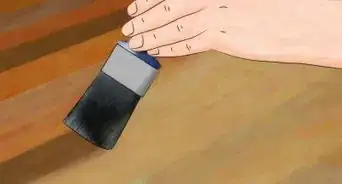
2Stir the gel stain thoroughly before using it. Gel stain is very thick and the pigments tend to settle at the bottom of the can over time. It’s important to stir the stain thoroughly with a wooden paint stick or some other tool you don’t mind throwing away. If you want to be extra thorough, turn the can upside down for 15 to 20 minutes, then pop open the can and stir well.[11]
-
3Divide your piece into small sections. Gel stain dries very quickly. You’ll end up with the best results if you divide your project up into small sections and work on 1 section at a time. The size of the sections is up to you, but if you’re working on a really big piece, work in sections no larger than 2 square feet (0.18 square meters).[12]
-
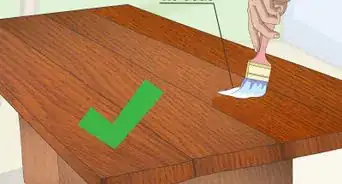
4Use a foam brush or pad to apply the stain liberally to the first section. Dunk the foam brush or pad into the gel stain, then apply a thick, even coat on your first section. It doesn’t matter which way the grain is going for the application, but you do want to work as quickly as you can while also taking care to coat the surface evenly. Saturate the surface with the stain.[13]
- Foam brushes and pads give you lots of control when applying stain over flat swaths of wood.
- For crevices and curves, use an artist’s paintbrush to apply the stain.
-
5Let the stain sit for 30 seconds. Once the first section is evenly covered with stain, give it about 30 seconds so the stain can get a good “grip” on the surface of the wood. Do not wait longer than 30 seconds. Gel stain dries very quickly and will become tacky if left on the surface any longer than that.[14]
-
6Wipe off the excess stain with a staining pad or old t-shirt. Wipe the surface in the same direction as the grain, then inspect the surface for any streaks or marks. It may take up to 4 passes to fully remove the excess stain from the surface, so be diligent. To prevent smears, refold the pad or t-shirt so that you’re wiping with a clean piece of cloth each time.[15]
-
7Repeat the process for each section of your piece. Continue the exact same technique of liberally spreading the stain on the surface, letting it sit for 30 seconds, and wiping away the excess until you’ve completely covered your piece. Remember to work quickly while also paying attention to the evenness of your application.[16]
-
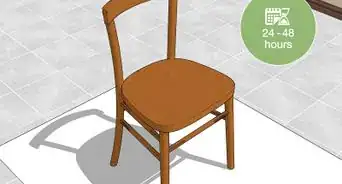
8Let the stain dry for 24 hours before applying another coat. Allow the gel stain to dry completely before deciding if you want to do additional coats. The color will probably look a little different once completely dry. If you do want to stain the piece darker, apply the second coat the exact same way you applied the first one. The second coat will fill in any streaks and deepen the color.[17]
- Let the piece dry for 48 hours before proceeding with the top coat.


Applying the Top Coat
-
1Select the gel stain top coat of your choice. The top coat seals the gel stain and protects the finish of your piece. Choose a top coat that matches the base of your stain – if you used an oil-based gel stain, use an oil-based top coat. If you used water-based stain, go for a water-based top coat. It will be clearly labeled oil or water-based on the packaging.[18]
-
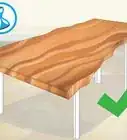
2Apply a thin coat of top coat. For oil-based products, wipe on the top coat with a lint-free shop towel or old t-shirt. Use a foam brush to apply water-based top coats. Start on one side and work systematically to the other side. All you need is a thin coat to seal in the stain. Let the top coat dry overnight before proceeding.[19]
-
3Sand the surface with 400-grit sandpaper. After the top coat dries, go over the entire surface lightly with a piece of 400-grit sandpaper. Be sure to sand with the grain. Then, wipe the surface down thoroughly with a damp cloth to remove any dust or debris generated by your sanding.[20]
-
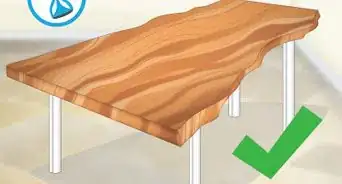
4Apply a second coat of top coat. The second coat will really lock the gel stain in place. Apply a thin coat, just like you did with the first one. Work systematically from 1 side to the other. Let the top coat dry completely before proceeding.[21]
-
5Sand the surface lightly one last time. After the final coat of top coat, sand the surface very lightly again using the 400-grit sandpaper. Be sure to sand with the grain. Use a very gentle touch – you only want to remove a small amount of the finish to even out the surface. Wipe the surface down thoroughly.[22]
- If you masked off areas with paper or painter's tape, you can remove that now.


Things You’ll Need
- Gel stain
- 120-grit sandpaper
- 320-grit sandpaper
- 400-grit sandpaper
- Plastic tarp or cardboard
- Protective gloves
- Paint stirrer
- Foam brushes
- Artist’s paintbrush
- Microfiber cloths
- Old t-shirts
- Gel stain top coat


References
- ↑ http://anastasiavintage.com/2015/04/gel-stain-essential-tips-tricks.html
- ↑ http://anastasiavintage.com/2015/04/gel-stain-essential-tips-tricks.html
- ↑ https://www.woodcraft.com/blog_entries/how-to-use-oil-base-gel-stain-over-existing-finishes
- ↑ https://www.marthastewart.com/274289/cleaning-products-101?slide=3408054
- ↑ http://anastasiavintage.com/2015/04/gel-stain-essential-tips-tricks.html
- ↑ http://anastasiavintage.com/2015/04/gel-stain-essential-tips-tricks.html
- ↑ https://generalfinishes.com/videos/how-to-apply-gel-stain-and-gel-topcoat#.WjWZ7TdG3IU
- ↑ http://anastasiavintage.com/2015/04/gel-stain-essential-tips-tricks.html
- ↑ https://www.woodcraft.com/blog_entries/how-to-use-oil-base-gel-stain-over-existing-finishes
- ↑ https://www.woodcraft.com/blog_entries/how-to-use-oil-base-gel-stain-over-existing-finishes
- ↑ http://anastasiavintage.com/2015/04/gel-stain-essential-tips-tricks.html
- ↑ http://anastasiavintage.com/2015/04/gel-stain-essential-tips-tricks.html
- ↑ http://anastasiavintage.com/2015/04/gel-stain-essential-tips-tricks.html
- ↑ http://anastasiavintage.com/2015/04/gel-stain-essential-tips-tricks.html
- ↑ https://www.theweathereddoor.com/2014/10/how-to-stain-with-gel-stain-over.html
- ↑ http://anastasiavintage.com/2015/04/gel-stain-essential-tips-tricks.html
- ↑ https://www.woodcraft.com/blog_entries/how-to-use-oil-base-gel-stain-over-existing-finishes
- ↑ http://anastasiavintage.com/2015/04/gel-stain-essential-tips-tricks.html
- ↑ http://anastasiavintage.com/2015/04/gel-stain-essential-tips-tricks.html
- ↑ http://anastasiavintage.com/2015/04/gel-stain-essential-tips-tricks.html
- ↑ https://generalfinishes.com/videos/how-to-apply-gel-stain-and-gel-topcoat#.WjWZ7TdG3IU
- ↑ https://generalfinishes.com/videos/how-to-apply-gel-stain-and-gel-topcoat#.WjWZ7TdG3IU
About This Article