X
wikiHow is a “wiki,” similar to Wikipedia, which means that many of our articles are co-written by multiple authors. To create this article, volunteer authors worked to edit and improve it over time.
There are 8 references cited in this article, which can be found at the bottom of the page.
This article has been viewed 32,616 times.
Learn more...
Microsoft Outlook is an email client bundled with Microsoft Office for Windows-based computers. The latest versions of Outlook allow you to send, reply, and forward emails, add file attachments, make appointments, and much more.
Steps
Method 1
Method 1 of 10:
Creating a New Outlook Account
-
1Launch Outlook and click “Next” when prompted to configure an email account. The Microsoft Outlook Startup wizard will guide you through creating a new Outlook account if this is your first time using Outlook.
- Follow the steps outlined in Method Two if your goal is to add an additional email account to Outlook.
-
2Select “Yes” to confirm you want to create a new Outlook account, then click “Next.”Advertisement
-
3Enter your name and preferred email address.
-
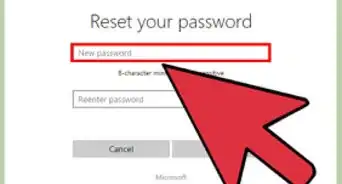
4Type a password for your email account, then click “Next.” Outlook will take a few moments to create and configure your email account.
-
5Click on “Finish.” Your new Outlook account is now created.[1]


Advertisement
Method 2
Method 2 of 10:
Adding an Outlook Account
-
1Click on “File” and select “Info.”
-
2Click on “Add Account” under the Account Information section.
-
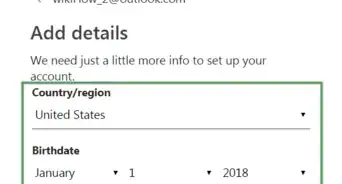
3Enter your name and preferred email address.
-
4Type a password for your email account, then click “Next.” Outlook will take a few moments to create and configure your email account.
-
5Click on “Finish.” Your additional Outlook account is now created.


Advertisement
Method 3
Method 3 of 10:
Creating an Email
-
1Click on the “Home” tab at the top of Outlook.
-
2Click on “New Email.” This opens a new, blank email.
- Alternately, press CTRL + Shift + M on your keyboard to open a new, blank email.
-
3Type the subject or title of your message into the “Subject” field.
-
4Type the recipient’s email address into the “To” box. If sending to multiple recipients, separate each recipient’s name with a semicolon.
-
5Type your message into the body of the email, then click “Send.” Your email has now been sent to the recipient.[2]


Advertisement
Method 4
Method 4 of 10:
Replying and Forwarding
-
1Open the email to which you want to reply or forward.
-
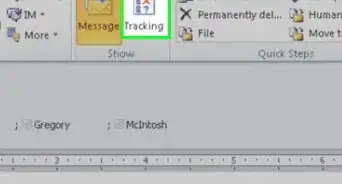
2Click on the “Home” tab and select “Reply,” “Reply All,” or “Forward.” Selecting “Reply” allows you to reply to just the sender, whereas “Reply All” sends a reply to all parties copied on the email. The “Forward” option allows you to forward the entire contents of the email to one or more recipients.
-
3Type your message into the body of the email.
-
4Confirm that the email’s “To” field contains the names of intended recipients.
-
5Click on “Send.” The email has now been sent or forwarded to the recipient.[3]


Advertisement
Method 5
Method 5 of 10:
Adding an Attachment
-
1Open the email message to which you want to add an attachment.
-
2Click on the “Message” tab and select “Attach File.” File Explorer will open and display on-screen.
-
3Navigate to and select the file you want attached to the email. You can attach file types of any kind, including photos, videos, spreadsheets, and more.
-
4Click on “Insert” after selecting the file. The file will now be attached to your email message.[4]


Advertisement
Method 6
Method 6 of 10:
Adding an Email Signature
-
1Click on the “Message” tab and select “Signature.”
-
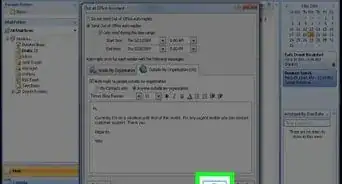
2Select “Signatures,” then select “New.”
-
3Type a name for your signature, then click “OK.”
-
4Type the message you want included with your signature into the “Edit signature” box. For example, type your name, title, and company.
-
5Click “OK,” then click on “Choose default signature.”
-
6Select your email account, then select the signature you just created. Going forward, your signature will be added to all outgoing emails.[5]


Advertisement
Method 7
Method 7 of 10:
Scheduling Calendar Appointments
-
1Click on the “Home” tab and select “New Appointment.” Alternately, press CTRL + Shift + A on your keyboard, or right-click a time block in your calendar grid and select “New Appointment.”
-
2Type a description of your appointment into the “Subject” box.
-
3Type the location of your appointment into the “Location” box.
-
4Enter the start and end times for your appointment, then click “OK.” Outlook will automatically remind you about your appointment 15 minutes before the appointment’s start time.
-
5Click on the “Appointment” tab, then click “Save and close.” Your appointment is now saved to Outlook.[6]


Advertisement
Method 8
Method 8 of 10:
Creating and Adding Contacts
-
1Click on the “Home” tab and select “New Contact.” Alternately, press CTRL + Shift + C on your keyboard.
-
2Enter the contact’s name and any other important information about your contact.
-
3Click on “Save and close.” If adding another contact to your list, select “Save and New.” The contact is now added to Outlook.


Advertisement
Method 9
Method 9 of 10:
Creating Notes
-
1Click on the “Home” tab and select “New Note.” Alternately, press CTRL + Shift + N on your keyboard. A blank note will open and display on-screen.
-
2Start typing text in the note. The note will save automatically and stay open so you can take additional notes or refer to them as you work.
-
3Drag and drop the note anywhere on your desktop as desired for easier viewing.
-
4Close the note when finished. All notes are saved to the Notes folder in Outlook by default.[7]


Advertisement
Method 10
Method 10 of 10:
Printing Items
-
1Open the email or item you want printed from Outlook.
-
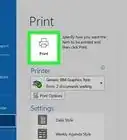
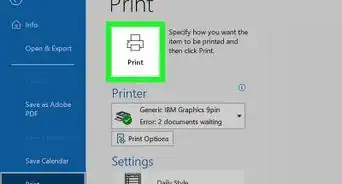
2Click on “File” and select “Print.”
-
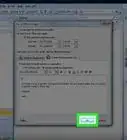
3Select your print settings as desired. You can change the font style, heading, or adjust page margins.
-
4Click on “Print” again. The email you selected will now be printed.[8]


Advertisement

References
- ↑ https://support.office.com/en-my/article/Add-or-remove-an-email-account-5a74e3be-7e11-4d9b-99f7-08ec25e9d072
- ↑ https://support.office.com/en-my/article/Create-an-email-message-83eb5c08-15e1-4936-8bf9-f476d38a5182
- ↑ https://support.office.com/en-my/article/Reply-to-or-forward-an-email-message-2d7a77e7-b55d-4921-9c8a-d04b4c70c5a7
- ↑ https://support.office.com/en-my/article/Attach-a-file-message-contact-or-task-to-an-email-message-477e3f61-5564-41e3-aa95-bb4737ad8cbb?ui=en-US&rs=en-MY&ad=MY
- ↑ https://support.office.com/en-my/article/Create-and-add-an-email-message-signature-Outlook-2010-95cce669-d370-43fe-afbe-4e79361dfc12?ui=en-US&rs=en-MY&ad=MY
- ↑ https://support.office.com/en-my/article/Schedule-an-appointment-d027b756-7960-4d74-b159-05005e36c06d
- ↑ https://support.office.com/en-my/article/Create-a-note-9e7eb168-096e-408b-9e4d-f6812a889248
- ↑ https://support.office.com/en-my/article/Print-items-in-Outlook-c0d95fcb-ca30-4c0f-9baf-32f22e8652cf
About This Article
Advertisement