This article was co-authored by wikiHow Staff. Our trained team of editors and researchers validate articles for accuracy and comprehensiveness. wikiHow's Content Management Team carefully monitors the work from our editorial staff to ensure that each article is backed by trusted research and meets our high quality standards.
There are 13 references cited in this article, which can be found at the bottom of the page.
This article has been viewed 264,057 times.
Learn more...
If you have a brand new laminator and you're not quite sure how to use it, never fear! A laminator is fairly simple to use. You load the paper into a laminating pouch, and then insert the pouch into the preheated machine. Once you trim up the sheet, you'll have a durable laminated sheet of paper to use in whatever way you see fit.
Steps
Loading the Project into a Pouch
-
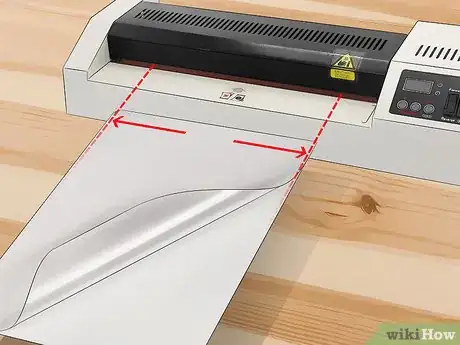
1Choose a pouch small enough to fit in the laminator. Lamination pouches come in a variety of sizes. When choosing a size, make sure it's small enough to fit in your machine. That means that the folded side of the pouch needs to be smaller than the area you feed the pouch into. However, ensure your paper can fit completely inside the pouch.[1]
- If your project is small, try using a smaller sheet so you don't waste part of the pouch.
-
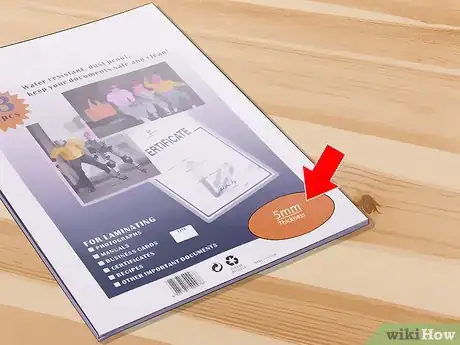
2Select a thicker pouch for added durability. Pouches range in thickness from 3 millimeters to 14 millimeters. The thicker pouches provide more protection. However, always check the directions for your machine, as many machines cannot handle very thick pouches.[2]
- Most machines will handle pouches in the 3-5 millimeter thickness.
Advertisement -
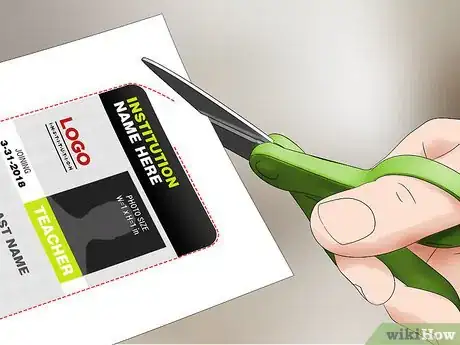
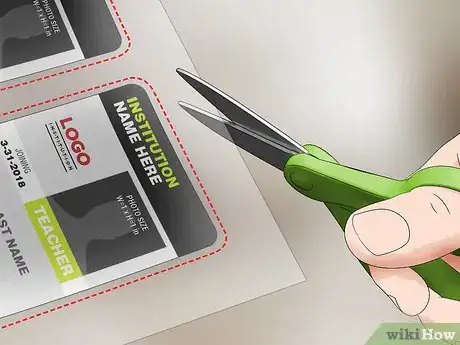
3Trim the paper to the shape you want it. If you want to cut out the white around an object on the paper, it's best to do it before you laminate it. Cut carefully around the edges until you're happy with how it looks.
-
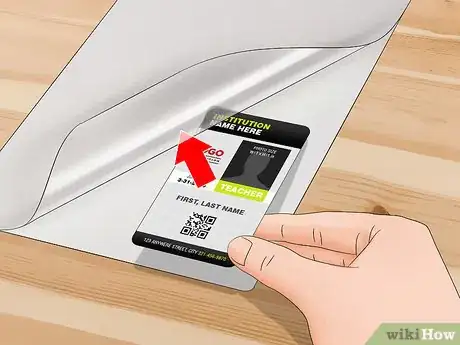
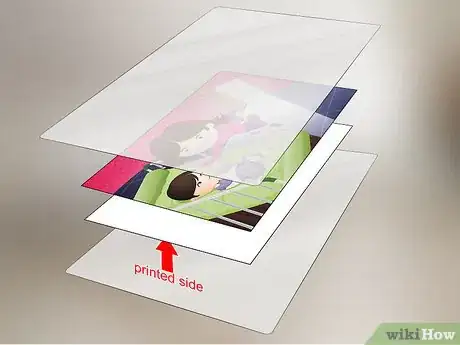
4Lay the paper in the laminating pouch. A laminating pouch is 2 sheets held together by 1 folded edge. Open the pouch up and place the edge of the paper up against the inside of the folded edge. On the other edges, make sure to leave a little space between the edge of the paper and the edge of the pouch for the laminator to seal the edges. Close the pouch.[3]
- Don't cut the pouch before inserting it in the machine, as that can cause jams.
-
5Space multiple small pieces out in a pouch, if necessary. If you have multiple pieces, carefully space them out inside the pouch, leaving a bit of room between them. You will need to be able to cut between them and still have a bit of laminated edge around each piece.[4]
- Some laminators warn against using multiple pieces in 1 pouch, so read your instruction booklet to find out more about your machine before attempting this.
Putting the Pouch in the Laminator
-
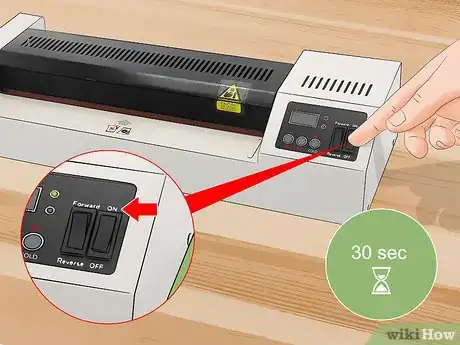
1Turn the laminator on and wait for it to heat up. The laminator may heat up in as little as 30 seconds, but it can take as long as 10-15 minutes with larger machines. Typically, the laminator will have an indicator light to tell you when it's warmed up.[5]
- Laminators use heat to activate the glue in the lamination pouches, so you must wait for it to get warm!
-
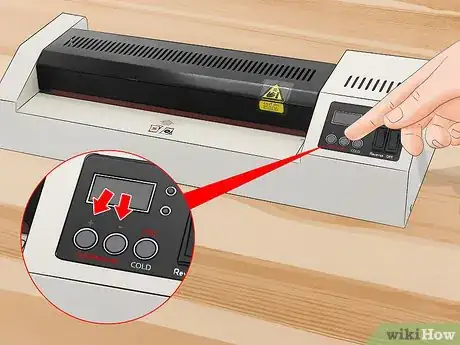
2Adjust the temperature based on the thickness of the pouch. You need more heat for a thicker pouch. Check the chart that came with your laminator to see what temperature you need to use with the pouch thickness you've chosen. Change the temperature to match.[6]
- If you have a fancy laminator, it may adjust the temperature on its own. Alternatively, if you have a cheaper laminator, you may not have heat settings, and the laminator may only handle thinner pouches. Some machines only have 3-millimeter and 5-millimeter options.
-
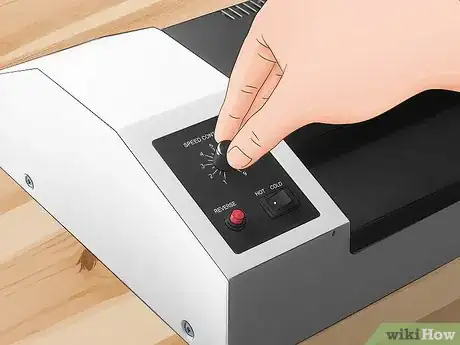
3Match the speed to the thickness of the pouch. More expensive laminators may allow you to change how fast the pouch goes through the laminator. Typically, pick a lower speed for a thicker pouch, but check the chart that came with the laminator to see the best speed for the thickness you chose. The laminator automatically grabs the pouch and feeds it through the machine, and the speed is how fast the machine does that.[7]
- Cheaper laminators will likely not have this option, which is another reason you may only be able to use thicker pouches with these.
-
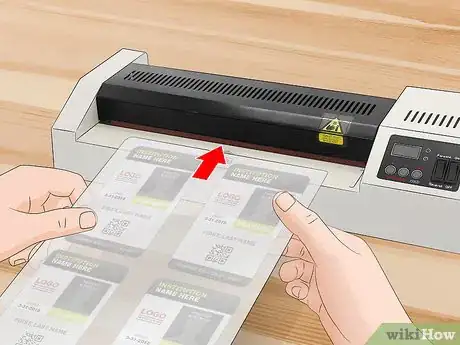
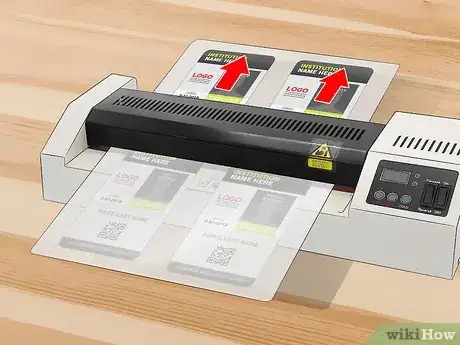
4Place the folded edge of the pouch into the rolling part of the machine. Carefully pick up the pouch, trying not to move the papers inside around. Feed the edge into the slot in the machine between the rollers. Don't force it in. It will grab the edge and roll it through itself.[8]
- Feed the pouch in as straight as you can. If you put it in at an angle, you may end up crumpling it. Some machines have guides along the edge to help you.[9]
-
5Wait until the pouch has gone completely through the machine. This will take a minute or two, so be patient. Don't try to force it through the machine faster, as you'll likely cause a jam.
-
6Let the page cool before trimming it. The page will come out hot from the laminator, so let it sit for a minute or two. Then, trim around the edges of your paper. Typically, the seal will hold a bit better if you leave a little of the plain lamination around the outer edge of the paper.[10]
Troubleshooting and Improving Your Lamination
-
1Laminate 2 sheets of paper together for an easy way to create a 2-sided project. Instead of printing on both sides of a piece of paper, which can lead to ink bleed through, print it on 2 separate sheets. Line up the sheets back-to-back in the pouch, and laminate that way. You'll end up with a 2-sided sheet![11]
- When trimming this paper, make sure to leave a little of the lamination around the outside of the sheet. If you trim it right up to the edge, the sheets will come apart. In some cases, that may be what you want; you get 2 sheets that are just laminated on the front, which can save you money if don't need to laminate the back.
-
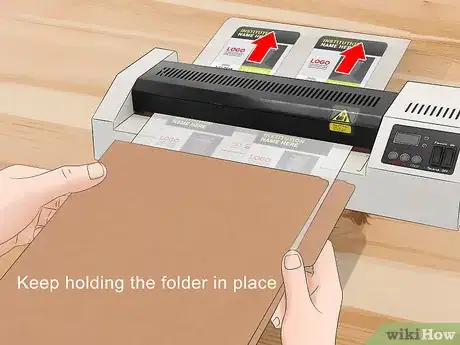
2Use a basic filing folder to move a pouch with several paper pieces. If you're afraid your pieces will move around, place the open end of the pouch in the folder. Leave about 2 to 3 inches (5.1 to 7.6 cm) of the sheet out of the folder on the folded edge end. Pick up the folder and pouch together. Use the folder to hold the pieces in place while you guide the folded edge into the machine.[12]
- Keep holding the folder in place, but let the page slip down into the machine. Don't allow the folder to go through the machine.
-
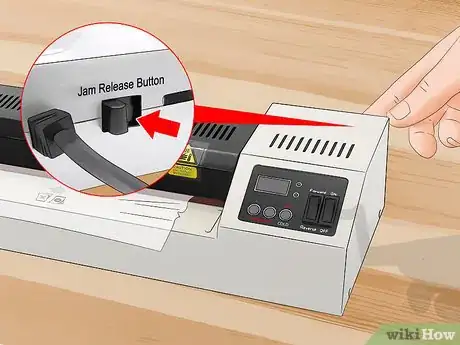
3Use the release button if your paper jams. Sometimes, the pouch may crinkle, leading to a jam. If it does, try not to let it feed through the whole machine. Press the "release" button on the machine to pull out the paper.[13]
- Some machines may require that you turn the power off before removing the jammed paper so always check your instruction manual.
- This can happen if you accidentally put it in at an angle, for instance.
Community Q&A
-
QuestionCan an A4 laminator be used to laminate A3 size paper?
 Community AnswerAn A4 laminator cannot laminate A3 paper, but an A4 laminator can laminate any size below it.
 -
QuestionHow big does a laminator get?
 Community AnswerFor home/office use, the biggest is for A4 paper or scrapbook size paper (12 inch by 12 inch). However, printing shops might have bigger ones (A3 and above).
 -
QuestionHow do I open the plastic sheets that come with the laminator?
 Community AnswerLaminator sheets don't stick together until they are heated. Just find the edge and pull it apart.
Warnings
- Turn the laminator off when you're done.⧼thumbs_response⧽
References
- ↑ https://www.youtube.com/watch?v=wRmzD5PgTm4&feature=youtu.be&t=34
- ↑ https://www.youtube.com/watch?v=wRmzD5PgTm4&feature=youtu.be&t=45
- ↑ https://www.youtube.com/watch?v=v32Vb5nxWcI&feature=youtu.be&t=39
- ↑ https://www.youtube.com/watch?v=CT2lMcj83sE&feature=youtu.be&t=109
- ↑ https://www.youtube.com/watch?v=v32Vb5nxWcI&feature=youtu.be&t=28
- ↑ https://www.youtube.com/watch?v=wRmzD5PgTm4&feature=youtu.be&t=59
- ↑ https://www.youtube.com/watch?v=wRmzD5PgTm4&feature=youtu.be&t=68
- ↑ https://www.youtube.com/watch?v=wRmzD5PgTm4&feature=youtu.be&t=80
- ↑ https://www.youtube.com/watch?v=v32Vb5nxWcI&feature=youtu.be&t=53
About This Article
To use a laminator, trim the paper item you want to laminate down to the desired shape and sandwich it inside a laminating pouch. Next, turn the laminator on and wait for it to heat up, adjusting the temperature as needed based on the thickness of the pouch. Then, feed the folded edge of the pouch into the rolling part of the machine and let it pull the pouch through until it comes out on the other side. Finally, let the melted pouch cool before trimming around the edges of the laminated item. For tips on dealing with a jammed machine, read on!
