This article was co-authored by Sherri Miller. Sherri Miller is a Seamstress, Costume Designer, and the Owner of The Scarlett Seam. With more than eight years of experience, she specializes in wedding gown alterations and has extensive knowledge in pattern-making. Sherri received an Associate of Science in Costume Design from Chaffey College.
This article has been viewed 98,291 times.
A serger, or overlock sewing machine, gives garments and other sewn objects finished seams. When using one, you get many things done for you; a serger will secure seams with an overlock stitch to cover raw edges and cut excess fabric. The overlock stitch is ideal to use on knit fabrics since it has built-in stretch. The most important part of using a serger is threading the machine properly, since it has between three to five spools of thread.
Steps
Threading a Serger
-
1Turn the machine off. A serger should be off when you thread it. Locate your sergers power button and switch it off.[1]
-
2Determine the correct threading order. Most sergers use four spools of thread: two for looping underneath the needles and two to use in the needles. The model you have will tell you the order in which you thread them. Look at the threading diagram on your machine.[2]
- A 3-thread machine has an upper looper, lower looper and a single needle thread.
Advertisement -
3Place a spool of thread on the upper looper. More than likely the upper looper will be on the right side of the machine. Set a spool of thread on the correct spindle for this.
-
4Thread the upper looper. Pull the upper looper thread up so that it is just below the needles. Remove the faceplate on the machine's front and pull the thread through the metal loops underneath the plate. Your serger will most likely have a color-coded guide to help you thread the upper looper.
-
5Thread the lower looper. Set the spool on the second spindle and bring the thread over the front of the machine. Use tweezers to help you get the thread through the tight spots on the machine.
-
6Thread the needles. Set the threads on the spindles and bring them over the front of the machine. Put the thread through the needle or needles on the overlock sewing machine.


Adjusting the Tension
-
1Turn on the serger. You will need to use your serger to adjust the tension, so switch the power button on.
-
2Determine what stitch you want to use. A serger can do many things like create a rolled hem, finish raw knit edges and gather fabric. Look at your user manual to determine what stitch you need to use for your desired result.[3]
- Visit https://www.craftsy.com/blog/2012/10/what-does-this-serger-stitch-do/ for more information or if you don't have a manual.
-
3Adjust each spool’s tension dial. After you decide on what effect you want, your manual should tell you the required tension for each spool. Adjust each tension dial accordingly.
-
4Run a practice stitch. You do not need fabric under the needles to test a serger stitch. Place your foot on the machine pedal and let the machine create looped thread.
-
5Inspect the looped thread. You should have an idea of how your stitch should look by looking in your serger’s user manual. The loops and interlocking stitches should be even, without areas that are too even or too loose.
- If the stitches are loose, adjust the tension dials next to each spool of thread on the overlock sewing machine to make the thread tighter.
- If the fabric is puckered or bunched up, loosen the tension on the serger.
-
6Practice on a scrap of fabric. Find a piece of scrap fabric to test your stitch. Continue to sew practice stitches until the stitches are even.
- Always do a practice stitch whenever you change your needle, thread, or any other part of the machine. That way, you can make sure that everything is in place and working properly.


Finishing Seams
-
1Lift the presser foot and needles. Lift the presser foot lever up to lift the metal presser foot and turn the needle dial towards you to lift the needles.[4]
-
2Push your fabric under the needles and foot. Lift your practice string up and back while you slide your fabric under the presser foot and needles.
-
3Lower the presser foot and needles. Lower the presser lever to lower the foot and turn the needle dial towards you to lower the needles.
-
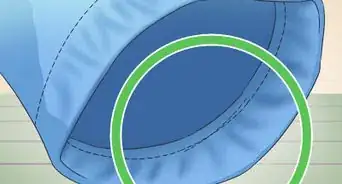
4Cut the fabric edge. A serger will finish seams and cut your fabric at the same time. Look at the seam allowance numbers to the right of the needle and push the fabric past the blade accordingly. This can be 1.5 to 2.5 cm depending on what seam allowance you used when measuring your fabric.
-
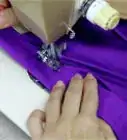
5Sew and guide fabric under the needles. Use the foot pedal to control the speed when sewing. Don't push on the fabric too hard and remember to keep the fabric straight. The feet on the overlock sewing machine should help push the fabric through.
-
6Create a tail of stitches. Continue sewing for a few stitches at the end of your seam to create a tail of stitches that you can tuck under and hand sew in place.


Community Q&A
-
QuestionWhat do I do if I always have an extra thread when I pull the fabric out on a four thread overlock?
 Community AnswerYou shouldn't be pulling the fabric out. You should continue sewing past the end of the fabric for a few inches, then just cut the chain, not too close to the fabric if you need it neat. You can then tuck the chain underneath and stitch it, or unravel it and sew the ends in.
 -
QuestionIs there a tool to change the needle?Community AnswerYour serger should have come with a little hex screwdriver. You need this to loosen and tighten the screw holding in the needle. On some models of machine, the cleaning brush has some holes in the handle, these are intended to be used as needle holders to facilitate inserting the needle.
Warnings
- Never start sewing with the needles in a raised position when you use a serger.⧼thumbs_response⧽
Things You'll Need
- Serger
- 4 spools of thread
- Tweezers
- Fabric


References
About This Article

To use a serger, start by making sure your machine is turned off, then following the threading diagram to thread the upper looper, the lower looper, and the needles. Next, turn your machine on, and adjust the tension dials for the type of stitch you want according to your machine’s manual. When you’re ready to finish your seams, lift the presser foot lever up, turn the needle dial toward you, and push your fabric under the needles and the foot. Then, lower the presser lever, turn the needle dial back, and begin sewing, using the foot pedal to control your speed. For tips on how to test the tension on your machine before you begin sewing, scroll down!