This article was co-authored by wikiHow Staff. Our trained team of editors and researchers validate articles for accuracy and comprehensiveness. wikiHow's Content Management Team carefully monitors the work from our editorial staff to ensure that each article is backed by trusted research and meets our high quality standards.
There are 12 references cited in this article, which can be found at the bottom of the page.
This article has been viewed 21,613 times.
Learn more...
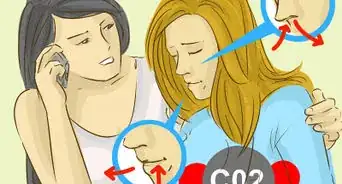
+Oxygen masks can be life-saving tools in an emergency. If you have a medical condition that makes breathing difficult, you might even have to wear one every day. There are full face masks that give you more oxygen and smaller plugs called cannula that are simpler to wear. They both have straps you can use for adjustment. If you are on a plane, you may also come into contact with similar face masks during an emergency. Masks can be uncomfortable, but knowing how to use one is an important skill that can help you get through your day more easily and safely.
Steps
Using a Full Mask at Home
-
1Position the mask so the hollow side is facing you. Hold the mask out in front of you, then rotate it so you’re able to put your face into it. Make sure the wider end is on the bottom, since that is where your mouth will go. Hold onto the elastic strap coming out from the sides of the mask for now.[1]
- There are a few different types of mask, but they all have the same basic shape and are put on the same way.
- Home oxygen masks are very similar to the ones used in hospitals and other medical settings.
-
2Loop the strap over your head to tuck behind your ears. Raise the strap until it’s behind your head, then lower it back down. Keep it in the space between your ears and your head. It’s very similar to wearing glasses.[2]
- The strap typically stays attached to the mask and isn’t adjustable at all, so you don’t have to do anything extra to it.
- Make sure that the oxygen tube on the chin of the mask isn’t kinked or coiled. If it is, you may have to take the mask back off to straighten it out.
Advertisement -
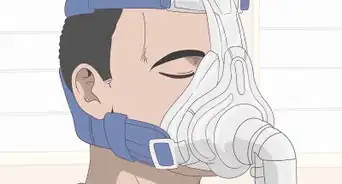
3Place the mask snugly over your nose and mouth. Adjust the mask until it’s comfortable against your face. It will rest firmly against your skin. It should form a seal around your nose and mouth, so reposition it if it feels loose or uncomfortable.[3]
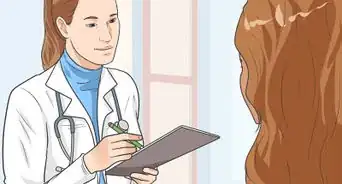
- The mask might make you feel a little warm or trapped. However, it has to make an airtight seal over both your mouth and nose to work. If it’s still uncomfortable after using it for a few days, talk to your doctor about it.
-
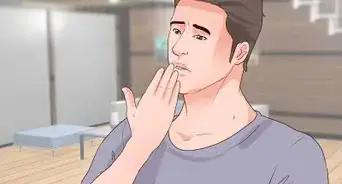
4Breathe normally to ensure that the mask is working. Take a few deep breaths in and out. You will be able to feel the oxygen coming through the tube. If you aren’t getting enough oxygen from it, make sure that the mask has created a seal around your nose and mouth.[4]
- When the mask is working, you will also be able to hear it hissing. If it isn’t hissing, then check the oxygen tank to make sure it’s turned on.
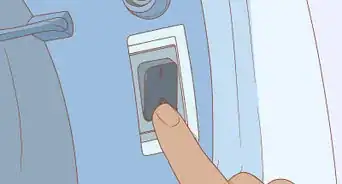
- While you’re using a mask, stay away from cigarettes and open flames that could spark a fire.


Putting on a Nasal Cannula
-
1Hold the prongs in front of you so they are facing your nose. A nasal cannula has a pair of plastic prongs on its strap. Hold onto the strap by placing your hands beside the prongs. Rotate it so the prongs are face up.[5]
- A nasal cannula is a partial face mask, so it doesn’t deliver as much oxygen as a full one does. It’s more like a nose plug than a mask.
-
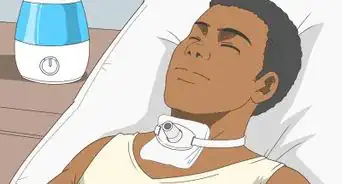
2Insert the prongs into your nostrils. Just raise the prongs up to slide them into your nose. Push them all the way in. However, they won’t be secure yet, so keep a hold of the strap for now.[6]
- The prongs are pretty short and sit comfortably at the front of your nose. Usually, the cord is more uncomfortable to wear, since it can rub against your skin if you have to wear it all day.
- Make sure the prongs are all the way in your nose. If they aren’t, then you won’t be getting all of the oxygen.
-
3Drape the cord over your ears to hold the cannula in place. Gently pull the cord back behind your head. Rest it on your ears like you would with glasses. Make sure the cord is wrapped around your ear rather than merely resting on top of it.[7]
- Another option is to move the cord behind your head, lower it down, and slide the prongs into your nose. You can then wrap the tube over your ears. It’s not as comfortable since it puts tension on the tube each time you turn your head.
- Before continuing, move your head from side to side a few times to check that the cannula is comfortable to wear and secure against your nose. Make adjustments as needed.
-
4Pull the adjustment slide on cord to tighten and secure the cannula. Look for a small plastic ring on the tubing leading to the oxygen tank. Move the slide all the way up to your chin. It will tighten the tube so the cannula stays in place. When you’re ready to remove it, pull the slide back down again.[8]
- If you’re wearing the cannula with the tubing behind you, the slide will also be behind you. Pull it until it’s up against the back of your head.


Using a Mask on a Plane
-
1Pull the mask toward you until the tube is fully extended. The mask drops down from the ceiling. You will see a long, clear tube with a bag and a colorful, circular mask attached to it. Grab onto the mask and gently move it forward. Doing this will stretch out the tube so air can flow through it.[9]
- Some masks use a coiled tube. If you see a coiled tube, you don’t have to straighten it out. As long as you’re able to stretch it toward you, air will flow through it.
- These masks only appear in emergencies, so put yours on as soon as it appears. Stay calm and do your best to get it on without damaging it.
-
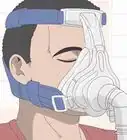
2Slide the elastic strap over your head to tuck around your ears. The strap is on the back of the mask. Hold the front end of the mask with one hand, then grip the strap with the other. Pull the strap up while moving the mask toward you. Slide your head through the strap, then tuck it around your ears.[10]
- The strap isn’t adjustable, so you won’t have to do anything to it. It’s usually elastic.
- Make sure that the strap is comfortable but snug against your ears. It’s meant to be like wearing glasses. The strap should stay in the space between your head and ears.
- Airline masks are very similar to the ones used at home and in medical settings. If you have ever seen or used an oxygen mask before, you won’t have much trouble figuring out how to deal with one on a plane.
-
3Adjust the mask so it’s over your nose and mouth. Airline masks are pretty small, but they are still meant to cover your nose and mouth at the same time. Push it gently against your face. Make sure it rests snugly against your skin, creating a seal around your nose and mouth.[11]
- This is where people tend to mess up. It’s easy to forget that the mask is supposed to go over your nose as well as your mouth. For safety, make sure it covers both.
- The mask may feel uncomfortable at first, but don’t try to adjust it. Airline masks aren’t meant to be worn for long, so the most important thing is making sure yours works correctly.
-
4Breathe normally to get oxygen from the mask. Many people expect the bag attached to the mask to inflate. It won’t move at all, so don’t panic if nothing seems to be happening. Instead, just take a few deep breaths to keep calm. Oxygen is flowing through the mask, but you won’t be able to see it.[12]
- Once you start breathing into the mask, you may be able to spot it rising and falling a little bit. If you’re feeling a little uncertain, watch for that to confirm that you put the mask on right.
-
5Help other people after you have finished putting yours on. If you are traveling with young children, for instance, make sure your mask is secure first. Then, put on their mask for them by tucking the elastic band around their ears. Position the mask so it seals in their nose and mouth.[13]
- It’s tempting to reach out to someone else when you see the masks appear, but you can do a better job of helping once you’re able to breathe comfortably.
- Keep in mind that you have a limited range of movement while wearing a mask. You will only be able to reach the people next to you while you have a mask on.


Warnings
- Whenever you’re using an oxygen mask, stay 6 ft (1.8 m) away from sources of heat or fire. This includes cigarettes, stoves, furnaces, heaters, and candles.[16]⧼thumbs_response⧽


References
- ↑ https://www.drugs.com/cg/using-oxygen-at-home.html
- ↑ https://www.drugs.com/cg/using-oxygen-safely.html
- ↑ https://elsevier.health/en-US/preview/oxygen-therapy-nasal-cannula-or-oxygen-mask
- ↑ https://elsevier.health/en-US/preview/oxygen-therapy-nasal-cannula-or-oxygen-mask
- ↑ https://www.drugs.com/cg/using-oxygen-at-home.html
- ↑ https://apps.who.int/iris/bitstream/handle/10665/204584/9789241549554_eng.pdf;jsessionid=E1A17D2428D4ED8181B078B3BA4A1057?sequence=1
- ↑ https://www.drugs.com/cg/using-oxygen-safely.html
- ↑ https://www.youtube.com/watch?v=1d1Hj7uuQ0Y&feature=youtu.be&t=30
- ↑ https://www.youtube.com/watch?v=XESkuyWomqc
- ↑ https://www.youtube.com/watch?v=XESkuyWomqc
- ↑ https://bringmethenews.com/life/heres-the-correct-way-to-wear-an-oxygen-mask-on-a-plane
- ↑ https://www.youtube.com/watch?v=IFG-XllVS7w&feature=youtu.be&t=144
- ↑ https://www.youtube.com/watch?v=IFG-XllVS7w&feature=youtu.be&t=152
- ↑ https://medlineplus.gov/ency/patientinstructions/000048.htm
- ↑ https://www.ncbi.nlm.nih.gov/pmc/articles/PMC4170342/
- ↑ https://www.nhs.uk/conditions/home-oxygen-treatment/


Medical Disclaimer
The content of this article is not intended to be a substitute for professional medical advice, examination, diagnosis, or treatment. You should always contact your doctor or other qualified healthcare professional before starting, changing, or stopping any kind of health treatment.
Read More...