This article was co-authored by wikiHow Staff. Our trained team of editors and researchers validate articles for accuracy and comprehensiveness. wikiHow's Content Management Team carefully monitors the work from our editorial staff to ensure that each article is backed by trusted research and meets our high quality standards.
There are 14 references cited in this article, which can be found at the bottom of the page.
wikiHow marks an article as reader-approved once it receives enough positive feedback. In this case, 93% of readers who voted found the article helpful, earning it our reader-approved status.
This article has been viewed 608,939 times.
Learn more...
Welding is the process of joining 2 metal components by melting them together. Welding any material is a challenging process, but welding lightweight metals like aluminum requires the utmost precision to ensure a strong bond. Knowing how to weld aluminum is a matter of assembling the right tools, exercising caution and patience, and gaining experience. First assemble your materials, practice the welding motion, and then set up your work space.
Things You Should Know
- To meld aluminum, you'll need a TIG (tungsten inert gas) welder with AC capability.
- You'll also need aluminum filler rods (to bond the pieces of aluminum together) and a canister of argon gas.
- Work in a well-ventilated, cool area. You should also wear a welding helmet, thick gloves, longe sleeves, and a respirator.
Steps
Assembling Your Materials
-
1Get a TIG (tungsten inert gas) welder with AC capability, not only DC. This is a type of welder that uses a tungsten electrode and an inert gas to shield the welding area.[1] The precision achieved with this type of welder is crucial when working with aluminum, especially thin pieces.[2]
- TIG welders are expensive, so consider contacting a local welding supply store or home hardware outlet about rental possibilities.
- It’s possible to weld aluminum with other welding processes, such as MIG welding, but TIG welding is the method most suitable for beginners.
-
2Acquire an aluminum filler rod. This tool is needed in order to bond the 2 pieces. Try to avoid using rusty or dirty filler rods, as these will lead to weaker welds.Advertisement
-
3Get a canister of argon gas. Argon’s purpose in the welding process is to shield. Pure argon is a cost-effective gas solution. 3% helium can be added to increase arc stability.[5]
- Gas needs to be acquired from authorized gas dealers. Most welding supply stores will be able to provide gas or refer you to an outlet that can.
- If you’re renting the TIG welder, purchase your argon canister when you pick up the welder.
-
4Wear protective clothing. Wear a shirt with long sleeves made from a thick fabric. TIG welding produces a large amount of ultraviolet radiation. Because of this, you will get burns along your arms if you weld in short sleeves.[6]
- Try to find a shirt that is made of 100% cotton.
- Make sure that your pants do not have cuffs that can catch molten metal.
-
5Use safety equipment. Make sure to wear a heavy welding helmet, a thick pair of gloves, and a respirator to protect yourself while welding.[7] This equipment will protect you from intense light, radiation, chemical burns, fumes, oxides, electric shock, and more.[8]
- Your welding gloves should be insulated and fire-resistant.
- Keep a fire extinguisher easily accessible in case of any stray sparks.
- Try to use a helmet with a lens that automatically darkens during the welding process. The lens should be rated at 10-13 shade.
-
6Do a safety check on all your equipment. Using damaged, broken, or improperly set-up welding equipment can be very dangerous. A quick safety check can prevent injury or even save your life. Before you get started, take a few moments to:
- Double check all hoses and connections.
- Check for and replace any cracked or corroded parts.
- Replace any dented or rusted tanks.
- Check your wires and cords and fix any that are frayed or nicked.


Setting up the Work Space
-
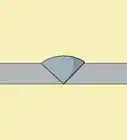
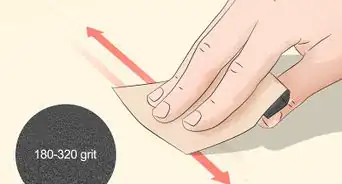
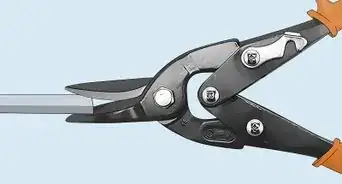
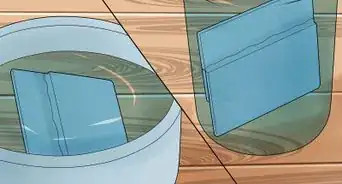
1Clean the aluminum. Over time, aluminum forms a thin coat of aluminum oxide on its exterior, which melts at a much higher temperature than aluminum. So, before welding any piece of aluminum, you have to clean away the aluminum oxide. Do this mechanically by wire-brushing, grinding, or filing away the oxides.[9]
- If you use wire brushes to clean the aluminum, make sure to use brushes that are new or have only been used to clean aluminum. Brushes that have been used to clean other metals may leave traces of those metals behind, which can affect the quality of your weld.
- Spray the joints with electrical cleaner. Rinse the work piece in water, and then allow it to dry thoroughly. Scrub the aluminum with a stainless steel wool scrubber, such as a Scotch Brite scrubbing pad, to finish the cleaning process.[10]
-
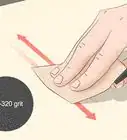
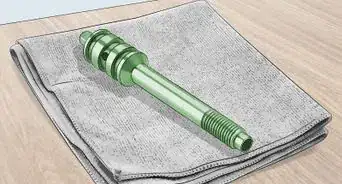
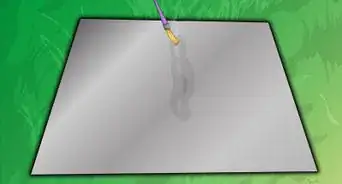
2Clean the filler rod. A dirty filler rod can contaminate the weld just as easily as a dirty work piece. Use an abrasive cleaning pad and some acetone to ensure that the rod is contaminant free.
-
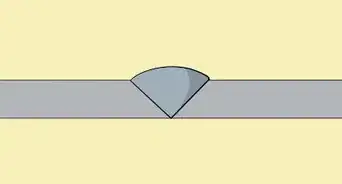
3Clamp the workpieces together as tightly as possible. TIG welders will be unforgiving if the joint is not fitted very tightly; you may be left with gaps in the joint. Make the workpieces fit together as tightly as possible by filling them before clamping them together with clamps or vise grips.[11]
- If you can, suspend the area you will be welding above the table. This will make the heat transfer more effective and create better weld penetration.
- Consider clamping the workpiece to a heat sink, such as copper. This will ensure that the heat from the weld will transfer safely without warping your work or damaging anything else in your workspace.[12]
-
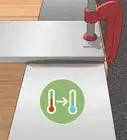
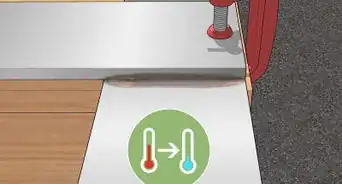
4Preheat the aluminum workpiece. Aluminum is much easier to weld when the work is already much hotter than room temperature. You can heat the workpiece by putting it directly in an oven, or you can use a propane torch to apply heat to the surface. Aim for a temperature between 300°F and 400°F (149-204°C).
- When welding thick pieces of aluminum, welding without preheating can lead to a very weak, shallow bond.[13]
-
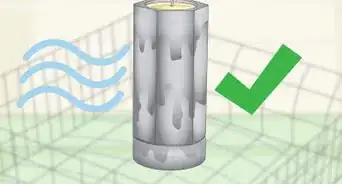
5Work in a safe, ventilated, cool environment. As you get ready to start welding, first make sure there’s a fire extinguisher nearby in case a fire starts during the welding process. It’s also important to work in a space below 77° Fahrenheit (25° Celsius) that has good airflow in order to prevent heat stress and/or inhalation of dangerous fumes.
- You can also ensure protection from fumes by using welding fume extractor machines.[14]


Practicing the Welding Motion
-
1Brace the torch with your hand. For practice, keep the torch unlit to save metal. While placing the base of your gloved hand on the table for support, hold the torch at a slight angle, tilting back about 10°. Hold the tip of the tungsten about ¼ inch (6.4 mm) away from the aluminum.
- If you pull the tip too far away, it will cause the arc to spread too much and the weld will become difficult to control.[15]
-
2Hold the filler at a 90° angle. You will lead the weld with the filler rod, which should be held at about a 90° angle to the torch tip. The torch should always be pushed and not dragged.
- If the filler and the tip come into contact, your weld will be contaminated and lose structural integrity.[16]
-
3Move the torch along the welding path. With the torch in proper position, practice moving your hand along the part of the aluminum that you will be welding. Practice with gloves on to simulate the amount of effort required. Make sure to move your entire hand, as getting in the habit of using just your fingers is very limiting.[17]


Welding the Metal
-
1Set the amperage of your welder. Aim to use about 1 amp per 0.001 inch (0.025 mm) of the workpiece's thickness.[18] It is a good idea to set the welder's amperage to higher than you expect to need and then tone the current back with the foot pedal.
- If you don’t have a lot of experience with welding, practice with some scrap aluminum and try different settings until you find what works best for you. Getting the settings right can make a big difference in the quality of your weld, and environmental factors can affect which setting works best.
-
2Get your tools and workpiece into position. Begin by extending the tungsten electrode no more than the diameter of the torch’s nozzle. For example, if you are using a ¼ inch (6.4 mm) wide nozzle, your tungsten tip should extend no more than ¼ inch (6.4 mm) from the nozzle. Tap the electrode tip against the workpiece and then pull it away about ⅛ inch (3 mm).
-
3Press the button on the torch. If there’s a button that you can press on the torch, then this is how you should create your electrical arc. Pressing this button activates the high frequency start feature because it’s connected to a cable that is connected to the TIG welding power supply. This is the simplest, easiest way to create the arc.[19]
-
4Use the foot pedal. If you don’t see a button on the torch, you’ll need to create an arc with the foot pedal. Press the pedal at least halfway down in order to create the arc.
- If you’re having trouble starting the arc, your amperage is likely too low. Adjust your amperage setting and try again.[20]
-
5Create the puddle. Melt the workpiece until you create an adequately-sized puddle that’s no wider than double the diameter of your filler. Add just enough of the filler rod to fill in the joint, and then move to the next portion of the weld. Continue until the entire joint is welded properly.
- As you weld, heat will increase throughout the workpiece. Use your foot pedal to lower the amperage as you go to maintain control of the puddle.[21]
- While you weld, pay close attention to your puddle size. If it’s too big or too small, you may burn through your material or not get a solid weld.
-
6Add a little extra filler rod at the beginning of the weld. Weld for about ¼ inch (6.35 mm), then stop and let things cool for a few seconds. After your weld has had a moment to cool, restart the weld. Having a little extra metal at the start of the weld will make your weld stronger and prevent cracking.
-
7Push the puddle. Slowly push the puddle that the torch creates down the joint, adding filler as you go. Move at an even pace to keep the puddle a consistent size.[22]
-
8Let off the foot pedal and release the button on the torch. Once you’ve finished your weld, stop the arc by slowly taking your foot off of the pedal. Then take your finger off of the button that’s on the torch.
- Give the metal plenty of time to cool before you touch the finished product.


Community Q&A
Did you know you can get answers researched by wikiHow Staff?
Unlock staff-researched answers by supporting wikiHow
-
QuestionIs it difficult to weld aluminum?
 wikiHow Staff EditorThis answer was written by one of our trained team of researchers who validated it for accuracy and comprehensiveness.
Staff AnswerwikiHow Staff EditorStaff AnswerGenerally aluminum is viewed as being harder to weld than steel, but the processes are different and aluminum also requires some different equipment as well. You probably shouldn't expect to do a flawless job on your first project.
Support wikiHow by unlocking this staff-researched answer.
-
QuestionWhat equipment is needed to weld aluminum with a MIG welder?
 Community AnswerYou need a push-pull system or a wire feeding system for your MIG welder (like spool gun or "cobra head").
 -
QuestionWhy are my electrodes burning back while I'm trying to weld aluminum?
 Community AnswerDuring the positive half cycle, there is a cleaning action (which is good), but it also means most heat goes into the tungsten electrode (which is bad). Only use as much cleansing action as you need. It is normal for the tungsten to form a ball end from this heat. If it is burning too much, reduce the amps or use a thicker tungsten.
Things You'll Need
- TIG welder
- Aluminum filler rod
- Argon gas
- Welding helmet
- Thick gloves
- Fire extinguisher
- Long-sleeved shirt
- Acetone
- Water
- Stainless steel brush
- Gas torch
- Heat sink
- Clamps
- File


References
- ↑ https://www.millerwelds.com/resources/article-library/tig-it-how-a-tig-welder-works-and-when-to-tig-weld
- ↑ https://www.bakersgas.com/weldmyworld/2017/03/13/welder-best-tig-welding-aluminum/
- ↑ http://www.esabna.com/us/en/education/blog/should-i-use-4043-or-5356-filler-alloy.cfm
- ↑ http://artsautomotive.com/publications/8-automotive/86-welding-beginner-guide-to-aluminum/
- ↑ http://www.lincolnelectric.com/en-us/support/welding-how-to/Pages/guide-aluminum-welding-detail.aspx
- ↑ https://www.hunker.com/13415544/how-to-weld-aluminum
- ↑ https://www.hunker.com/13415544/how-to-weld-aluminum
- ↑ https://www.ccohs.ca/oshanswers/safety_haz/welding/ppe.html
- ↑ http://www.lincolnelectric.com/en-us/support/welding-how-to/pages/tig-welding-aluminum-detail.aspx
- ↑ https://www.hunker.com/13415544/how-to-weld-aluminum
- ↑ https://www.hunker.com/13415544/how-to-weld-aluminum
- ↑ http://artsautomotive.com/publications/8-automotive/86-welding-beginner-guide-to-aluminum/
- ↑ https://www.hunker.com/13415544/how-to-weld-aluminum
- ↑ http://www.thefabricator.com/article/safety/creating-a-safe-welding-environment
- ↑ https://www.millerwelds.com/resources/article-library/tig-welding-aluminum-for-beginners-steps-1-2
- ↑ https://www.millerwelds.com/resources/article-library/tig-welding-aluminum-for-beginners-steps-1-2
- ↑ https://www.millerwelds.com/resources/article-library/tig-welding-aluminum-for-beginners-steps-1-2
- ↑ https://rts.i-car.com/images/pdf/upcr/we01s.pdf
- ↑ http://www.gowelding.org/welding/tig-gtaw/
- ↑ http://www.r-techwelding.co.uk/tig-welding-how-to-use-a-tig-welder-guide
- ↑ https://www.millerwelds.com/resources/article-library/tig-welding-aluminum-for-beginners-steps-3-4
- ↑ https://www.millerwelds.com/resources/article-library/tig-welding-aluminum-for-beginners-steps-3-4
About This Article
To weld aluminum, clamp the aluminum pieces together tightly and use a propane torch to preheat them to a temperature between 300°F and 400°F. Then, set the amperage of your welder, aim at the aluminum pieces, and press the button on the torch. Melt the aluminum until you create a small puddle, then slowly push the puddle down the joint, adding filler as you go. Be sure to move at an even pace to keep the puddle a consistent size! For tips on using proper welding movements, read on!