This article was co-authored by Daniel Stoescu. Daniel Stoescu is a Master Electrician and the Owner and Operator of Home Tech Solutions, LLC in Hampton, Virginia. With over a decade of experience, Daniel specializes in wiring residential, commercial, and light industrial structures. The Home Tech Solutions team has over four decades of combined experience and offers comprehensive solutions for residential electrical needs.
There are 9 references cited in this article, which can be found at the bottom of the page.
This article has been viewed 106,723 times.
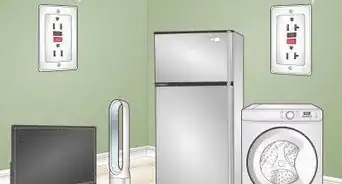
The National Electrical Code now requires Ground Fault Circuit Interrupter (GFCI) receptacles (also known as residual current devices or RCDs) to meet electrical code in kitchens, bathrooms, and outdoors (among other potentially wet places), at least for new installations.[1] This device is installed in areas around water to provide extra protection against accidental electrical shock. This article will tell you how to wire a GFCI receptacle for many ordinary circumstances.
Steps
-
1
-
2Unscrew the cover plate of the electrical outlet box with a flat-head or Phillips screwdriver.[4]Advertisement
-
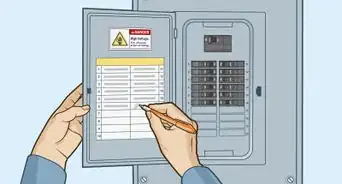
3Identify how many cables or wires you have in your electrical outlet box. You should have no more than 4 loose wires or 2 cables with a total of 6 wires between them, including grounding wires.
- Some receptacles are configured to be "switched" and there may be "extra" wires in the box for that function. If the receptacle is intended to be "half-switched", meaning one outlet is switched and the other is not, you cannot use an ordinary GFCI receptacle in that location.
- Contact a qualified electrician to complete the work if you have identified more than 4 loose wires (not counting grounding wires) or more than 2 cables, or for switched receptacles.


Wiring Procedure for Wiring With Only 1 Cable (2 or 3 wires)
-
1Identify the "Line" terminals on the GFCI by examining the markings. Do not use the "Load" terminals for this procedure. They should have come with a colored tape stuck across them as a reminder.[5]
- Power supply wires are connected to the line terminals, while load terminals help connect other outlets to the GFCI-protected device.[6]
-
2
-
3Attach any grounding wires (bare wire or green wire) to the green grounding screws. Needle-nose pliers may be needed to connect the wires.[9]
- Many electricians wrap the receptacle with a layer of insulating electrician's tape to protect the terminals from accidental contact with metal objects.
-
4Tuck the wires into the box, ensuring any bare grounding wires do not touch any other exposed terminals.
-
5Install the receptacle into the box and install the cover.[10]
-
6Test the GFCI as instructed in the Testing section, below, and resolve any problems before proceeding to the next circuit.


Wiring Procedure for 2 Cables (4 to 6 wires)
-
1One cable (or pair of wires) typically supplies power to the first outlet device and the other carries power to other devices further down the line. You will need to determine which is which.
- There are many ways to determine which cable is the "supply", using various test instruments (contact, non-contact, meters, etc). The following technique is for those who are unfamiliar with such things or who do not wish to touch the wiring while it is "live".
-
2Detach 1 white "neutral" and 1 black "hot" wire from one of the two cables and put a wire cap on each of them. Ensure the wires come from the same cable or conduit.[11]
-
3Reinstall the receptacle into the electrical box and restore power at the main fuse or breaker box.
-
4Plug in a night light or other device and press the "Reset" button (if necessary) to determine if power is flowing into the receptacle. If the power returns to the device, the capped lines are "load" lines, or lines that can be strung together to give GFCI protection to multiple outlets.
- If no power comes on in the receptacle, your capped wires are probably the "line" wires or your main power wires, assuming they are working properly.
- You may also want to test the capped wires to make sure the GFCI will have power before proceeding. You may do this with a separate tester or by repeating the previous testing steps with the cables swapped.
-
5Turn the power off at your main panel and take out the receptacle. Label your "line" and "load" wires.
-
6
-
7Remove the yellow sticker (or other colored tape) that covers the "load" terminals on the receptacle. You will hook your remaining circuit wires to these terminals.
-
8Connect your "load" white wire to the silver "load" terminal and your "load" black wire to the "hot" brass "load" terminal.[14]
-
9Attach your ground wires to the green grounding screw of the GFCI. Fold your wires into the box, making sure the grounding wires do not touch any exposed"line" or "load" terminals. Attach the cover plate.
- Many electricians wrap each receptacle with a layer of insulating electrician's tape before reinstalling them into a box, especially a metal box. This provides another layer of safety from accidental contact with live parts.


Testing the GFCI
-
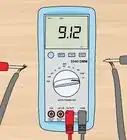
1Turn on the power at the main panel and plug in a lamp or night light into the outlet and switch it on. Press "Reset" on the GFCI if necessary to make the light come on.[15]
- If the device does not light up, you need to find out why before proceeding.
-
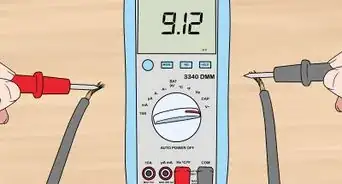
2Press the "Test" button on the GFCI to make the light turn off. The "Reset" button should also pop out. Press the "Reset" button to restore the power to the device.[16]
-
3Test the light in the surrounding outlets if you have connected more outlets to the GFCI using the second (two cable) method. The same result should occur when the "Test" button is pressed on the GFCI. If not, you may have to move the GFCI receptacle or add another one to protect devices plugged into those receptacles.
- Be sure to mark the additional outlets to show they are "GFCI Protected", using stickers that come with the GFCI receptacle.
- If you intend to work on more than a few of these, you may want to obtain a handy "outlet polarity and GFCI tester" at the home improvement store. It plugs into the GFCI and has lights that confirm power is on, the proper wiring polarity and ground, and may be obtained with a GFCI test button to verify the GFCI mechanism operates in each downstream receptacle.
- Note that a GFCI tester plugged into a receptacle without a properly attached grounding wire will not trip the GFCI because the tester is designed to "leak" a test current to ground.


Adding GFCI at Service Panel
-
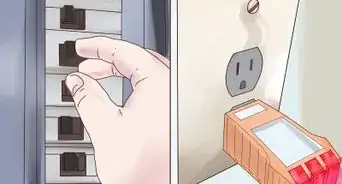
1Consider whether you need a GFCI circuit breaker. In some cases it may be best to have an electrician install a GFCI circuit breaker in the panel, rather than a GFCI receptacle.[17]
- The GFCI breaker has a protected "hot" conductor, a separate neutral connection, as well as a test and reset button. It will protect all devices on that entire branch, if properly installed.
-
2Don't attempt this one as a DIY job if you don't have extensive electrical experience. It can be very dangerous to work on exposed circuit breakers, even if you believe the main breaker (or feed) has been disconnected.
-
3Some newer installations may require an AFCI breaker as well as GFCI protection for some circuit branches. Combination AFCI/GFCI breakers may be an elegant way to solve that complicated problem.


Community Q&A
-
QuestionThe GFCI keeps tripping and will not reset. What is happening?
 Community AnswerThere could be a ground fault, or the GFCI was wired improperly or is faulty.
 -
QuestionHow do I wire GFCI to two lights and a switch?
 Upnorth HereTop AnswererYou can use a GFCI breaker in the panel to protect the entire branch circuit.
 -
QuestionCan I or should I wire a GFCI outlet on a GFCI breaker?Upnorth HereTop AnswererYes, it's possible, but probably pointless and potentially trouble-causing when both trip and you have to remember to reset both, or when one becomes more sensitive than the other.
Warnings
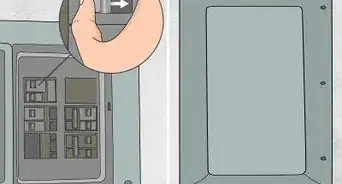
- Turn off the electricity to the circuit being worked on to avoid possible electrocution.⧼thumbs_response⧽
- Refer to your particular product's troubleshooting guide or contact an electrician if your GFCI test fails.⧼thumbs_response⧽
- Do not confuse GFCI receptacles (outlets) with GFCI breakers. GFCI breakers are for main electricity panels and should only be installed by a qualified electrician.⧼thumbs_response⧽
- To protect multiple non-GFCI receptacles, they must all be "downstream", meaning further away from the service panel, from the GFCI receptacle and connected via the "Load" terminals of the GFCI. Any other receptacles will have no GFCI protection if you have not properly selected the first receptacle on the branch for GFCI replacement.⧼thumbs_response⧽
Things You'll Need
- Phillips and flat-head screwdrivers
- Wire strippers
- Needle-nose pliers
- Wire connectors (also known as caps)
- GFCI
-Step-6-Version-2.webp)


References
- ↑ NFPA 70 National Electrical Code, 2014 edition.
- ↑ https://www.youtube.com/watch?v=4ogeh3qOjl4
- ↑ Daniel Stoescu. Master Electrician. Expert Interview. 16 August 2021.
- ↑ https://www.youtube.com/watch?v=4ogeh3qOjl4
- ↑ Daniel Stoescu. Master Electrician. Expert Interview. 16 August 2021.
- ↑ Daniel Stoescu. Master Electrician. Expert Interview. 16 August 2021.
- ↑ https://www.homedepot.com/c/ah/how-to-install-a-gfci-outlet/9ba683603be9fa5395fab9027be8d3c
- ↑ Daniel Stoescu. Master Electrician. Expert Interview. 16 August 2021.
- ↑ Daniel Stoescu. Master Electrician. Expert Interview. 16 August 2021.
- ↑ https://www.homedepot.com/c/ah/how-to-install-a-gfci-outlet/9ba683603be9fa5395fab9027be8d3c
- ↑ https://electriciansmesaaz.com/gfci-outlets-how-to-wiring-diagrams/
- ↑ https://electriciansmesaaz.com/gfci-outlets-how-to-wiring-diagrams/
- ↑ Daniel Stoescu. Master Electrician. Expert Interview. 16 August 2021.
- ↑ https://electriciansmesaaz.com/gfci-outlets-how-to-wiring-diagrams/
- ↑ https://inspectapedia.com/electric/GFCI-Test-Procedures.php
- ↑ https://inspectapedia.com/electric/GFCI-Test-Procedures.php
- ↑ https://www.constructionprotips.com/jobsite-tips/electrical/gfci-breaker-vs-receptacle/
- ↑ NFPA 70 National Electrical Code, 2014 edition, Article 210.8.
- http://bluesea.com/files/resources/instructions/IST-0004C.pdf
About This Article

To properly wire GFCI, or ground fault circuit interrupter receptacles, turn off the power to the circuit you’re working on and unscrew the cover plate on the outlet box. If there is only 1 cable containing 2-3 wires, connect the white line wire to the silver or white terminal, and connect the black wire to the brass terminal, which is the hot terminal. Leave enough wire for the receptacle to be pulled at least 4-6 inches from the box, and attach any bare or green grounding wires to the green grounding screws. Tuck any wires into the box and replace the receptacle box and cover. For tips on how to test the wires, or what to do if you have 2 cables, read on!


-Step-6-Version-2.webp)