This article was co-authored by wikiHow Staff. Our trained team of editors and researchers validate articles for accuracy and comprehensiveness. wikiHow's Content Management Team carefully monitors the work from our editorial staff to ensure that each article is backed by trusted research and meets our high quality standards.
There are 24 references cited in this article, which can be found at the bottom of the page.
The wikiHow Video Team also followed the article's instructions and verified that they work.
This article has been viewed 122,949 times.
Learn more...
Wrapping boxes isn't easy, but wrapping an oversized box presents a special kind of challenge. You may have to use much more wrapping paper than the norm, which means struggling with tape and potential accidental gaps. Knowing how to approach the wrapping process can make it much easier to deal with. Measuring the box properly, making sure you have the right amount of wrapping paper, and wrapping the box in sections can make the task a breeze!
Steps
Measuring the Box and Wrapping
-
1Set up all of your supplies on a large, smooth, and flat surface. Your dining room table or a workbench should suffice, as long as it gives you enough room to rotate and move the box freely as you work. Place your box in the middle of your work area.[1]
-
2Measure all sides of the box with measuring tape or a ruler. Knowing the exact size of the box will inform you of how much wrapping paper you'll need. Place your ruler at the bottom of the box first, taking its measurement lengthwise. Measure its width second. Measure the height of the box last. Perform these measurements in the same order for every side.[2]Advertisement
-
3Check the measurements of your wrapping paper with a ruler. If the wrapping paper is at least 2 inches (5.1 cm) longer than the box on the left and right sides, proceed with using the paper. Use a second roll of wrapping paper if the wrapping is too short to fit all the way around the box.[3]


Using 1 Sheet of Wrapping Paper
-
1Unfurl the wrapping paper. Pull the box into an upright standing position to spread out the wrapping paper. If the box is too heavy to stand up without wobbling, have someone stand nearby to hold the box up while you spread the wrapping paper out. Make sure the wrapping paper is completely smooth. Do not cut the wrapping paper just yet; you may still need to unfurl more paper as you work.[4]
-
2Position the box in the middle of the paper. Make sure the edges of the wrapping paper overlap the edges of the box in even amounts on the left and right and on the top and bottom. You don't need to be 100 percent precise. Eyeball the amount of space the paper overlaps the edge on both sides to see whether they're even enough.[5]
-
3Wrap the box 1 section at a time. The box will be much easier to wrap if you break the process down into small steps. Wrap around the long sides of the box first. Then fold and tape the corners down on one end of the box. Repeat the process with the other end.[6]
-
4Pull the wrapping paper over the sides of the box. Pull the paper so it fits tightly against the box. Leaving any slack will cause excess creasing and make your wrapping job look less attractive. Fold the edge of the wrapping paper at each corner, unfurling more wrapping paper until it touches the edge of the paper folded over the bottom of the box.[7]
-
5Cut the wrapping paper where it creates a seam on the other side. Use the remaining roll to help make a straight cut. Cut along the roll as closely as you can. Try to create a small overlap between the top and bottom edges of the wrapping paper.[8]
-
6Pull the other side of the wrapping paper up over the other side of the box. You want the wrapping paper to come up over the edge of the box. Fold the paper down at the corner of the box to make a crease. Then lay the other side of the wrapping paper flat on your workspace and fold the edge inward by 1 inch (2.5 cm) to create a flap. This will make your wrapping look much neater and more attractive.[9]
-
7Fold the wrapping paper back up the side of the box. Crease the edge of the bottom end of the wrapping paper down into a 1 inch (2.5 cm) flap (optional). Doing this will make your wrapping look tidier. Make sure to hold the wrapping paper tight against the edge of the box to create the best fit.[10]
-
8Fold the open ends of the wrapping paper flat against the box, top side first. Pinch the corners down against the box to create two triangular flaps, then fold the top end of the wrapping paper flat to create another flap. Secure the flap with tape. Repeat for the bottom end.[11]
- It's okay if there's a gap on the ends of the box. You can cover them up with more wrapping paper.[12]
- Follow this same step for the other end of the box.
-
9Position 1 end of the box on top of wrapping paper and pull the roll up. Slide the bottom edge of the box about 1 inch (2.5 cm) over the edge of the wrapping paper. Cut where the wrapping paper folds just over the edge of the box. Fold a crease at the edge of the box, then pull the wrapping paper flat against the table. Fold the creased edge completely, then secure it with double-sided tape. Repeat for the other edge.[13]
-
10Fold the sides of the wrapping paper edges over the corners of the box. If you want to make your wrapping look neater, fold the corners of the side of wrapping paper you're working with before folding it down against the box. Secure the wrapping paper with tape. Repeat for the opposite side of the box.[14]

Working with Multiple Sheets of Wrapping Paper
-
1Set the box in the middle of 1 sheet of wrapping paper. It doesn't matter which sheet you choose, since you'll be using several to cover the box completely. Check whether the sheet is long enough to cover halfway up the sides of the box beforehand. Use a ruler to measure the sides of the box and how much the wrapping paper overlaps. This will help you to figure out how much additional wrapping paper you'll need from the other sheet.
-
2Pull the sides of the wrapping paper up against the longest sides of the box. Hold the wrapping paper as tightly against the sides of the box as possible. Secure both sides of the wrapping paper with tape before moving on to the next sheet.[15]
-
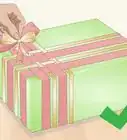
3Place another sheet of wrapping paper on the top half of the box. Position it so it lines up with the bottom half of the wrapping paper. You want to the paper to be long enough to cover the edges of the bottom half. Fold the ends down against the side of the box and secure them with tape.[16]
-
4Fold the top edge of the wrapping paper down against the side of the box. Make sure the wrapping paper presses down flat against the box. Try to align it as straight as you can. Use the edge of the box to guide your creasing. Secure with tape.[17]
-
5Crease the top edge of 1 side of the box into a triangular flap. Pinch 1 side of the top edge up and fold it flat. Repeat for the other side of that edge. Keep your folding even so the fold will look attractive. [18]
-
6Fold the flap against the side of the box. Keep your folding straight by following the edge of the box. Make sure the flap lays flat against the box, then secure it with tape on both sides of the flap.[19]
-
7Press the sides of the bottom edge inward to create a second flap. Fold 1 side of the bottom edge in at a time. Do it again for the other side. Line the sides up before finishing the fold to make sure the edge makes an even diagonal line.[20]
-
8Fold the bottom flap up against the box. Press the flap against the end of the box so it lies flat. Follow the bottom edge of the box to ensure your folding is straight. Secure the sides of the flap with tape once you're sure it's straight.[21]


Taping the Box and Adding Decorations
-
1Use double-sided tape for the seams of your wrapping paper. Double-sided tape will allow you to secure the edges of your wrapping paper. Apply the tape to edge of the wrapping paper. Next fold the other edge down on top of the the tape and press down to smooth and secure it. The seam will hold in place and look neat and attractive![22]
-
2Tape the edges of each folded section as you go. Don't create any new folds without first securing the previous fold with tape. If you don't tape down your folds as soon as you make them, they could come undone as you keep wrapping and lead to a messy job. Regular tape will work just fine for any folds that aren't seams.
-
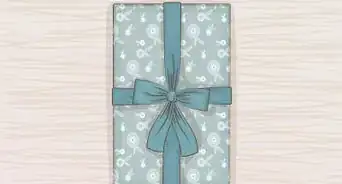
3Unfurl a thick cloth ribbon across your workspace. Keep the ribbon attached to the spool if you can. This will allow you to add more ribbon if you find the length you've initially rolled out isn't long enough. Lie the ribbon straight along the table.[23]
-
4Position your wrapped box on top of the ribbon. Place the box so it lies in the middle of the ribbon and creates equally sized ends on either sides. Wrap the ribbon up the sides of the box and over the top to test whether it's long enough before cutting it from the spool. If there isn't enough ribbon, unfurl more ribbon and repeat this step.[24]
-
5Pull the sides of the ribbon up and over the sides of the box. Hold the ribbon tight against the surface of the box. Leaving any slack will give you a messier looking end result. You may need to slide the box to one side to adjust the ribbon so the ends are the same length at the top of the box.[25]
-
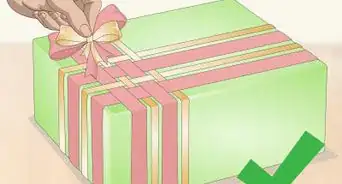
6Secure the ribbon with a glue gun. Apply glue at one end of the ribbon. All you need is a thin line. Don't go all the way to the edges or the glue could bleed out. Press it down onto the box for a few seconds. Repeat for the other end of the ribbon.[26]
- If you find excess glue on the box, wait for it to dry, then wipe it up with an alcohol swab.
- There will be a gap between the ends of the ribbon. This is okay. You can cover it up with another decoration.[27]
-
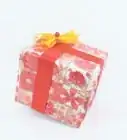
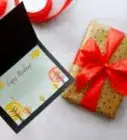
7Place a card on top of the ribbon. Dot some glue on the back of the card with your glue gun before sticking it in place. You could use a birthday or holiday card to commemorate the occasion. Alternatively, if the box contains a gift, attach a name card for the recipient.[28]
- Alternatively, you could attach a bow over the gap. Make sure it matches the color of the ribbon!
-
8Add postage if you're sending your box in the mail. You may be wrapping a big box in order to ship it off. In that case, you'll need to add postage. Write the recipient's address on top of the box, right in the center. Write the return address in the top left-hand corner of the box. Add your stamps in the top right corner.[29]


Warnings
- Avoid leaving any parts of the box exposed.[31]⧼thumbs_response⧽
- Don't worry about getting the wrapping picture perfect. Remember: the wrapping is just decoration. What really counts is the object inside.⧼thumbs_response⧽
Things You'll Need
- Large box
- Wrapping paper
- Scissors
- Double-sided tape
- Regular tape
- Measuring tape (or a ruler)


References
- ↑ https://www.huffingtonpost.com/entry/how-to-wrap-oversized-gifts_us_5845fca5e4b02f60b0249e3f
- ↑ https://www.wired.com/2015/12/how-to-wrap-a-box/
- ↑ https://www.wired.com/2015/12/how-to-wrap-a-box/
- ↑ https://youtu.be/1-587fJFDcE?t=30s
- ↑ https://youtu.be/1-587fJFDcE?t=38s
- ↑ https://www.huffingtonpost.com/entry/how-to-wrap-oversized-gifts_us_5845fca5e4b02f60b0249e3f
- ↑ https://youtu.be/1-587fJFDcE?t=46s
- ↑ https://youtu.be/1-587fJFDcE?t=50s
- ↑ https://youtu.be/1-587fJFDcE?t=1m5s
- ↑ https://youtu.be/1-587fJFDcE?t=1m26s
- ↑ https://youtu.be/1-587fJFDcE?t=1m55s
- ↑ https://youtu.be/1-587fJFDcE?t=2m32s
- ↑ https://youtu.be/1-587fJFDcE?t=2m32s
- ↑ https://youtu.be/1-587fJFDcE?t=3m19s
- ↑ https://youtu.be/1Pi2zV4lsGM?t=53s
- ↑ https://youtu.be/1Pi2zV4lsGM?t=1m30s
- ↑ https://youtu.be/1Pi2zV4lsGM?t=3m6s
- ↑ https://youtu.be/1Pi2zV4lsGM?t=3m21s
- ↑ https://youtu.be/1Pi2zV4lsGM?t=3m27s
- ↑ https://youtu.be/1Pi2zV4lsGM?t=4m
- ↑ https://youtu.be/1Pi2zV4lsGM?t=4m15s
- ↑ https://youtu.be/1-587fJFDcE?t=1m26s
- ↑ https://youtu.be/1Pi2zV4lsGM?t=5m12s
- ↑ https://youtu.be/1Pi2zV4lsGM?t=5m19s
- ↑ https://youtu.be/1Pi2zV4lsGM?t=5m24s
- ↑ https://youtu.be/1Pi2zV4lsGM?t=5m40s
- ↑ https://youtu.be/1Pi2zV4lsGM?t=6m19s
- ↑ https://youtu.be/1Pi2zV4lsGM?t=6m19s
- ↑ https://pe.usps.com/text/dmm100/preparing-packages.htm
- ↑ https://www.wired.com/2015/12/how-to-wrap-a-box/
- ↑ https://www.wired.com/2015/12/how-to-wrap-a-box/
About This Article