This article was co-authored by wikiHow Staff. Our trained team of editors and researchers validate articles for accuracy and comprehensiveness. wikiHow's Content Management Team carefully monitors the work from our editorial staff to ensure that each article is backed by trusted research and meets our high quality standards.
There are 15 references cited in this article, which can be found at the bottom of the page.
The wikiHow Video Team also followed the article's instructions and verified that they work.
This article has been viewed 37,131 times.
Learn more...
A big part of creating a beautiful, unique gift basket is finishing it by wrapping it in shimmery, shiny cellophane paper. It may take a few minutes to make sure you’re using enough paper and getting it situated right, but putting a little extra attention into this task will pay off big dividends and help you become a master at gift-basket wrapping. This is a great skill that will help you create charming gifts for your friends and family.
Steps
Finishing Gifts with Rolls of Cellophane
-
1Purchase rolls of cellophane online or from a craft store. Similar to rolls of wrapping paper, you can purchase big rolls of cellophane for all your crafting and gift-basket-making needs. There are tons of different colors and patterns you can choose from, too.[1]
- You may even be able to buy a length of cellophane from a local florist shop.
- Clear cellophane would be nice if you want the contents of a gift basket to be visible.
- Colored or patterned cellophane can add an extra pop of fun to your gift.
-
2Measure enough cellophane to completely wrap around the container. Clear a large work area and pull out a long length of cellophane from the roll. Place the container in the middle, and pull the cellophane up on either side. Adjust how much cellophane there is until the whole container is covered, and then add an additional 6–12 inches (150–300 mm) to that length.[2]
- Ideally, work on a hard, clean surface rather than on carpet. The cellophane will attract little fibers and bits of dust.
- Remember, it’s better to have too much cellophane. You can always trim away excess material, but it’s a lot harder to add more without it looking funny.
Tip: If the container you’re covering is really large, follow the instructions above, but then cut a second piece of cellophane the same size as the first one. Crisscross the sheets underneath the container so that each side will be equally covered.
Advertisement -
3Cut the cellophane and lay it out flat on your work surface. Use a pair of sharp craft scissors. As you cut, try to make it as smooth as possible so there aren’t any jagged edges.[3]
- Once you make the initial cut, you should hopefully be able to just glide your scissors down the length of the cellophane. This prevents weird edges from forming.
-
4Place the prepared container in the center of the piece of cellophane. Position the front of the basket or container so that it’s parallel to one of the straight edges of the cellophane. This way, when you wrap the container the “seams” of cellophane will be on the sides rather than in the front.[4]
- It’s best to work with a container that has already been prepared. That way, you can make sure to position it exactly how you want it, and you’ll be able to better see where you should tie the ribbon at the end.
-
5Bring the sides of cellophane together overtop of the container. It’s okay if the sides don’t quite reach all the way—you’ll stick those in place later. Right now, just focus on creating a poof of cellophane at the top.[5]
- One of the great things about cellophane is that it’s supposed to look a little messy. It doesn’t matter if the pieces aren’t perfectly smooth (in fact, they’re not meant to be).
-
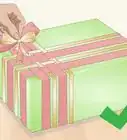
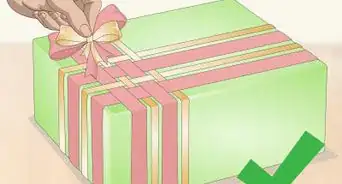
6Secure the poof of cellophane with a decorative ribbon or bow. This can take a little finagling, especially if you’re working with a particularly large basket or container. Hold the poof in one hand, and wrap the ribbon around it with your other hand. Tie a bow with the ribbon.[6]
- Try your best to position the ribbon overtop of the highest point in the basket or container. This should hopefully make things look very balanced.
-
7Trim long edges and tape down loose sections of cellophane. Take a look at the poof of cellophane and cut away any super long pieces that extend out past the rest of the material. Then, use clear tape to secure pieces of cellophane that weren’t quite long enough to reach the top.[8]
- Try to focus on making sure there are no “blank” spaces or little gaps where you can see between pieces of cellophane into the basket.


Using Shrink-Wrap Cellophane
-
1Open the cellophane bag and place the gift basket inside. Shrink bags are sealed on the bottom and the sides, making them much easier to use to wrap gift baskets and other oddly-shaped containers. Simply separate the 2 sides of the bag and hold them open while putting your prepared gift basket at the bottom.[9]
- Do your best to center the gift basket so that the bottom seam of the bag is along the middle of the basket.
- A shrink bag is a great option to create a tightly-sealed basket. It’ll help keep items in place more securely, which is important if there are fragile items or if you’ll be traveling with it.[10]
-
2Lift the sides of the bag around the basket. Once the gift basket is in place, carefully extend the sides to their full length around the entire basket. There will probably be excess space on either side of the basket, as well as on top, but don’t worry! That will all get taken care of when you shrink-wrap it.[11]
- It’s generally easier to work with a filled basket rather than an empty one. If you didn’t already fill your basket, though, now is the time to do so.
Themed Ideas for Gift Baskets:
Create a pasta basket with sauce, dry noodles, specialty cheese, and wrap everything in a colander.
Make a coffee lovers basket with a mug, coffee beans, and special syrup.
Create a relaxation basket with a candle, fuzzy slippers, a face mask, exfoliating scrub, and a crossword book.[12]
-
3Tie the top of the shrink-wrap together with a twist tie. Gather the shrink-wrap on either side of the basket and bring it all together in the middle to create a poof. Secure this poof with a twist tie or rubber band so it doesn’t come undone.[13]
- Hold off on using ribbon or a bow at this stage.
-
4Move a heat gun back and forth over the basket to shrink the cellophane. Set the heat gun to a medium or high heat and hold it about 6 inches (150 mm) away from the basket. Continue waving it back and forth over the entire basket until you notice the cellophane bag starting to shrink and adhere more tightly to the basket itself.[14]
- If you don’t have a heat gun, you could also use a hairdryer on the highest setting for the same results.[15]
- Avoid holding the heat gun in one place for very long. This could burn through the cellophane.
-
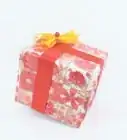
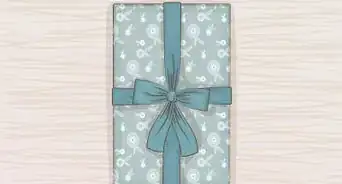
5Finish your basket with a decorative ribbon or bow. Once you’re done shrinking the cellophane, cover or replace the twist tie with something a little more festive. You could use a simple ribbon for an elegant touch, or get more creative with a big bow and spiraled ribbons.[16]
- If you notice a section of the bag that seems too loose, just use your heat gun on it again.

Things You’ll Need
Finishing Gifts with Rolls of Cellophane
- Cellophane
- Basket or container
- Craft scissors
- Cellophane
- Prepared basket or container
- Twist tie (optional)
- Ribbon
- Clear tape
- Craft scissors
Using Shrink-Wrap Cellophane
- Gift basket
- Shrink bag
- Twist tie or rubber band
- Heat gun or hairdryer
- Ribbon


References
- ↑ https://www.northpole.com/craftcottage/gift-basket-assembly-tips
- ↑ https://youtu.be/0TxJQk72378?t=49
- ↑ https://youtu.be/0TxJQk72378?t=78
- ↑ https://youtu.be/0TxJQk72378?t=107
- ↑ https://youtu.be/0TxJQk72378?t=163
- ↑ https://sewguide.com/different-types-of-ribbons/
- ↑ https://youtu.be/0TxJQk72378?t=195
- ↑ https://youtu.be/G0eu07hC-DE?t=50
- ↑ https://youtu.be/KgKQwrr-VX8?t=44
- ↑ https://youtu.be/B_NQ_U2JEp4?t=33
- ↑ https://youtu.be/KgKQwrr-VX8?t=62
- ↑ https://www.diys.com/gift-basket-ideas/
- ↑ https://youtu.be/KgKQwrr-VX8?t=82
- ↑ https://youtu.be/KgKQwrr-VX8?t=133
- ↑ https://youtu.be/B_NQ_U2JEp4?t=94
- ↑ https://sewguide.com/different-types-of-ribbons/
- ↑ https://www.northpole.com/craftcottage/gift-basket-assembly-tips
About This Article