Siege of Tobruk
The siege of Tobruk took place between April 10 and November 27, 1941, when elements of the Allied Army were trapped and besieged in the North African port of Tobruk by German and Italian forces. The defenders quickly became known as the Rats of Tobruk.
| Siege of Tobruk | |||||||
|---|---|---|---|---|---|---|---|
| Part of the Western Desert Campaign of the Mediterranean and Middle East theatre of World War II | |||||||
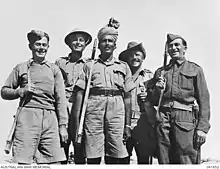 Soldiers of the victorious Allied Armies (Polish, British, Indian, Australian and Czech). | |||||||
| |||||||
| Belligerents | |||||||
|
| |||||||
| Commanders and leaders | |||||||
|
|
| ||||||
| Strength | |||||||
| 27,000 | 35,000 | ||||||
| Casualties and losses | |||||||
|
5,989
|
12,296
| ||||||
The siege lasted for 241 days in 1941, after Axis forces advanced through Cyrenaica from El Agheila in Operation Sonnenblume against Allied forces in Libya, during the Western Desert Campaign (1940–1943) of the Second World War. In late 1940, the Allies had defeated the Italian 10th Army during Operation Compass (9 December 1940 – 9 February 1941) and trapped the remnants at Beda Fomm.
But the balance between the armies shifted in early 1941. Much of the Western Desert Force (WDF) was sent to the Greek and Syrian campaigns. As German troops and Italian reinforcements reached Libya, only a skeleton Allied force remained, short of equipment and supplies. Operation Sonnenblume (6 February – 25 May 1941), forced the Allies into a retreat to the Egyptian border.
A garrison, consisting mostly of the 9th Australian Division (Lieutenant-General Leslie Morshead) remained at Tobruk, to deny the port to the Axis, while the WDF reorganised and prepared a counter-offensive.
The Axis siege of Tobruk began on 10 April, when the port was attacked by a force under Generalleutnant Erwin Rommel and continued during three relief attempts, Operation Brevity (15–16 May), Operation Battleaxe (15–17 June) and Operation Crusader (18 November – 30 December). The occupation of Tobruk deprived the Axis of a supply port closer to the Egypt–Libya border than Benghazi, 560 mi (900 km) west of the Egyptian frontier, which was within the range of RAF bombers; Tripoli was 930 mi (1,500 km) to the west in Tripolitania.
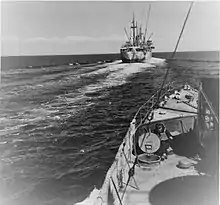
The siege diverted Axis troops from the frontier and the Tobruk garrison repulsed several Axis attacks. The port was frequently bombarded by artillery, dive-bombers and medium bombers, as the RAF flew defensive sorties from airfields far away in Egypt. Allied naval forces, such as the British Mediterranean Fleet (including the Inshore Squadron) ran the blockade, carrying reinforcements and supplies in and wounded and prisoners out.
On 27 November, Tobruk was relieved by the Eighth Army (which controlled British and other Allied ground forces in the Western Desert from September 1941) as part of Operation Crusader.
Background
Terrain
The Western Desert Campaign was fought from Mersa Matruh in Egypt to Gazala in Cyrenaica on the Libyan coast, an area about 390 kilometres (240 mi) wide along Via Balbia along the coast, the only paved road. A sand sea 150 mi (240 km) inland marked the southern limit of the desert, which was at its widest at Giarabub and Siwa; in British parlance, the Western Desert came to include eastern Cyrenaica in Libya. Extending inland from the coast lies a raised, flat plain of stony desert, about 500 ft (150 m) above sea level, for 120–190 mi (200–300 km) to the sand sea.[1] Scorpions, vipers and flies populated the region, which was inhabited by a small number of nomads. Bedouin tracks linked wells and the more easily traversed ground; navigation was by sun, star, compass and "desert sense", good perception of the environment gained by experience. When Italian troops advanced into Egypt in September 1940, the Maletti Group got lost leaving Sidi Omar and had to be found by aircraft.[2]
In spring and summer, days are miserably hot and nights very cold; the Sirocco (Gibleh or Ghibli), a hot desert wind, blows clouds of fine sand, which reduces visibility to a few metres and coats eyes, lungs, machinery, food and equipment; motor vehicles and aircraft need special oil filters and the barren ground means that supplies for military operations have to be transported from outside.[3][4] German engines tended to overheat and tank engine life fell from 1,400–1,600 mi (2,300–2,600 km) to 300–900 mi (480–1,450 km), which was made worse by the lack of standard parts for German and Italian types.[5] The ground is a hard surface which drops to sea level in steps, with the coast cut by ravines. The Italian fortifications at Tobruk included an outer perimeter, comprising a double semi-circle of dug-in strong points with concrete walls, positioned well for forward observation, an inner anti-tank ditch, some parts of which were behind barbed wire and/or included booby traps, as well as several more fortified positions closer to the port, at the Bardia–El Adem road junction and towards Fort Pilastrino.[6]
Capture of Tobruk
The 6th Australian Division captured Tobruk from the Italians in January 1941.
Prelude
Operation Sonnenblume
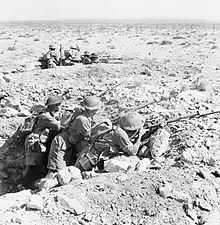
In February 1941, the Allies defeated the 10th Army and the 5° Squadra of the Regia Aeronautica, after which Allied leaders decided to hold the area with minimal forces and send the remainder of the WDF to Greece. The Australian 9th Division and the British 2nd Armoured Division (Major-General Michael Gambier-Parry), minus a brigade group sent to Greece, were left to garrison Cyrenaica under Cyrenaica Command (Cyrcom: Lieutenant-General Henry Maitland Wilson), despite the inadequacy of the force if the Germans sent reinforcements to Libya. Command in Egypt was taken over by Lieutenant-General Richard O'Connor and the XIII Corps HQ was replaced by the HQ of the 1st Australian Corps (Lieutenant-General Thomas Blamey). It was believed by General Wavell and the GHQ in Egypt that the Germans could not attack until May, when the 9th Australian Division, two more divisions and support troops, particularly artillery would be ready and the tanks of the 2nd Armoured Division would have been overhauled.[7]
The 2nd Armoured Division had a reconnaissance regiment and the 3rd Armoured Brigade (Brigadier Reginald Rimington), which had an under-strength light tank regiment and one equipped with captured Fiat M13/40 tanks. The cruiser regiment arrived in late March with worn-out tracks, after many breakdowns en route and brought the division up to an under-strength armoured brigade. Most of the British tanks were worn out and the Italian tanks were slow and unreliable. The British 2nd Support Group (similar to a small infantry brigade) had only a motor battalion, a 25-pounder field gun regiment, an anti-tank battery and a machine-gun company. The division was short of transport and its workshops were understaffed and lacked spare parts. Two brigades of the 9th Australian Division (Major-General Leslie Morshead) were swapped with two from the 7th Australian Division (Major-General John Lavarack), which had insufficient training, equipment and transport.[8]
Lack of transport made it impossible to supply a garrison west of El Agheila, the most favourable position for a defensive line and restricted the 2nd Armoured Division to movement between supply dumps, reducing its limited mobility further. In February, Lieutenant-General Philip Neame took over Cyrcom and predicted that the armoured division would lose many tanks through breakdowns if it had to move far. Neame asked for a proper armoured division, two infantry divisions and adequate air support to hold the area; he was told that there was little to send and none of that before April. In early March, the 9th Australian Division began to relieve the 6th Australian Division (Major-General Iven Mackay) at Mersa Brega for shipment to Greece, which demonstrated the difficulty of tactical moves with insufficient transport and it was withdrawn to the area east of Benghazi.[9]
Neame was ordered to conserve the tank units, retire as far as Benghazi if pressed, abandon it if necessary, and hold the high ground nearby for as long as possible, with no prospect of reinforcement before May. Neame was to fight a delaying action up the Via Balbia towards Benghazi and then the defiles near Er Regima and Barce; the tanks would move to Antelat to operate against the flank and rear of an attacker moving up the road or across the desert to Tobruk, falling back on a flank if necessary. On 20 March, the 2nd Armoured Division took over from the Australians, who moved back to Tocra, near Er Regima. The force was to use depots at Msus, Tecnis, Martuba, Mechili and Tmimi, El Magrun and Benghazi as a substitute for lorry-borne supply. The 3rd Indian Motor Brigade (Brigadier E. W. D. Vaughan) arrived in late March, with lorries but no tanks, artillery, anti-tank guns and only half its wireless sets; the brigade was based at Martuba, ready to use its vehicles to move towards Derna, Barce or Mechili.[10]
On 24 March, Rommel advanced with the new Deutsches Afrikakorps (DAK). The 3rd Armoured Brigade was south-east of Mersa Brega, where the 2nd Support Group held an 8 mi (13 km) front; the Australians were 150 mi (240 km) to the north, minus a brigade left at Tobruk, deficient in much equipment and out of contact with the 2nd Armoured Division. Allied air reconnaissance had observed German troops west of El Agheila on 25 February and by 5 March, it was expected that the German commander would consolidate the defence of Tripolitania before trying to recapture Cyrenaica and then invade Egypt, using bases at Sirte and Nofilia but not before April. Rommel was identified on 8 March but local intelligence was hard to find under the restrictions to preserve the few troops and vehicles near the front and avoid the danger of the faster German eight-wheeler armoured cars, which inhibited Allied tactical reconnaissance.[11]
On 3 April, Gambier-Parry had received a report that a large enemy armoured force was advancing on Msus, site of the main divisional supply dump. The 3rd Armoured Brigade moved there and found that the petrol had been destroyed to prevent capture. The tank brigade was reduced by losses and breakdowns to 12 Cruiser tanks, 20 light tanks and 20 Italian tanks. Neame received conflicting reports about the positions of the Allied and Axis forces and news on 5 April that a large Axis force was advancing on El Abiar led him to order the 9th Australian Division back to Wadi Cuff and the elements of the 2nd Armoured Division to guard the desert flank and retire to Mechili. Other reports led Neame to countermand these orders, which caused the Australians much confusion. On 6 April, Allied air reconnaissance reported that there were Axis columns in the desert and the 3rd Indian Motor Brigade repulsed an attack at Mechili, which led to O'Connor at the Cyrcom headquarters (Neame had left to visit Gambier-Parry) to order a general withdrawal.[12]
Loss of Mechili
Rommel had intended to attack Mechili on 7 April but the Axis forces were scattered, short of fuel and tired. Group Fabris moved forward during the morning but the 132nd Armoured Division "Ariete" (Ariete Division) and Group Streich took all day to arrive, having been attacked all day by the RAF. A Squadron of the Long Range Desert Group (LRDG) had appeared from the south, to harass Axis movements. By nightfall on 7 April, the 9th Australian Division (less the 24th Infantry Brigade) and British 2nd Support Group had blocked the Via Balbia at Acroma, about 15 mi (24 km) west of Tobruk, where the 18th and 24th Infantry Brigades were preparing the defences. (The 18th Australian Infantry Brigade had arrived from Egypt by sea after the dispatch of the 7th Australian Division to Greece had been cancelled.) A small force held El Adem, south of Tobruk to observe the approaches from the south and south-west and at Mechili, Gambier-Parry had the 2nd Armoured Division headquarters soft-skinned vehicles and a cruiser tank, most of the 3rd Indian Motor Brigade, M Battery 1st Royal Horse Artillery, part of the 2/3rd Australian Anti-tank Regiment and elements of other units.[13]
The Germans tried twice to bluff Gambier-Parry into surrender but he received orders from Cyrcom to break out and retreat to El Adem and decided to attack at dawn, to gain a measure of surprise. On 8 April, A Squadron of the 18th Cavalry broke through and then turned to attack Italian artillery, as some Indian troops of the 11th Prince Albert Victor's Own Cavalry (Frontier Force) got away. Most of the garrison was pinned down and after a second attempt at 8:00 a.m. when small parties of the 2nd Royal Lancers escaped. The garrison had fired most of its small arms ammunition at the vision slits of the German tanks, which had hung back in fear of mines and when Italian infantry attacked, had little left. Gambier-Parry and 2,700–3,000 British, Indian and Australian troops surrendered to the 17th Infantry Division "Pavia" (General Pietro Zaglio).[14]
Supply
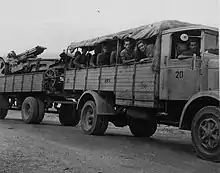
Axis supplies came from Europe and deliveries were moved by road; after Operation Compass (December 1940 – February 1941), only Tripoli remained, which had a maximum capacity of four troopships or five cargo ships at once, about 45,000 long tons (46,000 t) per month. Tripoli to Benghazi was 600 mi (970 km) along the Via Balbia, which was only half-way to Alexandria. The road could flood, was vulnerable to the DAF and alternative desert tracks increased vehicle wear. The Axis advance of 300 mi (480 km) to the Egyptian frontier in early 1941, increased the road transport distance for supplies to 1,100 mi (1,800 km). Benghazi was captured in April but coastal shipping could only carry 15,000 long tons (15,241 t) and the port was within range of the DAF. Tobruk could take about 1,500 long tons (1,524 t) per day but lack of shipping made its capture irrelevant.[15]
A German motorised division needed 350 long tons (360 t) per day and moving the supplies 300 mi (480 km) took 1,170 two-ton lorries.[16] With seven Axis divisions, air and naval units, 70,000 long tons (71,000 t) of supplies per month were needed. Vichy France agreed to Bizerta being used for supplies but none passed through until late 1942. From February–May 1941, a surplus of 45,000 long tons (46,000 t) was delivered; attacks from Malta had some effect but in May, the worst month for ship losses, 91 percent of supplies arrived. Lack of transport in Libya left German supplies in Tripoli and the Italians had only 7,000 lorries for deliveries to 225,000 men. A record amount of supplies arrived in June but at the front, the shortages worsened.[17]
There were fewer Axis attacks on Malta from June and ships sunk increased from 19 percent in July, to 25 percent in September, when Benghazi was bombed and ships diverted to Tripoli; air supply in October made little difference. Deliveries averaged 72,000 long tons (73,000 t) per month from July–October but the consumption of 30–50 percent of fuel deliveries by road transport and truck unserviceability of 35 percent reduced deliveries to the front. In November, a five-ship convoy was sunk during Operation Crusader and ground attacks on road convoys stopped journeys in daylight. Lack of deliveries and the Eighth Army offensive, forced a retreat to El Agheila from 4 December, crowding the Via Balbia where Allied ambushes destroyed about half of the remaining Axis transport.[18]
Tobruk
Work on the fortifications at Tobruk had begun in March, using the Italian defences, two lines of concrete bunkers 8–9 mi (13–14 km) away from the port, making a perimeter about 30 mi (48 km) long, far enough out to keep artillery out of range of the port. Few intermediate defences had been built by the Italians except at the Bardia–El Adem road junction, the barbed wire was in disrepair and an anti-tank ditch was unfinished. The Allies selected another line about 2 mi (3.2 km) back from the perimeter and worked on this while the original line was refurbished. Two battalions of the Australian 24th Infantry Brigade and the newly arrived Australian 18th Brigade (which had been detached from the 7th Division) took over the perimeter and the Australian 20th and 26th brigades took up a covering position on the outside until 9 April, while more work was done on the defences. Once inside, the three 9th Australian Division brigades took over the defences and the 18th Brigade went into reserve.[19]
A cadre of the British 3rd Armoured Brigade was refitting at Tobruk, with personnel and equipment sent from Egypt by sea and had a regiment of armoured cars, two composite regiments with 15 light, 26 cruiser and a troop of four infantry tanks. There were four 25-pounder regiments, two anti-tank regiments and an anti-tank company in each infantry brigade, the British 4th Anti-Aircraft Brigade had sixteen heavy and fifty-nine light guns, all but two Bofors guns being sited around the harbour. Rear area units had accumulated at Tobruk and 1⁄3 of the 36,000 personnel were in base units or local refugees and prisoners of war. Morshead planned an active defence and stressed that, with battalions holding 5 mi (8.0 km) frontages, a break-in should be expected anywhere that the attackers made a serious effort and that it should be eliminated, since there would be no withdrawal.[20]
Siege
Investment of Tobruk
By 8 April, the most advanced German units had arrived at Derna; but some units which had cut across the chord of the Jebel Akhdar ran out of water and fuel at Tengeder. Heinrich von Prittwitz und Gaffron, the commander of the 15th Panzer Division, was sent ahead with a column of reconnaissance, anti-tank, machine-gun, and artillery units to block the eastern exit from Tobruk as the 5th Light Division moved from the southwest and the 27th Infantry Division "Brescia" advanced from the west. On 10 April, Rommel made the Suez Canal the objective of the Afrika Korps and ordered that a breakout from Tobruk be prevented. The next day, the port was invested; but the rush ended with the 5th Light Division on the east side, the Prittwitz group to the south (Prittwitz having been killed), and the 27th Infantry Division "Brescia" to the west. Reconnaissance Unit 3 went on to Bardia, and a composite force was sent on to Sollum to try to reach Mersa Matruh. The British Mobile Force (Brigadier William Gott), on the frontier from Halfaya Pass to Sidi Barrani, conducted a delaying-action around Sollum and Capuzzo.[21]
El Adem road
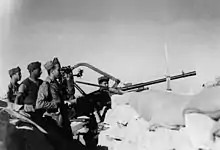
From 11–12 April, the 5th Panzer Regiment probed the defences of the 20th Australian Brigade near the El Adem road. The tanks were held off by artillery-fire; German infantry who reached the anti-tank ditch were forced back by Australian infantry. The Germans were surprised, having assumed that the shipping at Tobruk was to evacuate the garrison and planned a night attack by the 5th Light Division for 13/14 April. Groups of Axis vehicles were attacked by 45 and 55 Squadrons RAF, which rearmed at the airfields inside the perimeter. The attack began after dark, with an attempt to get over the anti-tank ditch west of the El Adem road in the 2/17th Australian Battalion sector, which the Australians repulsed. Another attempt was made later and by dawn a small bridgehead had been established, where the 5th Panzer Regiment drove through and turned northwards, ready to divide into one column for the harbour and one to move west to stop the escape of the garrison.[22]
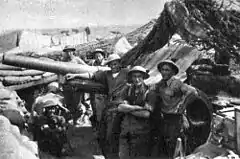
The German tanks were engaged head on by the 1st RHA and veered away, only to drive into the path of the British cruiser tanks, waiting hull-down and received anti-tank fire from three sides, losing sixteen of 38 tanks and retreated. The Australian infantry had stood their ground and pinned down the German infantry. As the retreat continued, every gun and aircraft at Tobruk fired into the area and the German 8th Machine-Gun Battalion lost about 75 percent of its men including its commander Gustav Ponath, for a garrison loss of 26 men killed, 64 wounded, two tanks and a field gun knocked out. Attacks from the south were abandoned and the 5th Light Division dug in, with the Schwerin Group (renamed after Prittwitz had been killed) to the east.[23] In support, the Luftwaffe and Regia Aeronautica flew 959 sorties over Tobruk; on 14 April 40 Ju 87s bombed the defences and on day 27 they succeeded in destroying a heavy anti-aircraft battery at Tobruk by swamping the defences with 50 aircraft allowing for an entire staffel (12) to concentrate on each gun.[24]
Ras el Medauar
On 16 April, Rommel led an attack from the west, with the 132nd Armoured Division "Ariete" reinforced by the 62nd Infantry Regiment of the 102nd Motorised Division "Trento". The 2/48th Australian Battalion counter-attacked and took 803 prisoners. In the morning, the 132nd Armoured Division "Ariete" attacked again and some tanks reached the most advanced Australian posts, found that their infantry had not followed and retired after five tanks were knocked out. Morshead ordered the garrison to exploit Axis disorganisation and their inability to quickly dig in on stony ground, through conducting patrols and small sorties. On 22 April, a company of the 2/48th Australian Battalion, three infantry tanks and a troop of 25-pounders, raided a hillock held by the Fabris Detachment south-west of Ras el Medauar; the raiders destroyed two guns and took 370 prisoners. At the same time a company of the 2/23rd Battalion advanced across the Derna road and in a costly attack, took about 100 prisoners from the 27th Infantry Division "Brescia", which led the Germans to hurry on the 15th Panzer Division from Tripoli.[22]
Air and sea war
The defeat of the Axis attacks in April greatly improved the situation in Tobruk but Fliegerkorps X had sent 150–200 aircraft to Libya from Sicily in February, which flew frequent dive-bomber sorties by day and medium-bomber raids by day and night on the docks, buildings, anti-aircraft sites, artillery positions and the airfields.[25] Westland Lysander aircraft and all but the most essential ground crew of 6 and 73 Squadron were withdrawn to Egypt. At least ten Hawker Hurricane fighters were based at the port during the day and on 19 April, Hurricanes of 73 and 274 Squadrons, intercepted a Ju 87 raid escorted by fighters. After another two days, 73 Squadron was down to five operational aircraft with very tired pilots. By 23 April, three more Hurricanes had been shot down, a further two were damaged and on 25 April the squadron was withdrawn. The fighters of 274 Squadron stayed at Gerawla and 6 Squadron remained at Tobruk to fly tactical reconnaissance sorties. Fighter cover could only be maintained at intervals by the last 14 Hurricanes in the desert; Axis airfields at Gazala, Derna and Benina, were bombed at dusk and night to limit Axis air attacks on Tobruk.[26] The Desert Air Force [so-named from October 1941] flew long-range missions to attack German armour massing near Tobruk in the early stages of the siege. On 12 April, for example, 45 and 55 Squadron Bristol Blenheim bombers, operating from airfields in Egypt, attacked German tank formations near the port. The attack succeeded in breaking up the German advance.[27]
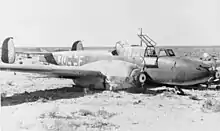
Air Commodore Raymond Collishaw, commanding 204 Group RAF (renamed the Desert Air Force), wrote to Air Marshal Arthur Tedder on 24 April. In his view the situation in the air had rapidly deteriorated. The arrival of two German fighter wings (Jagdgeschwader 27 and Zerstörergeschwader 26) near Tobruk allowed the enemy formations to arrive at great height within ten minutes of an air raid warning, leaving British fighters at lower altitude and a great disadvantage. He remarked attrition had caused "a serious reduction in our fighter force."[28] The bombardment and close air support operations in the initial phases were carried out by Lehrgeschwader 1, III./Sturzkampfgeschwader 1 and II./Sturzkampfgeschwader 2.[29] Collishaw noted the aggression shown by Axis aviation and reported to Tedder that 274 Squadron, which had only 13 fighters available as of 23 April, formed the major part of the fighter defence for Egypt and he was "loathe to send them to Tobruk."[28] As Collishaw wrote his letter, the RAF lost a further six aircraft over Tobruk, equating to very heavy losses given the small contingent defending the port.[30] He requested Tedder's advice. Air Marshal Arthur Longmore cabled the Air Ministry in London. He wished to operate in greater strength, and complained reinforcements and fresh pilots were needed to replace the exhausted 73 Squadron. He told London that to maintain patrols, the fighters were forced to refuel at Sidi Barrani granting Axis air units a free hand over Tobruk but arguing that without patrols to defend fighter squadrons refuelling at Tobruk on the ground, they were "hostage to a fortune we cannot afford."[28] On 1 May, for example, 274 Squadron lost all six Hurricanes it sent on a single mission when a flight of Bf 109s from JG 27 led by Gerhard Homuth, and containing the most successful fighter pilot in Africa, Hans-Joachim Marseille, engaged them from a superior altitude over Tobruk.[31]
From 1–14 May each side paused to stockpile supplies for the next battle.[32] Of stated losses from 10 April—14 May [excluding claims made by either side], 73 Squadron lost 15 fighters and five damaged. Five pilots were killed, one captured and one wounded. 274 Squadron lost six fighters, three pilots killed and two captured. 45 Squadron suffered the loss of three aircraft and five killed, while 55 and 6 Squadron lost one and two respectively. 39 Squadron lost three bombers and 14 Squadron one for a total of 31 aircraft.[33] Reported German losses, excluding RAF claims, were lower. III/StG 1 and II/StG 2 lost eight between them while III/ZG 26 reported three destroyed and one damaged, two killed, one wounded and three captured. III./LG 1 reported the loss of one aircraft.[33] JG 27 suffered the loss of four fighters, three damaged and three pilots killed.[33] The Regia Aeronautica's 151 Gruppo reported two aircraft destroyed and one damaged.[33]
The intensity of the battle for air superiority was mirrored by the air war over the sea as the Luftwaffe and Regia Aeronautica attempted to cut off sea traffic supplying the defenders. The air-sea battle, after the failure of Operation Battleaxe, was the main sector of operations for Allied and Axis aviation throughout the summer.[34] Sturzkampfgeschwader 3, another Ju 87 wing arrived in Africa in the summer. The eight-month long siege was costly for the Stuka gruppen. At the end of April, virtually all Tobruk-based fighters had been removed from the encircled port. The Ju 87s were facing defenders with anti-aircraft artillery numbering 88 guns—28 heavy (90 mm or above). Ships lent their weapons to the defenders. In an example, the gunboat Ladybird, sunk in shallow waters to her deck by II./StG 2, was able to use her 3-inch deck guns.[35] In April, Draco, Bankura, Urania, and HMS Chakla were sunk by Axis aircraft.[36] On 4 May the hospital ship Kapara (846t) was damaged evoking fury on the Allied side.[37]
The arrival of Italian Ju 87s from 97 Gruppo resulted in the sinking of the 3,741-ton tanker Helka on 25 May before it could reach Tobruk.[38] The squadron involved, the 239 Squadriglia was the successful unit, which became among the most successful over Tobruk.[39] The escorting sloop, Grimsby was damaged, and sunk by 3./StG 1. Commensurate with the sinking of Fiona and Chakla in April, the burden fell to the Mediterranean Fleet's destroyers to carry the burden but supply operations in daylight and on moonlit nights proved hazardous.[38] On 24 June the sloop Auckland was sunk by 239 Squadriglia. This unit also sank the destroyer Waterhen. The vessel had just survived an attack by Junkers Ju 88s of III/LG 1 and II/StG 2.[40][41] The lack of fighters made for a straight battle between the gunners and German pilots. The gunners changed their tactics from a sustained barrage at a fixed altitude, to a staggered, and thickened belt, at various altitudes covering 1000 metres or more, thereby forcing the Ju 87s to fly through fire for much longer. The gunners spread their fire from side to side, to prevent German pilots from travelling down the side of the barrage and sliding in underneath it.[42] The Stukas were active in night operations. On 26/27 October 1941, I/StG 1 attacked a convoy transporting 7,000 British and Polish soldiers with munitions sailed toward Tobruk. An attack by the Ju 87s sank the Latona (2,650 t) with a direct hit—though the vessel could reach 40 knots. The destroyer Hero was badly damaged in the same attack.[40]
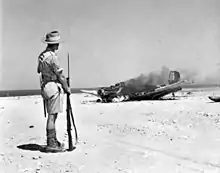
In March, destroyers were withdrawn from the Inshore Squadron to escort convoys to Greece and in April, four more ships joined the squadron. As the army retreated to Tobruk and the frontier, coastal operations were conducted on the nights of 10–11 April by gunboats, which bombarded transport on the Via Balbia around Bomba and Gambut airfield and on the night of 12 April, six destroyers and two cruisers made a coastal sweep from Ras Tayones to Ras et Tin. Next day, three ships bombarded Sollum and on 15 April, transport was bombarded at Bardia and Capuzzo, as Gazala airfield was shelled again. For the rest of April, naval bombardments continued along the Libyan coast on the Via Balbia, airfields and ports. A Commando raid was carried out on Bardia and supply runs began to Tobruk.[43] From 11 April – 10 December, 47,280 men were taken from Tobruk, 34,113 were brought in and 33,946 long tons (34,491 t) of stores delivered; 34 ships were sunk and 33 damaged.[44]
Bardia raid
The Bardia raid was planned for the night of 19/20 April, by 'A' Battalion, Layforce to disrupt Axis lines of communication and damage installations and equipment. The landing force sailed to the area in HMS Glengyle, escorted by the anti-aircraft cruiser HMS Coventry and the destroyers HMAS Stuart, Voyager and Waterhen. The Commandos of 'A' Battalion and a troop of tanks from the Royal Tank Regiment were to land on four beaches from Landing Craft Assault (LCA). On arrival, one LCA could not be lowered and there were difficulties releasing the others. On the run-in, there were no lights to guide them in, because the advance Folbot section had been delayed, when their submarine HMS Triumph had to dive and take evasive action when it was mistakenly attacked by Allied aircraft.[45] As a result of these issues the main force was late and landed on the wrong beaches, albeit unopposed. Once ashore the Commandos found that the port was empty of Axis forces and faulty intelligence led to some objectives being missed and others turning out not to exist. The Commandos destroyed an Italian supply dump and a coastal artillery battery before re-embarking. Seventy men got lost, ended up on the wrong evacuation beach and were captured.[46]
Battle of the Salient
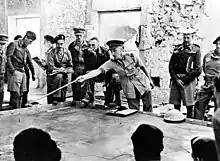
After the failure to capture Tobruk off the march, Comando Supremo and the Oberkommando der Wehrmacht (OKW) agreed that Tobruk should be captured and supplies accumulated, before the advance into Egypt was resumed. Rommel thought that Tobruk could only be taken by a deliberate attack, which could not begin until support units had arrived in the area and the Luftwaffe had been reinforced, particularly with transport aircraft to carry ammunition, fuel and water. On 27 April, Major-General Friedrich Paulus, a Deputy Chief of the General Staff, arrived from Oberkommando des Heeres (OKH) in Berlin, to question Rommel on his intentions, impress on him that there was little more help available and to forecast the defensive possibilities of the area, if Sollum was lost. Paulus refused to allow an attack planned for 30 April, until he had studied the situation and on 29 April, allowed the attack to go ahead, as did General Italo Gariboldi who had arrived on 28 April. Nothing more ambitious than securing the Axis hold on the Egyptian frontier, from Siwa Oasis north to Sollum was envisaged.[47]
The Tobruk garrison continued work on the defences and sowed minefields, the first being planted in the south-west, between the outer and inner perimeters. Twelve infantry tanks had been delivered among 5,000 long tons (5,100 t) of supplies landed during the month, despite Axis bombing of the harbour and the sinking of two supply ships. The Axis attack was to be made in the south-west, either side of the hillock of Ras el Medauar, about two weeks after the previous attempt, using the 5th Light Division on the right and the 15th Panzer Division on the left, even though it had only recently arrived in Africa. At 8:00 p.m. on 30 April, the divisions were to break into the Tobruk defences, followed by assault groups from the Ariete Division and 27th Infantry Division "Brescia" to roll up the flanks. German infantry would press forward to reconnoitre the vicinity of Fort Pilastrino, to see if the attack could continue to the harbour. If not, the Italian infantry would dig in on the flanks and artillery would be moved forward for an attack the next day.[48]
_presso_Tobruch_nell'autunno_1941.jpg.webp)
The attack came in the area held by the 26th Australian Brigade, which had the 2/23rd and 2/24th battalions in the line and the 2/48th Battalion in reserve at Wadi Giaida. The Australians expected an attack, after withstanding bombing and artillery-fire on the perimeter defences on 29 April; Axis troops seen massing in the evening of 30 April had been dispersed by artillery-fire. The posts either side of Ras el Medauar were shelled and bombed and German troops began to dribble forward, under cover of dust and the gathering darkness. By 9:30 p.m., the Germans made a small bridgehead as planned but several Australian posts held out, the reconnaissance party vanished and the Italian troops were not able to reach their objectives. The night passed in confused fighting as the Germans tried to reorganise and mop up at Ras el Medauar and attack south-westwards along the perimeter. The new attack failed and by morning, some of the Australian posts were still holding out.[49]
A thick mist rose and German tanks moved eastwards instead of south-east and then ran into the new minefield, where they were engaged by anti-tank guns and repulsed. Tanks of the 15th Panzer Division, tried to drive north but were prevented by anti-tank fire. No German reserves were left and the most advanced troops were south of Wadi Giaida, tired and isolated in a sandstorm. Paulus judged that the attack had failed and Rommel decided to attack on the right to widen the breach. In the afternoon, German tanks attacked south-east towards Bir el Medauar and Morshead sent 15 cruiser and five infantry tanks to counter-attack. The German attack was stopped for a loss of five British tanks and in the evening, the Australian 2/48th Battalion counter-attacked Ras el Medauar but met determined resistance and was repulsed. During the day, 73 and 274 Squadrons had maintained standing patrols over the area and on the morning of 2 May, the fighting around Wadi Giaida continued in a dust storm, as German troops tried to trickle forward. On the night of 3 May, the 18th Australian Brigade made a converging counter-attack with two battalions, which lost co-ordination, failed and was ended, to avoid being caught in the open at daybreak.[50]
The Axis attack had overrun the perimeter defences on a 3 mi (4.8 km) front, to a maximum depth of 2 mi (3.2 km) and captured higher ground useful as a jumping-off position and from which observation points could be established, for a loss of 650 German and 500 Italian casualties. The 8th Bersaglieri Regiment of the 132nd Armoured Division "Ariete" had captured most of the Australian positions.[51] Paulus ordered that no more attacks be made, unless the Allies were evacuating the port. The DAK was to hold Cyrenaica regardless of who held Sollum, Bardia or Tobruk and a new line was to be built further back at Gazala. In a report on 12 May, Paulus wrote that sea communications between Italy and Libya should be reinforced, that any air and anti-aircraft units sent to Libya should be German and that the army in Libya needed ammunition, fuel and food first, then more vehicles before the dispatch of more men, of whom medium artillery and anti-tank gun crews should have priority. The Tobruk garrison settled into a routine of patrols, air raids and minor attacks, some to regain positions in the Medauar salient and some in connexion with WDF operations.[52]
Twin Pimples raid
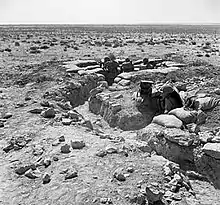
The Twin Pimples was a defensive strong point outside Tobruk, on two hills close together which overlooked the Tobruk perimeter. It was held by the Italian Army, and the 18th King Edward's Own Cavalry (normally part of the 3rd Indian Motor Brigade) held the perimeter opposite. No. 8 Commando was selected to carry out an attack on the Twin Pimples, which conducted patrols for several days with the Indians, to reconnoitre the ground.[53] The 18th Cavalry Regiment was to mount a diversion, while 43 members of No. 8 Commando and some Australian Engineers crossed the Italian forward positions and a supply road, to attack the Twin Pimples from behind.[54]
The Commandos advanced at 11:00 p.m. on the night of 17/18 July and crossed the Italian lines undetected. At the supply road they took cover, waited until 1:00 a.m. and edged forward just before the diversion by the 18th Cavalry. The diversion attracted Italian machine-gun fire and very lights, as the Commandos got within 30 yd (27 m) of the Twin Pimples before challenge, at which the commandos attacked. The password Jock was used when a position had been taken and the Italians were swiftly overcome. The Australian engineers planted explosives on several mortars and an ammunition dump. The plan assumed that it would take 15 minutes for Italian artillery to open fire on the captured trenches, and the raiders were only about 100 yd (91 m) away when shelling began to come down onto the position they had just departed.[54]
Relief operations
Operation Brevity
Operation Brevity (15–16 May) was a limited offensive to inflict attrition on the Axis forces and to secure positions for a general offensive towards Tobruk. The Allies attacked with a small tank-infantry force in three columns and seized the top of the Halfaya Pass, Bir Wair and Musaid, then pressed on and took Fort Capuzzo. The coast group failed to capture the bottom of the Halfaya Pass. The garrison on the east side of the Tobruk defences was strengthened in case of a sortie and a German counter-attack recovered Musaid. The coast group eventually overran the foot of the pass; but, the next day, Allied retirements against German counter-attacks to a line from Sidi Omar to Sidi Suleiman and Sollum, left all but Halfaya Pass in German hands. On 26 May, Operation Skorpion, a German attack on the pass, succeeded and the Allies were ejected.[55] Brevity failed to achieve most of its objectives, only briefly holding the Halfaya Pass. The Allies lost 206 casualties, five tanks destroyed and 13 damaged. German casualties were 258 men, three tanks destroyed and several damaged. The Italians had 395 casualties, of whom 347 were captured.[56] On 12 May, the Tiger convoy lost one ship and arrived in Alexandria with 238 tanks, to re-equip the 7th Armoured Division and 43 aircraft; on 28 May, planning began for Operation Battleaxe.[57]
Operation Battleaxe
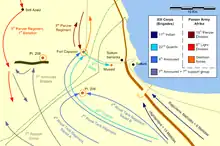
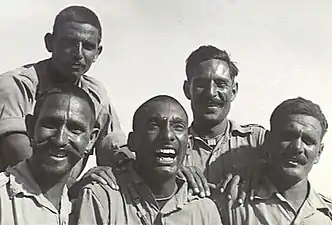
Operation Battleaxe, 15–17 June 1941 was intended to lift the siege of Tobruk and capture eastern Cyrenaica. The attack was to be conducted by the 7th Armoured Division and a composite infantry force based on the 4th Indian Division headquarters, with two brigades. The infantry were to attack in the area of Bardia, Sollum, Halfaya and Capuzzo, with the tanks guarding the southern flank. The Tobruk garrison was to stand by but not to sortie until XIII Corps drew close. The Halfaya Pass attack failed, Point 206 was captured and only one of three attacks on Hafid Ridge succeeded.
At the end of 15 June only 48 British tanks remained operational and next day, a German counter-attack forced back the Allies on the western flank but was repulsed in the centre; the Allies were reduced to 21 Cruiser tanks and 17 Infantry tanks. On 17 June, the Allies evaded encirclement by two Panzer regiments and ended the operation. The Allies had 969 casualties, 27 cruiser and 64 Infantry tanks were knocked out or broke down and lost; the RAF lost 36 aircraft. German losses were 678 men (Italian losses are unknown), twelve tanks and ten aircraft. General Wavell, the XIII Corps commander, Lieutenant-General Noel Beresford-Peirse and Major-General Michael O'Moore Creagh the 7th Armoured Division commander were sacked and Claude Auchinleck took over as Commander-in-Chief of the Middle East.[58]
Australian relief in place
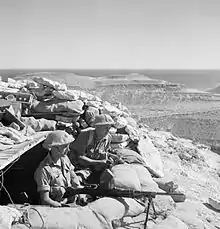
In mid-1941, Blamey, as commander of the Australian Imperial Force (AIF), with the support of the Australian government, requested the withdrawal of the 9th Division from Tobruk. Blamey wrote that the health of the Australian division had deteriorated "to the point where it was not longer capable of resisting attack"; he also wanted to unite Australian forces in the Middle East. Auchinleck agreed but noted that a troop movement this big could only be made by fast warships during moonless periods, to evade air attacks. The Mediterranean Fleet was busy elsewhere, the Inshore Squadron was carrying supplies into Tobruk and Operation Crusader was being prepared. The Australian withdrawal began in the August non-moon period and from 19–29 August, 6,116 men of the Polish Carpathian Independent Rifle Brigade and Czechoslovak 11th Infantry Battalion and 1,297 long tons (1,318 t) of stores were landed.[59]
The navy took out 5,040 men of the 18th Australian Infantry Brigade and the Indian 18th King Edward's Own Cavalry, on three destroyers, a minelayer and one destroyer carrying supplies, with cruiser escorts as anti-aircraft ships, a cruiser and a destroyer being damaged. From 19–27 September, the British 16th Infantry Brigade, 70th Infantry Division (Major-General Ronald Scobie), the HQ of the 32nd Army Tank Brigade and the 4th Royal Tank Regiment with 6,308 men and more 2,000 long tons (2,032 t) of supplies arrived, while 5,989 men of the 24th Australian Infantry Brigade left, with no loss of ships. From 12–25 October, the rest of the 70th Infantry Division was delivered and most of the Australians removed. Ship losses on normal delivery runs, led to the 2/13th Australian Battalion and two companies of the 2/15th Battalion remaining in Tobruk. Command of the garrison passed from Morshead to Scobie.[60]
Operation Crusader
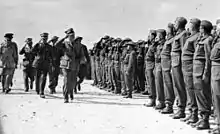
Operation Crusader began on 18 November 1941, with an outflanking movement that brought the Eighth Army to within 30 mi (48 km) of the Tobruk perimeter. It was planned that the 70th Infantry Division would break out from Tobruk on 21 December, to cut the German line of communication to the troops on the border to the south-east. The 7th Armoured Division would advance from Sidi Rezegh, to rendezvous and roll up the Axis positions around Tobruk. The 2nd New Zealand Division, attached to XIII Corps, would take advantage of the distraction of the 21st Panzer Division and 15th Panzer Division and advance to the Sidi Azeiz area, overlooking the Axis defences at Bardia. The 70th Infantry Division attack surprised Rommel, who had underestimated the size of the garrison and number of tanks in Tobruk. A three-pronged attack by the 2nd King's Own on the right flank, the 2nd Battalion, Black Watch in the centre and the 2nd Queen's Own on the left flank, advanced to capture a series of strong points leading to Ed Duda.[61]
By mid-afternoon, the Allies had advanced about 3.5 mi (5.6 km) towards Ed Duda on the main supply road, where they paused as it became clear that 7th Armoured Division would not arrive.[62] The central attack by the Black Watch, involved a charge under massed machine-gun fire to strongpoint Tiger, which incurred 201 casualties. On 22 November, Scobie ordered the position to be consolidated and the corridor widened, ready for the Eighth Army. The 2nd York and Lancaster Regiment with tank support, took strong point Lion leaving a 7,000 yd (6,400 m) gap between the corridor and Ed Duda. On 26 November, Scobie ordered an attack on the Ed Duda ridge and in the early hours of 27 November, the Tobruk garrison captured the ridge and later met a small force of New Zealanders advancing from the south. The 7th Armoured Division had planned its attack northwards to Tobruk for 8:30 a.m. on 21 November. At 7:45 a.m. patrols reported the arrival from the south-east of about 200 tanks. The 7th Armoured Brigade and a battery of field artillery turned to meet this threat and without the tanks, the northward attack by the Support Group failed; by the end of the day, the 7th Armoured Brigade had only 40 of 160 tanks operational.[63]
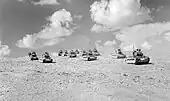
On 22 November, the 25th Infantry Division "Bologna" repulsed an attack from Tobruk towards Sidi Rezegh and next day, Rommel sent the Afrika Korps towards the Egyptian border (the Dash to the Wire) to exploit the victory and destroy XXX Corps. The blow mostly fell on empty desert and gave the Eighth Army time to regroup and re-arm. The Afrika Korps was ordered back to Tobruk, where the 70th Infantry Division and the New Zealand Division had gained the initiative. At noon on 27 November, the 15th Panzer Division reached Bir el Chleta and met the 22nd Armoured Brigade (reduced to a composite regiment of fewer than fifty tanks), which was joined later by the 4th Armoured Brigade. As night fell the British tanks disengaged and the New Zealand Division, fighting at the south-east end of the corridor into Tobruk, was endangered by the Afrika Korps.[64] On 4 December, Rommel attacked Ed Duda and was repulsed by the 14th Infantry Brigade of the 70th Infantry Division. Rommel ordered a retirement from the eastern perimeter of Tobruk, to concentrate against XXX Corps to the south. On 7 December, the 4th Armoured Brigade engaged 15th Panzer Division and knocked out eleven tanks. Rommel was told on 5 December, by Comando Supremo that supply could not improve until the end of the month, when airborne deliveries from Sicily began. Rommel decided to abandon Tobruk and withdraw to Gazala, which led to the relief of Tobruk and the occupation of Cyrenaica.[65]
Aftermath
Analysis
| Service | Killed/ missing |
Wounded | Total |
|---|---|---|---|
| RN, RAN | 469 | 186 | 655 |
| Merchant Navy | 70 | 55 | 125 |
| Total | 539 | 241 | 780 |
For much of the siege, Tobruk was defended by the 9th Australian Division and other troops. Wavell ordered Morshead to defend the port for eight weeks; the Australians held on for over five months, before being gradually withdrawn during September and replaced by the 70th Infantry Division, the Polish Carpathian Brigade and Czechoslovak 11th Infantry Battalion (East). The fresh defenders held Tobruk until they broke out on 21 November and held open an 8 mi (13 km) corridor, unsupported for several days, then captured Ed Duda on 27 November, to link with the advancing Eighth Army, during Operation Crusader.[67][68]
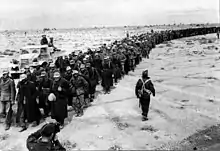
The Tobruk Ferry Service, made up of Royal Navy and Royal Australian Navy warships, played an important role in the defence of Tobruk providing gunfire support, supplies, fresh troops and by ferrying out the wounded. Control of Tobruk was useful to the Allies because it was the only significant port east of Benghazi and west of Alexandria. The supply of Axis troops on the Egyptian frontier could have been eased by sea transport to Tobruk. The siege of Tobruk was the first occasion in the war that German Panzer units had been stopped.[69] The siege of Tobruk was lifted in December 1941 in the course of Operation Crusader. Axis forces re-captured the port on 21 June 1942, after defeating the Eighth Army in the Battle of Gazala.[70] During the course of the siege, two destroyers, three sloops, seven anti-submarine vessels and minesweepers, seven store carriers and schooners, six A lighters and one fast minelayer were sunk, a total of 26 ships. Seven destroyers, a sloop, eleven anti-submarine and minesweeping vessels, three gunboats and a schooner were damaged, a total of 23 vessels. Six Merchant Navy ships and a schooner were sunk and six merchant ships were damaged; a total of 62 ships were sunk or damaged.[66]
Casualties
| Forces | Killed | Wounded | Missing | Total |
|---|---|---|---|---|
| Australian | 744 | 1,974 | 476 | 3,194 |
| British | 88 | 406 | 15 | 509 |
| Indian | 1 | 25 | 0 | 26 |
| Polish | 22 | 82 | 3 | 107 |
| Sub-totals | 855 | 2,487 | 494 | 3,836 |
| 70th Division | — | — | — | 2,153 |
| Total | — | — | — | 5,989 |
The Rats of Tobruk suffered at least 3,836 casualties, there being a small difference in Australian casualty figures quoted in the Australian and British official histories. Most of the Australian garrison withdrew from Tobruk between August and October but others remained in Tobruk for the duration.[71] In Australia in the War of 1939–1945 (1967) the Australian Official History, Maughan recorded 9th Australian Division casualties from 8 April – 25 October, including two days before the siege started, as 746 killed, 1,996 wounded, 604 prisoners, that 507 Australians were captured between 28 March 1941 and the investment of Tobruk and 467 more were taken during the siege.[72]
In the British Official History (1956), Playfair calculated the losses in the table created by Harrison in 1999.[73][74] When Harrison calculated other losses, there was no RAF casualty list but he recorded ten aircrew and six ground crew burials at the cemetery and six aircrew shot down in the harbour.[74] Italian casualties from 15 February to 18 November were 1,130 killed, 4,255 wounded and 3,851 missing. Libyan losses were 184 killed and German casualties for the same period were about 538 killed, 1,657 wounded, about 681 missing and from 74–150 Axis aircraft shot down.[75][76]
Fiction films
- The Rats of Tobruk is a 1944 Australian film about the siege, focusing upon the Australian defenders.
- The Desert Rats is a 1953 film about the siege. It also emphasised the Australian defenders but had a number of historical inaccuracies and omissions.
- Tobruk is a 1967 film which dramatised raids on the Germans.
- Raid on Rommel is a 1971 movie that used some of the earlier film from Tobruk.
- Tobruk is a 2008 film about a Czechoslovak soldier's disillusionment with war.
See also
- North African campaign timeline
- List of World War II Battles
- John Hurst Edmondson: Victoria Cross recipient during the siege
- Rats of Tobruk
- Twin Pimples raid
- Africa Star
- List of British military equipment of World War II
- List of Australian military equipment of World War II
- List of German military equipment of World War II
- List of Italian military equipment in World War II
Citations
- Luck 1989, p. 92.
- Playfair 1954, p. 116.
- Lewin 1998, p. 149.
- Playfair 1954, p. 115.
- Creveld 1977, p. 183.
- Playfair 1954, p. 290.
- Playfair 2004a, pp. 1–3.
- Playfair 2004a, pp. 2–4.
- Playfair 2004a, pp. 4–6.
- Playfair 2004a, pp. 6–8.
- Playfair 2004a, pp. 9–11.
- Playfair 2004a, p. 28.
- Playfair 2004a, pp. 30–34.
- Playfair 2004a, p. 30.
- Creveld 1977, pp. 182–187.
- Creveld 1977, pp. 182–185.
- Creveld 1977, pp. 185–187.
- Creveld 1977, pp. 189–190.
- Playfair 2004a, pp. 390, 36–37.
- Playfair 2004a, p. 37.
- Playfair 2004a, pp. 35–36.
- Playfair 2004a, pp. 37–38.
- Playfair 2004a, p. 38.
- Smith 2011, p. 268.
- PRO 2001, p. 130.
- Playfair 2004a, pp. 38–39.
- Ring & Shores 1969, p. 34.
- Shores, Massimello & Guest 2012, pp. 128–130.
- Ring & Shores 1969, pp. 33–37.
- Ring & Shores 1969, p. 36.
- Ring & Shores 1969, pp. 36–37.
- Ring & Shores 1969, p. 38.
- Ring & Shores 1969, pp. 34–38.
- Ring & Shores 1969, p. 47.
- Weal 1998, pp. 44, 46–48.
- Admiralty 1947, pp. 20–21.
- Smith 2011, p. 272.
- Weal 1998, pp. 48–51.
- Smith 2011, pp. 269–270.
- Smith 2011, p. 270.
- Weal 1998, pp. 50–51.
- Weal 1998, pp. 52–53.
- Playfair 2004a, pp. 39–40.
- Playfair 2004b, pp. 24–26.
- Saunders 2007, p. 53.
- Chappell 1996, p. 16.
- Playfair 2004a, pp. 40–41, 153.
- Playfair 2004a, pp. 153–155.
- Playfair 2004a, p. 155.
- Playfair 2004a, pp. 155–156.
- Dominioni & Izzo 1967, p. 18.
- Playfair 2004a, pp. 156–157.
- Mountbatten 2007, p. 39.
- Mountbatten 2007, p. 40.
- Lewin 1998, p. 43.
- Greene & Massignani 1994, p. 70.
- Playfair 2004a, pp. 159–163.
- Playfair 2004a, pp. 163–174.
- Playfair 2004b, pp. 23–25.
- Playfair 2004b, pp. 25–26.
- Maughan 1966, pp. 439–442.
- Murphy 1961, pp. 91–93.
- Neillands 2004, p. 90.
- Murphy 1961, p. 355.
- Playfair 2004b, pp. 73–87.
- Harrison 1996, p. 338.
- Playfair 2004b, pp. 73–81.
- Harrison 1996, p. 325.
- McDonald 2004, p. 204.
- Playfair 2004b, pp. 223–277.
- Maughan 1966, p. 395.
- Maughan 1966, pp. 401, 755.
- Playfair 2004b, p. 26.
- Harrison 1996, p. 228.
- ITOH 1974, pp. 258–259.
- Maughan 1966, p. 413.
References
Books
- Admiralty, British (1947). British merchant vessels lost or damaged by enemy action during Second World War, 3rd September, 1939 to 2nd September, 1945. London: Her Majesty's Stationery Office.
- Chappell, M. (1996). Army Commandos 1940–1945. Elite. Oxford: Osprey. ISBN 978-1-85532-579-1.
- Creveld, M. van (1977). Supplying War: Logistics from Wallenstein to Patton. Cambridge: Cambridge University Press. ISBN 978-0-521-29793-6.
- Dominioni, P. C.; Izzo, G. (1967). Takfír: Cronaca dell'ultima Battaglia di Alamein [Takfír: Chronicle of the Last Battle of Alamein]. Testimonianze fra cronaca e storia (in Italian). Milano: Ugo Mursia Editore. OCLC 163936563.
- Greene, J.; Massignani, A. (1994). Rommel's North Africa Campaign: September 1940 – November 1942. Conshohocken, PA: Combined Books. ISBN 978-0-585-19391-5.
- Harrison, F. (1999) [1996]. Tobruk: The Great Siege Reassessed. London: Brockhampton Press. ISBN 978-1-86019-986-8.
- La Prima controffensiva italo-tedesca in Africa settentrionale: (15 febbraio – 18 novembre 1941) [The First Italian-German Counter-offensive in North Africa: (15 February – 18 November 1941) Annex 32]. Ufficio storico (in Italian). Vol. I. Roma: Ministero della difesa, Stato maggiore dell'Esercito. 1974. OCLC 13007244.
- Lewin, R. (1998) [1968]. Rommel as Military Commander. New York: B&N Books. ISBN 978-0-7607-0861-3.
- von Luck, H. (1989). Panzer Commander: The Memoirs of Colonel Hans von Luck. New York: Dell (Random House). ISBN 978-0-440-20802-0.
- Maughan, B. (1966). Tobruk and El Alamein. Australia in the War of 1939–1945 Series 1 (Army). Vol. III (1st online ed.). Canberra: Australian War Memorial. OCLC 954993.
- McDonald, N. (2004). Chester Wilmot Reports. Sydney: ABC Books. ISBN 978-0-7333-1441-4.
- Mountbatten, L. (2007). Combined Operations: The Official Story of the Commandos. London: Read Books. ISBN 978-1-4067-5957-0.
- Murphy, W. E. (1961). Fairbrother, M. C. (ed.). The Relief of Tobruk. The Official History of New Zealand in the Second World War 1939–1945 (online ed.). Wellington, NZ: War History Branch, Department of Internal Affairs. OCLC 846906679. Retrieved 18 March 2015.
- Neillands, R. (2004). Eighth Army: From the Western Desert to the Alps. London: John Murray. ISBN 978-0-7195-5647-0.
- Playfair, Major-General I. S. O.; et al. (1959) [1954]. Butler, J. R. M. (ed.). The Mediterranean and Middle East: The Early Successes Against Italy (to May 1941). History of the Second World War, United Kingdom Military Series. Vol. I. 3rd impression. HMSO. OCLC 888934805.
- Playfair, Major-General I. S. O.; et al. (2004) [1st. pub. HMSO 1956]. Butler, J. R. M. (ed.). The Mediterranean and Middle East: The Germans Come to the Help of their Ally (1941). History of the Second World War, United Kingdom Military Series. Vol. II. Naval & Military Press. ISBN 978-1-84574-066-5.
- Playfair, Major-General I. S. O.; et al. (2004) [1st. pub. HMSO: 1960]. Butler, Sir James (ed.). The Mediterranean and Middle East: British Fortunes reach their Lowest Ebb (September 1941 to September 1942). History of the Second World War, United Kingdom Military Series. Vol. III. Uckfield: Naval & Military Press. ISBN 978-1-84574-067-2.
- Saunders, H. St. G.; Mountbatten, Louis (2007) [1943]. Combined Operations: The Official Story of the Commandos (Read Books ed.). London: HMSO. ISBN 978-1-4067-5957-0.
- The Rise and Fall of the German Air Force (Air 41/10). Public Record Office War Histories (repr. ed.). Richmond, Surrey: Air Ministry. 2001 [1948]. ISBN 978-1-903365-30-4.
- Ring, Hans; Shores, Christopher (1969). Fighters over the desert: the air battles in the Western Desert, June 1940 to December 1942. London, UK: Neville Spearman. ISBN 978-0-85435-060-5.
- Shores, Christopher F.; Massimello, Giovanni; Guest, Russell (2012). A History of the Mediterranean Air War 1940–1945: North Africa: June 1940 – February 1942. Vol. I. London, UK: Grub Street. ISBN 978-1-9081-17076.
- Smith, Peter (2011). The Junkers Ju 87 Stuka: A Complete History. London, UK: Crecy Publishing Limited. ISBN 978-0-85979-156-4.
- Weal, John (1998). Junkers Ju 87 in North Africa and the Mediterranean. London: Osprey Aviation. ISBN 978-1-85532-722-1. OCLC 40883686.
Websites
- "I Bersaglieri in Africa Settentrionale" [The Bersaglieri in North Africa]. Avanti Savoia website (in Italian). 2003. Retrieved 5 April 2015.
Further reading
- Beaumont, J. (1996). Australia's War, 1939–45. Melbourne: Allen & Unwin. ISBN 978-1-86448-039-9.
- Buckingham, W. F. (2012). Tobruk: The Great Siege, 1941–42. Stroud: Tempus. ISBN 978-0-7524-4501-4.
- Combes, D. (2001). Morshead: Hero of Tobruk and El Alamein. Melbourne: Oxford University Press. ISBN 978-0-19-551398-1.
- Converse, A. (2011). Armies of Empire: The 9th Australian and 50th British divisions in Battle 1939–1945. Australian Army History. London: Cambridge University Press. ISBN 978-0-521-19480-8.
- Cull, Brian; Minterne, Don (1999). Hurricanes Over Tobruk: The Pivotal Role of the Hurricane in the Defence of Tobruk, January-June 1941. Grub Street. ISBN 978-1-902304-11-3.
- de Zeng, H.L.; Stankey, D.G.; Creek, E.J. (2009). Dive-Bomber and Ground-Attack Units of the Luftwaffe, 1933–1945: A Reference Source. Vol. I. Ian Allan. ISBN 978-1-9065-3708-1.
- FitzSimons, P. (2006). Tobruk. Sydney: Harper Collins. ISBN 978-0-7322-7645-4.
- Glassop, L. (1992) [1944]. We Were the Rats (Penguin ed.). Sydney: Angus & Robertson. ISBN 978-0-14-014924-1.
- Guardia, M. (2014). Junkers Ju 87 Stuka. Air Vanguard. Oxford: Osprey. ISBN 978-1-4728-0119-7.
- Hoffman, K. (2004). Erwin Rommel. London: Brassey's. ISBN 978-1-85753-374-3.
- Hunt, Sir D. (1990) [1966]. A Don at War (rev. ed.). London: F. Cass. ISBN 978-0-7146-3383-1.
- Jentz, T. L. (1998). Tank Combat In North Africa: The Opening Rounds, Operations Sonnenblume, Brevity, Skorpion and Battleaxe, February 1941 – June 1941. Atglen, PN: Schiffer. ISBN 978-0-7643-0226-8. LCCN 97-80326.
- Johnston, M. (2003). That Magnificent 9th: An Illustrated History of the 9th Australian Division. London: Allen & Unwin. ISBN 978-1-86508-654-5.
- Latimer, J. (2004). Tobruk 1941: Rommel's Opening Move. Santa Barbara, CA: Greenwood Press. ISBN 978-0-275-98287-4.
- Long, G. (1952). To Benghazi. Australia in the War of 1939–1945 Series 1 (Army). Vol. I (1st online ed.). Canberra: Australian War Memorial. OCLC 18400892.
- Long, G. (1973). The Six Years War: A Concise History of Australia in the 1939–45 War. Canberra: Australian War Memorial. ISBN 978-0-642-99375-5.
- Maule, H. (1961). Spearhead General: The Epic Story of General Sir Frank Messervy and his Men in Eritrea, North Africa and Burma. London: Odhams. OCLC 2127215.
- Mead, R. (2007). Churchill's Lions: A Biographical Guide to the key British Generals of World War II. Stroud: Spellmount. ISBN 978-1-86227-431-0.
- Mitcham, S. W. (2007). Rommel's Desert Commanders: The Men who Served the Desert Fox, North Africa, 1941–1942. Westport, CN: Praeger Security International. ISBN 978-0-275-99436-5.
- Montanari, M. (1985). Tobruk (marzo 1941 – gennaio 1942) [Tobruk (March 1941 – January 1942)]. Le operazioni in Africa Settentrionale (in Italian). Vol. II. Roma: Stato Maggiore dell'esercito, Ufficio Storico. OCLC 886499428.
- Rommel, E. (1982) [1953]. Liddell Hart, B. (ed.). The Rommel Papers. trans. Findlay, Paul (New ed.). New York: Da Capo Press. ISBN 978-0-306-80157-0.
- Spencer, B. (1999). In the Footsteps of Ghosts: With the 2/9th Battalion in the African Desert. St. Leonards, NSW: Allen & Unwin. ISBN 978-1-86508-145-8.
- Walker, I. (2006). Iron Hulls, Iron Hearts: Mussolini's Elite Armoured Divisions in North Africa. Ramsbury: Crowood Press. ISBN 978-1-86126-839-6.
- Wilmot, C. (1993) [1944]. Tobruk 1941 (repr. Penguin ed.). Sydney: Halstead Press. ISBN 978-0-670-07120-3.
Websites
- 2/43 Infantry Battalion War Diary, April 1941 (Appendix No. 30: Summary No. 2, entry for 16 April) (PDF). Canberra: Australian War Memorial. pp. 111–112. RCDIG1026557. Archived from the original (PDF) on 4 March 2016. Retrieved 5 April 2015.
- Miller, W. A. (1986). "The 9th Australian Division Versus the Africa Corps: An Infantry Division against Tanks: Tobruk, Libya, 1941". Fort Leavenworth, KN: US Army Command and General Staff College, Combat Studies Institute. OCLC 815355690. Archived from the original on 25 February 2010. Retrieved 5 April 2015.
- Toppe, Generalmajor A. (1991) [~1947]. "German Experiences in Desert Warfare during World War II" (PDF). Fort Leavenworth, KS: US Army General Command and Staff College. OCLC 58531612. Retrieved 5 April 2015.