wikiHow is a “wiki,” similar to Wikipedia, which means that many of our articles are co-written by multiple authors. To create this article, volunteer authors worked to edit and improve it over time.
wikiHow marks an article as reader-approved once it receives enough positive feedback. In this case, 92% of readers who voted found the article helpful, earning it our reader-approved status.
This article has been viewed 31,115 times.
Learn more...
Airbrushed t-shirts are popular, but creating them is trickier than it seems. The hardest part is controlling the airbrush. Once you are able to produce consistent, even strokes of paint, however, you should be able to airbrush a variety of stenciled and freehand designs onto nearly any cotton t-shirt.
Steps
Part One: Prepare the Stencil
-
1Choose a design. You can draw your own design, create a design using digital image software, or find a pre-made design.
- If creating or using a digital design, you will need to print the design out before you can use it. Print the design on heavy paper for best results.
- Similarly, if drawing the design by hand, you should sketch it out onto heavy paper instead of sketching it out directly onto your stencil material.
- The easiest option is to use ready-made stencils, of course, but this option will also provide you with fewer design options.
-
2Transfer the design to pennant felt. Place the design over a patch of pennant felt. Trace around the edges of the design with a pencil to transfer it onto the felt.[1]
- Pennant felt is one of the best materials to use since it is durable and capable of absorbing excess paint. Cardstock, photo paper, and freezer paper can also be used but may produce messier results.
- When using ready-made stencils, you can trace the design without taking any additional steps.
- If using your own images, you will need to cut around the lines of the image to create a temporary stencil. After doing that, you can trace these newly created edges onto the felt.
Advertisement -
3Cut out the stencil. Place a cutting mat beneath the pennant felt, then carefully cut along the traced lines. Remove the scraps of material to reveal the finished stencil.
- For most designs, a hobby knife or utility knife should work adequately well. Detailed designs tend to look better when cut out with a stencil burner, however.
-
4Apply a light coat of temporary adhesive. Flip the stencil over to its back and lightly coat it with repositionable spray adhesive.
- The adhesive should help the stencil stay in place on the t-shirt. Make sure that you choose repositionable or temporary adhesive, though. Do not use permanent adhesive.
- For best results, allow the spray adhesive to dry for a few minutes before continuing to the next step. Doing so should prevent any residue from sticking to the shirt after you remove the stencil.
-
5Position the stencil. Place the stencil adhesive-side down onto the t-shirt in the desired location. Press firmly to help the stencil adhere to the t-shirt.
- After a few more minutes, check the stencil to make sure that it is securely stuck in place.
- It is also a good idea to secure the edges of the stencil with painter's tape. Aside from keeping the stencil steady, doing so can also protect the exposed portion of the t-shirt from over-spray.


Part Two: Prepare the Airbrush
-
1Select the airbrush. The best airbrush to use, especially as a novice, will be a dual action, internal-mix airbrush with a bottom feed.
- When using a dual-action airbrush, you will press the switch down to draw air and pull it back to spray paint.[2]
- Internal-mix airbrushes introduce the paint directly into the center of the air stream, creating an even spray of paint.
- With a bottom feeding airbrush, moderately sized jars of paint are positioned to the side or bottom of the brush. The airbrush will draw paint directly from these jars as you work.
-
2Use an appropriate air source. You will need to use an air source that can provide a steady, consistent stream of air at 60 psi.
- Typically, this will be either a CO2 tank or a commercial air compressor. Compressors marketed for airbrushing purposes will work for the most part, but professional grade compressors will produce even better results.
-
3Choose your paint. Select pre-reduced fabric paint for this project. This paint is water-soluble and will need to be set with heat if you want the design to remain after the shirt gets washed.
- Use a limited palette of colors, especially while you're a beginner.
- Note that you will need to use a separate jar for each color of paint.
-
4Load the paint. Fill an empty, clean airbrush jar with enough paint for your project, then screw the jar onto the airbrush.
- Start with the first color you intend to use. If you want to use more than one color, prepare the jars of paint in advance and swap out as needed while airbrushing the design.
- If you plan to mix colors, you should make sure that you have made enough for the entire project. Attempting to mix more later may create slight differences in shade.
-
5Attach the airbrush to the air source. Turn on the compressor and attach the airbrush using an appropriate hose.
- Turning the compressor on first will give the machine more time to build up the right amount of pressure. After the pressure builds up, adjust the regulator as needed to get it to 60 psi.
- Attach the compressor air hose to the airbrush using the attached coupling. If necessary, wrap Teflon tape around the coupling to create an airtight seal.
- Introduce air into the airbrush by pressing down on the switch or by opening the metering valve.


Part Three: Airbrush the T-Shirt
-
1Set up the t-shirt. Place a t-shirt board inside of the shirt and set the shirt onto an easel.
- The t-shirt board will stretch the material, preventing wrinkles, folds, and dimples from sneaking in and ruining your design. They also prevent paint from seeping through to the other side of the shirt.
- Most t-shirt boards are made of thick cardboard, masonite, or foam board.
- The easel should hold the shirt at least 32 inches (81 cm) above the ground. It must be positioned in a way that allows your hand to move naturally over the shirt as you work.
-
2Hold the airbrush over the shirt. Position the airbrush over the stencil attached to the shirt. It is best to start at the edge of the design right than starting at the middle.
- The distance between the airbrush and the shirt will create different effects. For a soft appearance, hold the airbrush roughly 6 inches (15 cm) away from the shirt. For a harder appearance, hold it roughly 4 inches (10 cm) away from the material.
-
3Spray even, overlapping strokes across the surface. Gently ease the trigger back to release a stream of paint. Steadily move your hand over the entire stencil to fill the exposed areas with paint.
- When holding the airbrush close to the surface, ease up on the trigger to use less paint.
- You need to move your hand steadily across the entire surface as you airbrush the paint onto the material. Failing to move your hand will cause globs of paint to appear at the beginning and end of each stroke.
- Overlapping each pass will prevent gaps of blank space from appearing, creating a more even appearance.
-
4Switch colors as needed. To switch colors, merely release the trigger to stop the spray, unscrew the old jar, and screw on the new jar.
- Some airbrush artists prefer to use a different airbrush for each color, but for bottom-fed airbrushes, you should be able to use the same brush for all colors.
-
5Carefully remove the stencil. After filling in the stencil portion of the design, carefully peel the stencil straight back to remove it from the shirt.
- Remove any tape holding the edges down before lifting away the stencil.
- If the stencil resists too much, you may need to wait until the paint dries before peeling it away. Doing so will minimize the risk of disturbing the paint and ruining the image.
-
6Add freehand designs as desired. If you want to add freehand elements, now is the time to do so. Consider the placement carefully since there will be no way to undo any mistakes.
- Letters and numbers are the most common freehand elements. Consider practicing different fonts in advance before attempting to airbrush them onto a shirt.


Part Four: Set the Paint
-
1Allow the paint to dry. Give the paint adequate time to dry before attempting to heat press it.
- The exact amount of time will vary by manufacturer, but you should usually let the paint dry for at least 30 minutes. When you touch the surface of the shirt, you should not pull away any paint and your fingers should not feel tacky.
-
2Protect the t-shirt with parchment paper. Place the t-shirt on a hard, flat surface and cover the design with a sheet of parchment paper or brown craft paper.
- Never apply heat directly to the design since doing so can actually cause the paint to peel away or stick to the iron.
- If you don't have parchment paper, turn the t-shirt over and iron the reverse side.
- Make sure that the material is flat and smooth before continuing to the next step.
-
3Pass over the design with an iron. Allow a standard iron to preheat to the "cotton" setting, then carefully press the entire design with the hot iron for approximately two minutes.[3]
- Heat-treating the airbrushed design should set the paint and prevent it from washing out.
- Note that the iron must reach a temperature of at least 300 degrees Fahrenheit (150 degrees Celsius).
- Other options for heat setting the design include:
- Using a professional conveyor set to 120 degrees Fahrenheit (50 degrees Celsius) for 20 minutes.
- Using a heat press set to 375 degrees Fahrenheit (190 degrees Celsius) for 30 seconds.
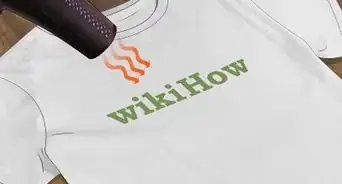
- Rotating a heat gun over the surface for 30 seconds.
-
4Launder as usual. Once the t-shirt cools, you should be able to wash the shirt in cold water using mild detergent. Tumble dry the shirt on low or allow the material to air dry.
- After washing and drying the t-shirt once, the process is complete and the garment is ready to wear.


Community Q&A
-
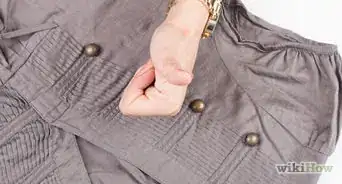
QuestionWhat do I need to do to prepare a T shirt before airbrushing?
 T. ChinsenTop AnswererAny purchased T shirt will have sizing/starch that needs to be washed out. It will not let paint absorb into the shirt.
 -
QuestionWill the same process work on a rug?T. ChinsenTop AnswererIf the fibers on the rug are synthetic, they will not fully absorb paint like cotton or other natural fibers. When paint is on the surface of fibers it is more likely to wear off, especially on a rug.
-
QuestionHow can I heat set a t-shirt if I don't have an iron?
 Community AnswerYou can leave it in the sun for under an hour. Leaving the shirt out too long will cause the color to fade.
Warnings
- Wear a safety mask, safety goggles, and gloves when airbrushing t-shirts. Doing so should prevent over-flow paint from getting into your lungs, into your eyes, or onto your hands.⧼thumbs_response⧽
Things You'll Need
- Pencil
- Hobby knife
- Pennant felt
- Temporary spray adhesive
- Painter's tape
- Dual-action, internal-mix airbrush with bottom feed
- Air compressor with attached hose
- Pre-reduced fabric paint
- Cotton t-shirt
- T-shirt board
- Easel
- Parchment paper
- Iron
- Ironing board
- Safety mask
- Safety goggles
- Gloves