This article was co-authored by Peter Salerno. Peter Salerno is the owner of Hook it Up Installation, a professional installation company, which has been hanging art and other objects around Chicago, Illinois for over 10 years. Peter also has over 20 years of experience installing art and other mountable objects in residential, commercial, healthcare and hospitality contexts.
There are 8 references cited in this article, which can be found at the bottom of the page.
This article has been viewed 23,136 times.
Arranging art on a blank wall can seem overwhelming at first. The trick is to let your art, personal style, and the space itself guide your decisions. Figure out whether you’d prefer a uniform or eclectic look, and decide what would look best in the available space. Look for themes in your collection, and choose objects that fit the tone you’re trying to achieve. Play around with various configurations until you’ve found the right balance. When it’s time to hang your arrangement, make careful measurements to precisely position your artworks.
Steps
Creating Contrast and Cohesion
-
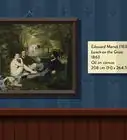
1Look for themes within your collection. If you need to decide which works of art to display, try to come up with a theme. Look through your collection, think about your style, and decide what kind of tone you want to achieve. Figure out whether you prefer uniformity or more eclectic looks, and decide what would look best in your space.[1]
- Suppose you have lot of works in one genre, such as portraits or landscapes, and want a more uniform look. You could create an arrangement of works solely in that genre and use frames with consistent sizes and colors.
- If you like visual puns and storytelling, look for objects in your collection that relate to each other in clever or interesting ways. For instance, a pair of portraits might seem to glance at each other as if they’re laughing at the same joke.
-
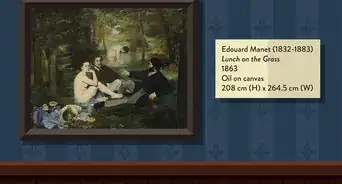
2Combine contrasting colors and forms for an energetic arrangement. If you want a vibrant, dynamic look, choose a wide array of colors and artistic styles. Mix up abstract works with representational landscapes, portraits, and still lifes. Include as mediums as you have in your collection, such as paintings, drawings, prints, and photographs.[2]Advertisement
-
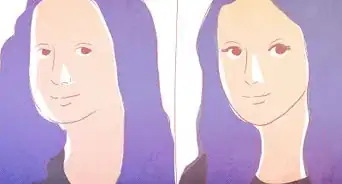
3Display black and white or monochromatic works for a subtle look. For a more minimalist, chic look, look for artworks that fit a particular color scheme. You could arrange black and white photographs, charcoal drawings, and black and white paintings. Black and white frames would reinforce your arrangement’s uniformity.[3]
- If you're going for a cohesive arrangement but still want a pop of color, you could go for a monochromatic look. For example, display works together that are all predominantly blue.
-
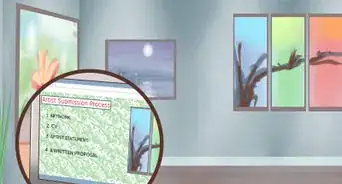
4Use frames to create uniformity or variety. While frames shouldn’t overwhelm artworks, you can use them to complement your arrangement’s theme. Mix up your frames to create a dynamic look, or use frames with consistent sizes and colors to impart unity.[4]
- For example, suppose you want to cluster several similar works, but don’t want your arrangement to be static. Use frames with different sizes and materials to add variety to your collection.[5]
- If you want to unify a broad range of mediums, colors, and sizes, use all black frames, wood frames, or frames with equal thicknesses.


Crafting Composition
-
1Choose an arrangement that suits the space. The wall itself should guide your composition’s form. For instance, fill an irregular, narrow nook with a clustered, floor to ceiling arrangement.[6]
- Suppose you have a large, rectangular dining room with a long table. A linear arrangement of artworks displayed in equally-sized frames and hung at the same height will complement the room’s horizontal lines.[7]
-
2Work your furniture into your arrangement. Make sure your artwork doesn’t crowd your furniture and that your furniture doesn’t obscure your artwork. Additionally, set your furniture layout before arranging your artwork. You wouldn’t want to hang a floor to ceiling arrangement, then hide or risk damaging a painting by placing a chair in front of it.[8]
- If you’re placing artwork over a bed or a sofa, hang it about 8 inches (20 cm) above the headboard or sofa back. Large scale works hung above a large piece of furniture should be between 65 and 85 percent of the furniture’s width. Larger works could dwarf your furniture, and smaller works could leave too much blank space.[9]
-
3Go with a grid if you have several equally-sized works. Grids work best for series of images that are all framed exactly the same. While artworks in an array of colors, scales, and mediums can add variety, the frames’ dimensions should match precisely.[10]
- For example, you could mix up drawings or paintings on paper, colorful prints, and black and white photographs. Frame them in equally-sized white frames with white matting, then hang them in a uniform grid.
- Keep in mind you’ll have to hang a grid as precisely as possible. A grid’s uniformity will magnify even the slightest misalignment.
-
4Cluster your works salon-style if you want an eclectic arrangement. Dramatic, eclectic salon-style installations are popular in contemporary interior design. However, a salon-style arrangement is more complicated than randomly hanging artworks wall to wall and floor to ceiling. Take the time to find a configuration that balances works’ color palettes, proportions, and other visual elements.[11]
- For instance, mix up scales to create a balanced composition instead of clustering small works on one side of the arrangement and larger works on the other.
- Pay attention to frames, too. Scatter frames’ styles evenly instead of grouping ornate frames in one part of the arrangement and simple frames in the other.
-
5Strike a balance between clustered and geometric styles. You don’t have to choose between a strict grid and dramatic salon-style cluster. For the best of both worlds, choose artworks in a range of mediums with various color palettes and scales. Arrange them in a balanced configuration that defines a square or rectangular area.[12]
- For example, 2 large scale objects could define the upper right and lower left corners of a rectangular arrangement. You could then use groupings of smaller works to define the rectangle’s other corners.
-
6Arrange your art on the floor to find the best composition. When you have a general idea of the look you want to achieve, lay the works on the floor. Experiment with different configurations, and move them around to see how various colors, forms, subject matter, and scales relate.[13]
- Planning out how your works’ colors and proportions relate is especially important if you’re going for a clustered or salon-style look.
- When you play with arrangements, avoid crowding artworks. Leave about 1 1⁄2 inches (3.8 cm) between smaller objects, and about 2 inches (5.1 cm) between large scale works.[14]


Hanging with Precision
-
1Set focal points 60 inches (150 cm) high. After arranging your artworks on the floor and finding the right configuration, figure out how high you should hang them. The general guideline is to hang an image so its center is 60 inches (150 cm) high. For a grid or cluster, you’d set the focal point or center of the arrangement at that height. However, that figure isn’t set in stone, and there are plenty of exceptions to the rule.[15]
- For example, if you have high ceilings, you might need to hang works higher to minimize blank space between them and the ceiling. You might also need to make adjustments in order to leave enough space between an image and a large piece of furniture.[16]
- The height guideline doesn’t really apply if you’re going for a floor to ceiling, wall to wall look.
-
2Tape paper templates of your artworks to the wall. Trace templates of your artworks on butcher paper or newspaper, cut them out, and tape them to the wall in your desired configuration. Shift them around to make final touches to your layout, such as setting enough space between artworks and adjusting hanging heights.[17]
- Use low adhesive masking tape so you can shift the templates around without pulling off your wall’s paint.
- Use a bubble level to double check your templates’ levelness. If you have a laser level, project level lines where you want to hang templates.
-
3Mark the templates’ top center points. When you’ve found the right arrangement, measure a template’s width at its top edge and locate its center point. Use a post-it note, piece of tape, a pencil to mark the top center point. Repeat the sequence for each template.[18]
-
4Measure 2 hanger locations on each artwork. Place a finger on either side of the hanging wire about 2 to 3 inches (5.1 to 7.6 cm) from the edges of the frame or canvas. Pull the wire toward the top of the object to simulate the wire’s position when it hangs on picture hooks. Measure the distance between your fingers and the object’s center, then measure the distance between the pulled wire and the top of the object.[19]
- For instance, suppose you pull the wire at points 3 inches (7.6 cm) to the left and right of the frame’s vertical center (imagine a line going through the center of the frame from top to bottom). Then, when you pull the wire toward the frame’s top, there are 2 inches (5.1 cm) between the wire and frame’s top. You’ll note those measurements and use them to nail picture hooks into the wall at the right spots.
- Hanging artwork with 2 hooks keeps it from shifting around, which helps maintain levelness and prevents wall damage.
- For works without hanging wires, such as those with D-rings, measure the distance from the ring or hook to the top of the frame.
-
5Mark the hanger locations on the wall. Find the post-it, tape, or pencil mark for a template’s top center point. At the top edge, measure the distances to the right and left where you placed your fingers and pulled the wire. From those points, measure the distance between the pulled wire and top of the template, then mark those spots.[20]
- For example, measure 3 inches (7.6 cm) to the left of the center point. From that spot, measure 2 inches (5.1 cm) down from the top edge, then make a mark. Repeat the steps on the right side, and mark the spot that’s 3 inches (7.6 cm) to the right of the center point and 2 inches (5.1 cm) from the top edge.
- To mark your spots, draw a dot on the template with a pencil or make an indentation with a nail.
-
6Factor in your picture hooks when you make your marks. If your picture hooks hang below the nail that supports them, measure the distance between the hook where the hanging wire will rest and the hole where the nail fits. Factor this number into your measurements to avoid hanging your artworks slightly lower than you desired.
- For instance, if the wire will rest on a hook 1⁄2 inch (1.3 cm) below the nail hole, hammer the nail into the wall 1⁄2 inch (1.3 cm) above the mark you made in the previous step. If you don’t make the adjustment, your artwork will hang 1⁄2 inch (1.3 cm) lower than you planned.
-
7Nail picture hooks into the wall. Place the picture hook against the wall, line its nail hole up with the mark on the template, then hammer a nail through the hook into the wall. You can hammer nails straight into the marks you made on the templates, then tear away the template when you’ve installed both hooks. Just make sure you keep track of which object goes in that spot.[21]
-
8Hang your artwork and double check levelness. Finish hammering before you start hanging your art. After hammering the last nail, start mounting your arrangement. Use a bubble level to check each object's levelness, then step back and admire your handiwork!


Expert Q&A
-
QuestionCan you mix and match picture frames?
 Peter SalernoPeter Salerno is the owner of Hook it Up Installation, a professional installation company, which has been hanging art and other objects around Chicago, Illinois for over 10 years. Peter also has over 20 years of experience installing art and other mountable objects in residential, commercial, healthcare and hospitality contexts.
Installation ExpertYes! Mixing and matching frames can easily add lots of style. For instance, you might have black, gold, and white frames in the same display.


References
- ↑ https://www.artspace.com/magazine/art_101/collecting-101/how-to-hang-your-art-salon-style-54450
- ↑ https://www.theguardian.com/lifeandstyle/2014/oct/12/get-hang-displaying-art-home
- ↑ https://www.artspace.com/magazine/art_101/collecting-101/how-to-hang-your-art-salon-style-54450
- ↑ https://www.artspace.com/magazine/art_101/collecting-101/how-to-hang-your-art-salon-style-54450
- ↑ https://www.theguardian.com/lifeandstyle/2014/oct/12/get-hang-displaying-art-home
- ↑ https://www.artspace.com/magazine/art_101/collecting-101/how-to-hang-your-art-salon-style-54450
- ↑ https://www.forbes.com/sites/houzz/2016/02/23/clever-ways-to-arrange-artwork/#5e87c6066d82
- ↑ https://www.forbes.com/sites/houzz/2016/02/23/clever-ways-to-arrange-artwork/#5e87c6066d82
- ↑ https://www.artspace.com/magazine/art_101/collecting-101/golden-rules-for-hanging-art-53978
- ↑ https://www.forbes.com/sites/houzz/2016/02/23/clever-ways-to-arrange-artwork/#5e87c6066d82
- ↑ https://www.forbes.com/sites/houzz/2016/02/23/clever-ways-to-arrange-artwork/#5e87c6066d82
- ↑ https://www.architecturaldigest.com/gallery/great-gallery-walls-slideshow/all
- ↑ https://www.thisoldhouse.com/ideas/how-to-hang-collection
- ↑ http://www.elledecor.com/home-remodeling-renovating/home-renovation/how-to/a3129/hang-art-like-a-pro-a-68712/
- ↑ http://www.elledecor.com/home-remodeling-renovating/home-renovation/how-to/a3129/hang-art-like-a-pro-a-68712/
- ↑ https://www.artspace.com/magazine/art_101/collecting-101/golden-rules-for-hanging-art-53978
- ↑ https://www.familyhandyman.com/walls/level-hanging-hang-artwork-and-wall-hangings-straight-and-level/view-all/
- ↑ https://www.familyhandyman.com/walls/level-hanging-hang-artwork-and-wall-hangings-straight-and-level/view-all/
- ↑ https://www.familyhandyman.com/walls/level-hanging-hang-artwork-and-wall-hangings-straight-and-level/view-all/
- ↑ https://www.familyhandyman.com/walls/level-hanging-hang-artwork-and-wall-hangings-straight-and-level/view-all/
- ↑ https://www.familyhandyman.com/walls/level-hanging-hang-artwork-and-wall-hangings-straight-and-level/view-all/
About This Article