wikiHow is a “wiki,” similar to Wikipedia, which means that many of our articles are co-written by multiple authors. To create this article, 26 people, some anonymous, worked to edit and improve it over time.
wikiHow marks an article as reader-approved once it receives enough positive feedback. This article received 17 testimonials and 87% of readers who voted found it helpful, earning it our reader-approved status.
This article has been viewed 279,010 times.
Learn more...
Bats are a beneficial and interesting mammal. They are the single most important controller of night-flying insects, including mosquitoes, moths, and beetles. Of course, watching them skillfully fly around your yard can also be great fun. This article will explain bat behavior and teach you how to construct a bat house of your own.
Steps
Understanding Bat Behavior
-
1Learn about the bats of your region. There are 2 broad types of bats, and each have different appearances and characteristics.[1]
- The bats that inhabit the temperate regions of Europe and North America all fall within the family Microchiroptera (roughly, "small bats"). Other than their small size (which is more of a common trait rather than a defining characteristic), they are physically distinct from their cousins in that they tend to have short noses or muzzles, smallish eyes, and larger ears.
- Megachiroptera is the suborder that represents most of the larger bat species of the world, but they are generally restricted to the tropical environments that stretch from Australia to South Asia and on to the Mediterranean. The species which make up this group tend to have longer muzzles and, some would say, even a vaguely rat-like or canine appearance. Because of this, several species native to Australia and Southeast Asia are commonly referred to as "flying foxes."
-
2Understand the feeding habits of bats. If you want to attract bats to your home, the likeliest way is to guarantee a ready supply of food.[2]
- The small bats that occupy most of the temperate regions fly at night and use echolocation to find the flying insects that make up most of their diet. If you do not have insects outside of your home at night, you may not be able to attract bats.
- Larger tropical bats live primarily on a diet of fruit and nectar. They may search widely over the course of a year looking for ripening fruits or flowering plants.
Advertisement -
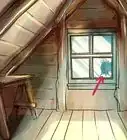
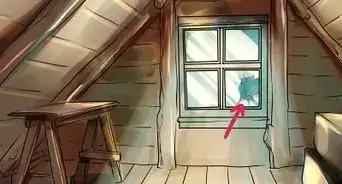
3Determine the type of place where local bats rest. While food is the dominant factor in the ability of bats to thrive in an environment, they do also require shelter. This, too, differs by type.
- Small insect-eating species tend to live in caves or in the hollow of a tree. Many species crowd very closely together, which can help them retain heat. Because they like to stay in enclosed spaces, many of them can be enticed to live in specially constructed bat houses.
- The flying foxes and other larger fruit bats usually roost in very dense concentrations in a relatively small section of forest. Because of the sounds, smells, and overall destruction that can come from hosting a horde of several thousand bats, in most areas their roosts are considered a nuisance to be removed.[3]
-
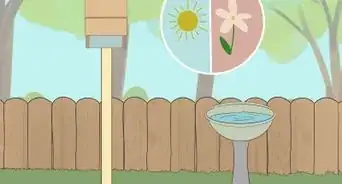
4Think about how you can use bat behavior to your advantage. If your goal is in fact to attract bats to your yard, you should consider how the needs of the animals fit with the environment you have created. Ask yourself these questions:
- Are there places for the bats to stay or rest? If not, you will not have bats that live on your property.
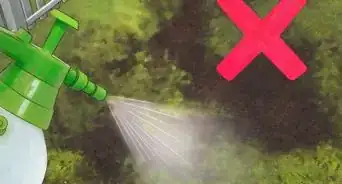
- Are there potential food sources? The most common bats to visit backyards are usually insect eaters. If there are no insects due to the use of pesticides, you will not likely have bats.
- Are there irritants that may discourage bats from coming to your yard? For example, many of the insect-eating bats use a combination of echolocation and passive listening to determine the location of the insects they prey upon. If you are in a loud neighborhood, those species would not be effective hunters and would stay away.[4]


Preparing to Build a Bat House
-
1Find an appropriate location. A bat house does not need to be large, but when considering a potential location there are a few points you should keep in mind.
- The house should be placed at a point roughly 15 feet (4.6 m) off of the ground and inaccessible to climbing predators.
- The house should be placed in a location that receives sunlight for most of the day.
-
2Understand how a bat house should look. In nearly all ways that it can, a bat house will differ from the bird houses with which most people are so familiar. Here is a list of the basic characteristics:
- Unlike birdhouses, the opening for entrance and exit will not be at the front. Instead, there should be a long open strip along the bottom. The entrance and the back wall of the bat house should have horizontal grooves carved into them that the bats can climb with their claws.
- It should not be cube shaped (as is common for many bird houses) but instead be a very wide, fairly tall, flat box. Keep in mind that you are not making this house for a single bat or even a pair of bats. Many bats rarely settle down for the day in groups of less than a dozen. According to those who have customized bat houses based upon studies of behavior, the smallest bat house should have exterior dimensions of roughly 13.5 inches (34 cm) wide, 3.75 inches (9.5 cm) deep, and 20 inches (51 cm) tall (with an additional 4–5 inches (10–13 cm) of the back wall extending below the floor to the entrance, providing something for the bats to latch on to).
- There should be several narrow open strips along the lower portions of the sides to vent air from the box. Because bats often rest in densely packed groups, the heat they generate and CO2 they release can make a bat house unlivable very quickly.
-
3Identify and obtain needed materials. These are the primary tools you will need:
- A pole (optional) on which you will mount the house when completed.
- Lumber, including 3⁄4 in (1.9 cm) plywood and that has been treated to make it water resistant.
- Screws (several sizes).
- Screwdriver.
- Saw.
- Staple gun.
Warning: Bat house builders often line the insides of the houses with plastic mesh to help the bats cling to the walls. However, if the mesh begins to detach due to improper installation or warping of the wood, bats could become trapped or entangled in it. For this reason, many bat habitat experts now recommend cutting grooves into the wood instead.[5]


Building a Bat House
-
1Cut the lumber. The largest piece should be used as a back wall for the bat house. It is a good idea to cut out notches in the front and sides to serve as ventilation slits before you finish assembling the bat house.
- All ventilation slits should be made no larger than 1⁄4 inch (0.64 cm). If the slits are slightly greater than that, they could allow too much cold air in. If the slits are 1⁄2 inch (1.3 cm) in size or more, it would allow small birds to take over the house as a nesting area for themselves and exclude bats altogether.
- The roof should be long enough to extend from a position above the back wall to a place several inches beyond the front wall. It can be installed to meet the back and front walls at a 90° angle, but if you want to roof to be at a 30° angle it will have to longer. You may also want to cut the roof, front wall, and back wall to an angled edge on one side so they will fit together smoothly.
-
2Cut horizontal grooves into one side of the largest plank. The largest plank will serve as the back of the bat house. Use a circular saw to cut a series of horizontal grooves into the interior side of the back wall. Space the grooves about .5 inches (1.3 cm) apart.[6]
- If you like, you can then use a hand saw to deepen the grooves a little. This can also help create a rougher surface inside the grooves that might be easier for the bats to cling to.
- You can also add grooves to other interior surfaces and the area around the entrance to make those areas easier for the bats to climb and cling to.
-
3Screw the floor onto the front wall. The floor should be attached to the front side only. The floor should be narrow enough that it will not touch the back wall when the house is fully assembled. The gap should be 3⁄4 inch (1.9 cm) wide in order to allow the bats to enter through the bottom.
-
4Screw the front to the sides and back. Drill pilot holes using a small drill bit before you attempt to screw the pieces in place. Use a minimum of 2 screws per side.
-
5Attach the roof. Again, drill pilot holes before attaching the roof. Screw the roof in place into the back and front walls. Use a minimum of 2 screws per side.
-
6Paint or stain the bat house. Painting or staining the bat house will provide an additional seal and ensure that the wood will last longer.
- Don’t paint any areas where you have added grooves, since the paint will fill the grooves and make them unusable to the bats. You can add stains and sealants after cutting the grooves, however.
-
7Attach the bat house to the intended site. While you could screw directly from the bat house into the target site, it may be best to attach some kind of mounting bracket that will hold the house in place but allow you to easily move it if you so choose. If you have decided to mount it on a new pole, do so before you anchor the pole into the ground.


Community Q&A
-
QuestionCan bats survive winters in the US northeast?
 Community AnswerBrown bats can survive in temps well below freezing. If you live in this area, you might find them in your backyard.
 -
QuestionAre there any repercussions to a bat's nesting area if outdoor lights are left on 24/7?
 Community AnswerThe bats may not come in the first place because the lights will scare them, but if they do, the lights won't harm them in any way.
 -
QuestionIs there anything you can put in bat house to attract bats?
 AnjaliCommunity AnswerAn empty bat box will have more space for the bats, as it will hold more bars. Put your bat box in a place where there is a good supply of bugs. Don't put it right next to the insect homes, as the bats like flying out to grab bugs from the air. Make sure there are no mothballs or other pesticides, as these kill the food bats need and are toxic to them.
Warnings
- It's fine to watch bats, but they should not be handled or chased. Bats are typically wary of humans and will not attack you. However, if you handle them directly, they may bite.⧼thumbs_response⧽


References
- ↑ http://www.si.edu/Encyclopedia_SI/nmnh/batfacts.htm
- ↑ http://www.defenders.org/bats/bats
- ↑ https://www.ehp.qld.gov.au/wildlife/livingwith/flyingfoxes/roost-management.html
- ↑ http://jeb.biologists.org/content/211/19/3174.full
- ↑ https://www.habitatforbats.org/bat-house-faq/
- ↑ https://www.nwf.org/Garden-for-Wildlife/Cover/Build-a-Bat-House
About This Article
To attract bats to your yard, try building a bat house by cutting pieces of lumber to make a tall, flat box. Once you've cut your planks, staple a layer of mesh to your largest plank, which will be the back side of the house. Next, nail the floor in place, making sure that' there's a gap between the floor and the back wall so the bats can get in. Additionally, attach the walls and roof before painting the house to make it more durable. Finally, hang the bat house from a mounting bracket on a pole or tree in your back yard. For tips on how large you should make your bat house, read on!