This article was co-authored by wikiHow staff writer, Travis Boylls. Travis Boylls is a Technology Writer and Editor for wikiHow. Travis has experience writing technology-related articles, providing software customer service, and in graphic design. He specializes in Windows, macOS, Android, iOS, and Linux platforms. He studied graphic design at Pikes Peak Community College.
This article has been viewed 171,681 times.
Learn more...
This wikiHow teaches you how to redirect emails to another Email account. Some email clients allow you to redirect and forward your email messages to another account. Some email clients only allow you to forward your email messages. Redirected email messages appear as though they came from the original sender. Forwarded emails appear as though they were sent from the email account they were forwarded from.
Steps
Using Outlook Web Application
-
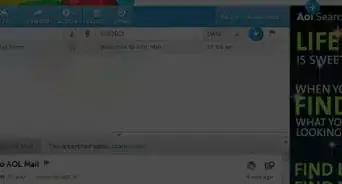
1Navigate to the Outlook sign in page. If you are using a work or school email address, you can log in at https://login.microsoftonline.com. If you are using a personal email account, you can log in at https://www.outlook.com.
- If you are using a free Outlook email account, you cannot redirect email.
-
2Enter your email address and click Next. Type your email address in the light-blue box and then click the blue button that says Next.Advertisement
-
3Enter your password and click Sign In. Type your password in the light-blue box and then click the blue button that says Sign In.
- If you can't remember your email address or password, click Can't access your account? and follow the instructions, or contact your administrator.
-
4
-
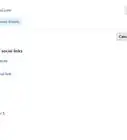
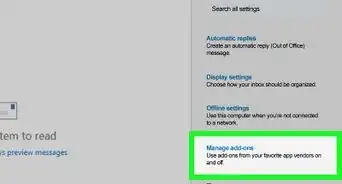
5Click Options. It's at the bottom of the Settings menu. This displays the Options menu in a sidebar to the left.
-
6Click Organize Email. It's in the Options sidebar on the left side of the screen.
-
7Click Inbox Rules. It's below "Organize Email" in the sidebar to the left.
-
8Click the arrow in the "New Rules" tab. It's next to the plus sign (+) under the "New Rules" tab. This displays a drop-down menu.
-
9Click Create a new rule for arriving messages. It's in the drop-down menu that appears when you click the arrow next to the plus sign.
-
10Type a name for the rule (optional). If you want to create a name for the new rule, type it in the box labeled "Name". This is not required.[1]
-
11Select Apply to all messages under "When messages arrive". Use the drop-down menu below "When messages arrive" to select "Apply to all messages".
-
12Select Redirect the message to under "Do the following". Use the drop-down menu under "Do the following" to select "Redirect the messages to". This displays a list of your contacts.
-
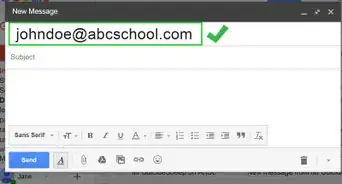
13Select or enter an email address. If the email address you want to redirect to is in your list of contacts, click the contact to select the contact's email address. Otherwise, type the email address you want to redirect to in the field next to "To:". Then press Tab ↹ to deselect the email.
-
14Click Ok. It's above the "To:" field. This returns you to the "New Rule" window.
-
15Click Save. It's at the top of the "New Rule" window. This takes you back to the "Inbox Rules" tab.[2]


Forwarding Using Outlook 2016
-
1Click File. It's in the menu bar at the top of the page. This displays a drop-down menu.
-
2Click Info. It's the first option in the sidebar to the left. This displays Account Information page.
-
3Click Manage Rules and Alerts. It's the third option on the Account Information page. It has an icon with an envelope and a bell.
-
4Click New Rule. It's the first button at the top of the "Rules and Alerts" window.
-
5Click Apply rule on messages I receive. It's under "Start from a blank rule" at the bottom of the Rules Wizard window.
-
6Click Next. It's in the bottom-right corner of the Rules Wizard window.
-
7Click the checkbox next to "sent only to me" and "when my name is in the To or Cc box". They are in the box labeled "Step 1: Select condition(s)" in the Rules Wizard window. You can also check any other conditions you want to apply.
- You can select conditions such as emails that contain a specific word, or are from specific people or group, as well as emails that are marked as important or sensitive. Then click the blue link in the "Step 2" box at the bottom of the Rules Wizard window to select the specific word or group of people you want to be redirected.
-
8
-
9Click People or public group. It's the blue text in the box labeled "Step 2: Edit the rule description" at the bottom of the Rules Wizard window.
-
10Enter a new email address and click Ok. This is the email you want your email messages to be forwarded to. You can either click an email from your address book or type it in the line labeled "To:" at the bottom of the window. Then click Ok in the lower-right corner of the window.
-
11Click Next twice. It's in the lower-right corner of the window.
-
12Type a name for this rule and click Finish. Use the line below "Step 1" at the top of the page to type a name for the rule. Then click Finish in the lower-right corner of the window.
-
13Click Apply and then click OK. This applies the rule changes and takes you back to the Account Info screen.[3]
- You can also forward Gmail messages to another account.


Community Q&A
-
QuestionHow do I forward e-mails to another e-mail?
 Community AnswerYou need to open your e-mail and hover the mouse over the message that you want to forward. Then you need to right click, and a menu will open which will give you options to forward online or to forward as an attachment. You can select whichever one you prefer.
 -
QuestionWill the original message remain on the redirecting device?Community AnswerThe original message will remain on the redirecting device if you set up the email account to forward all emails to another account. In this case, it is simply receiving the emails, and then forwarding them to another address.
-
QuestionHow do I find out how many email addresses a group can have?
 Community AnswerAdd as many as you can and when it doesn't allow you to add more, you'll have your answer.
Warnings
- It is not recommended to forward or redirect email messages to an email address outside your organization. In fact, many organizations regard the automatic forwarding of messages to an external address a violation of their policy on network and computer use.⧼thumbs_response⧽


References
- ↑ https://www.youtube.com/watch?v=w4fViIXmgeY
- ↑ https://support.office.com/en-us/article/use-rules-to-automatically-forward-messages-45aa9664-4911-4f96-9663-ece42816d746
- ↑ https://www.youtube.com/watch?time_continue=3&v=PC1AnSVAZuI
- [1] “Automatically forward messages to another e-mail account” Oct 23, 2003. [Online]
About This Article

1. Log in to the Outlook Web Application.
2. Click the gear icon in the upper-right corner.
3. Click Options.
4. Click Organize Email.
5. Click Inbox Rules.
6. Click the arrow in the "New Rules" tab.
7. Select Create a new rule for arriving messages.
8. Type a name for the new rule.
9. Select Apply to all messages under "When messages arrive".
10. Select Redirect the message to under "Do the following".
11. Select or enter the email address you want your messages to be redirected to.
12. Click Ok and then click Save.