X
wikiHow is a “wiki,” similar to Wikipedia, which means that many of our articles are co-written by multiple authors. To create this article, volunteer authors worked to edit and improve it over time.
This article has been viewed 35,866 times.
Learn more...
A set of bleachers can enhance the experience of watching any outdoor activity, including youth sports. With bleachers available, observers don't have to stand for hours or lug portable seats to the site. If you want to build bleachers for an outdoor venue, follow these steps.
Steps
-
1Begin building the base of the bleachers.
- Use 2 2-by-4's of 10 feet (3.05 m) in length to form the length of the frame, which will be rectangular.
- Measure and cut 2 69 inch (175.3 cm) 2-by-4's to form the width of the frame.
- Put the shorter boards at a right angle inside the longer boards. Taking into account the standard thickness of a 2-by-4 (1.5 inches or 3.8 cm), the total depth of the frame will be 72 inches (6 feet or 182.9 cm).
- Nail the 2-by-4's together with 16d nails
-
2Complete construction of the base of the bleachers.
- Cut 5 more 69 inch (175.3 cm) boards.
- Measure the 10 foot (3.04 m) sides of the frame, marking off sections in 20 inch (50.8 cm) intervals.
- Nail the 69 inch (175.3 cm) boards inside the rectangular frame at each point you marked.
- Measure the frame along its depth. Mark points with a pencil at 15 inches (38.1 cm), 30 inches (76.2 cm), and 45 inches (116.8 cm).
Advertisement -
3Cut boards to make the risers for the bleachers. The risers will be staggered heights to accommodate alternating seating and foot-rest sections. Cut 14 2-by-4's at these heights: 12 inches (30.5 cm), 18 inches (45.7 cm), 24 inches (61 cm), 30 inches (76.2 cm), and 42 inches (106 cm).
-
4Install the risers.
- Nail 2 of the 18 inch (45.7 cm) boards into the frame starting at the front of the frame at the left-hand corner. Nail the rest of the 18 inch (45.7 cm) boards, in pairs, into the front of the frame where it joins the 69 inch (175.3 cm) boards (every 20 inches or 50.8 cm). This group of risers will serve as the supports for the first row of seating. Repeat the process with the other board lengths at the corresponding points.
- At the 15 inch (63.6 cm) mark along the width of the frame, secure 2 12 inch (30.5 cm) boards at the frame's edge. Moving left to right, nail the rest of the 12 inch (30.5 cm) boards, in pairs, into the frame at the proper coordinates.
- Attach the 30 inch (76.2 cm) risers at the 30 inch (76.2 cm) mark. Remember to secure to 2 at a time along the width of the frame.
- Secure the 24 inch (61 cm) risers across the width of the frame at the 45 inch (116.8 cm) mark.
- Nail the 42 inch (106 cm) risers into the back edge of the frame. This group provides the support for the third row of seating.
-
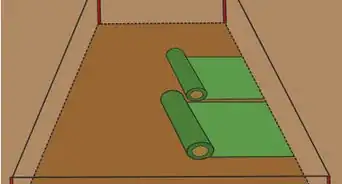
5Prepare the boards for the foot rests and seating.
- Measure drill points in each of the 5 12 foot (3.66 m) 2-by-4's you will be using.
- Mark 2 drill points for each riser, each 1 inch (2.54 cm) in from the edge of the board. The boards will hang 1 foot (30.5 cm) over each side of the frame, so the first measurement for drilling should be 1 foot (30.5 cm) in from the edge.
- Mark the next measurement at the 32 inch (81.3 cm) mark. The subsequent drill marks would come at 20 inch (50.8 cm) intervals, corresponding with the risers that support the board.
-
6Secure the boards into the risers. Screw the boards into the risers using a power drill and deck screws.
-
7Sand the boards. Use a power sander with 100-grit paper over the large surfaces. Sand edges by hand. Make sure all surfaces are smooth to reduce the chance of people getting splinters.
-
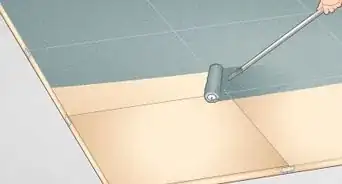
8Add stain to the bleachers. Select a hardwood stain to protect the wood. Start staining the edges and corners of the wood, using a small brush. Use a larger brush for flat sections, applying the stain evenly.
-
9Seal the wood. Apply a matte seal to the wood to waterproof it. Use the same brush technique as you did with the stain.


Advertisement
Things You'll Need
- 2-by-4's of the following lengths: 5 at 12 feet (3.66 m), 2 at 10 feet (3.05 m), 7 at 69 inches (175.3 cm), and 14 at each of these lengths--12 inches (30.5 cm), 18 inches (45.7 cm), 24 inches (61 cm), 30 inches (76.2 cm) and 42 inches (106 cm).
- Nail gun
- 16d nails
- Power drills
- 2 inch (5.08 cm) deck screws
- Circular saw
- 2 Paint brushes (3 inches/7.62 cm and 6 inches/15.24 cm)
- Wood stain
- Wood-stain sealant
- Pencil
- Tape measure


About This Article
Advertisement