X
wikiHow is a “wiki,” similar to Wikipedia, which means that many of our articles are co-written by multiple authors. To create this article, 23 people, some anonymous, worked to edit and improve it over time.
This article has been viewed 36,636 times.
Learn more...
Building a bomb shelter is different from the construction of storm shelters, fallout shelters, and other structures in that it is built in anticipation of direct exposure to explosive ordinance. This project requires special materials and construction practices, and is not for a novice or hobbyist. Nevertheless, here are steps to help you learn how to accomplish this task.
Steps
-
1Develop a site plan for the location you plan on building your bomb shelter at. To be successful on this project (where failure could, one might assume, leave you dead) requires a thorough survey of the site you choose.[1] Here are some explanations why this is critical to success.
- Bomb shelters must be able to sustain minimal damage in a near miss or direct hit from exploding ordinance. Soft soil can offer only limited resistance to bomb energy, so building in soft soil requires a deep excavation with highly reinforced construction. In areas with poor drainage or a high water table, the option of building deep will require more engineering than this page will offer.
- Building in solid rock, unless you have a suitable cavern to use as a superstructure, will require blasting and drilling, which also will exceed the scope of this page.
- Building into the side of a mountain or steep hill is a good choice for people with the resources to do so, and without the depth requirements, the following steps are fairly typical of what needs to be done to successfully complete your bomb shelter project.
- Building on stable, flat, well-drained land is the most direct approach to getting the job done, and that will be what we assume the reader plans to do.
-
2Determine the critical factors to consider in your design. Basically, there are four things to keep in mind while designing your shelter.
- How many people will it house? This will give you information needed to design the shelter in respect to size and accommodation. Since bomb shelters typical are very temporary in nature unless a sustained bombardment is anticipated, you can expect to allow at least 72 square feet of space per person.
- Decide what ordinance your structure will need to resist. A typical 500 pound bomb has a blast energy of about 10,000 feet per second using high explosives, and if fused for a ground burst or impact detonation, you will want a minimum of 15 feet of energy absorbing material between the ground and your structural roof. Bunker busters, on the other hand, can penetrate many feet (the exact distance, for obvious reasons, is classified), of reinforced concrete. Since 20 feet is a reasonable limit to excavate and redress, we will assume our design on that depth, other considerations are best left to experts.
Advertisement -
3Hire a geotechnical firm to address drainage, soil density, excavation shoring requirements, and other factors to ensure safe digging and building conditions. With an excavation this deep, shoring, sheet pilings, and other issues will require professional assistance, so the following construction steps are general requirements for minimal performance.
-
4Hire a structural engineer for detailed construction plans. If you are knowledgeable about concrete construction methods including load bearing cast in place concrete beams, roofs, and walls, you could do this yourself, however getting an expert is recommended
-
5Talk with your local planning and zoning office to determine what permits and licenses your project will require. Most likely, you will need engineered plans and a geotechnical report before a permit will be issued. Now that the technical issues have been addressed, look further down for actual building instructions.[2]
-
6Mark out your site, erect silt fences, erosion barriers, and other controls needed to begin clearing and excavation.
-
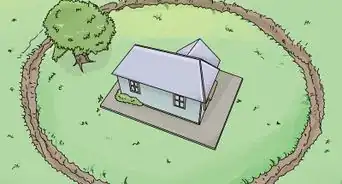
7Clear sufficient land for your excavation, spoil piles, and haul/storage areas. For a 12X18 foot shelter, you will want to clear about one acre of land for ancillary use.
-
8Grade the excavation area to a reasonably flat profile. Trying to dig a very deep hole on unlevel land is an invitation to disaster.
-
9Start digging your excavation about 150 feet from your actual shelter's footprint. This is to allow an access ramp to be created, and will give workment/equipment access in later steps. Continue to build your ramp until you are below the finish floor grade of your shelter.
-
10Dig the bottom of the shelter pit about 4 feet wider than the outside wall dimensions. You may use a load for this purpose, but a large excavator, in the 300 to 350 range and with an extended reach boom will give faster and more efficient production.
-
11Inspect the sides of the excavation often, especially if you enter a different soil layer, to make sure they are stable. Working in the bottom of a deep pit without cave in protection is illegal and foolish. When unstable soil is encountered, either use shoring systems or sheet piling to protect the workers.
-
12Dig until you reach the excavation requirements, grade the bottom of your pit, and compact the soil. You may now want to rough in whatever utilities your shelter will require, such as electrical power, plumbing, and a fresh air supply duct, since these may be installed underneath your shelter foundation.[3]
-
13Form up the foundation for your bomb shelter.[4] Since the main structural element of the shelter will be the walls and especially the roof, you will not need an very thick floor, but the exterior walls will require a substantial foundation. This can be placed in a monolithic slab, making the floor itself about 8 inches thick, and the wall foundations about 3 feet thick and 5 feet wide.
-
14Install the footing and slab reinforcement. Number 5 rebar on 8 inch centers, the wall footings will need something like 8 number 8 rebar, 4 top and bottom supported by number 4 rebar stirrups on 24 inch centers. You will also want to provide 2 rows of dowels made from number 8 rebar on 12 inch centers spaced 10 inches apart. These will require a minimum of 30 inches embedment and 6 feet of projection. Keep in mind these are general design requirements, if your structural engineer requires more or different configurations, he is the expert.
-
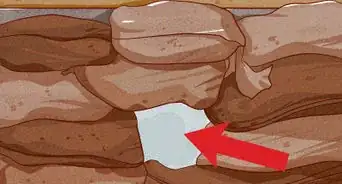
15Allow an opening on the end of the slab where your ramp enters your pit for a door. Your bomb shelter should be protected by a blast resistant, reinforced concrete and steel laminated structural door and frame. Consulting a vault door manufacturer like Mosler is probably a good idea.
-
16Place your concrete foundation and slab. You will almost certainly require an aerial concrete pump for this part of the project, choose one with sufficient boom and capacity to reach all sides of the slab without getting too near the excavation. These special vehicles can have booms from 30 to 40 meters long, and a pump hose 6 inches in diameter.
-
17Build or rent forms for your wall concrete placement. You may use coil rods, snap ties, or other means to secure the forms, along with whalers, stiff backs, and other shoring to keep your walls plumb and uniform in thickness. You will want to go ahead and erect the inside forms to the finished ceiling height of the bomb shelter. Generally, a minimum of 7 foot is required, but 8 foot ceilings are considered standard.
-
18Install and tie the reinforcing bars for your walls. The sides will be reinforced with number 8 rebar on twelve inch centers vertically (two rows), and number 6 rebar horizontal at 12 inch maximum centers on each row of vertical bars. Make sure to use corner bar reinforcement at all corners, and lap bars at splices a minimum of 48 bar diameters.
-
19Build beam pockets if your ceiling/roof span requires structural steel support beams (refer to engineer's recommendations) to allow these beams to be installed prior to building the roof.
-
20Set the exterior forms, shore and align them, and place the concrete for these. The tensile strength of the concrete is up to you or a structural engineer, but 4000 psi concrete is recommended. The exterior forms should extend higher than the interior ceiling so they will act as a perimeter form for placing the concrete roof on your bunker. Depending on the blast energy calculation you made earlier, decide on the thickness of the bunker roof. Since it will support the weight of tons of earth as well as resisting the bomb blast, a minimum thickness of 2 feet is suggested.
-
21Dowel out rebar for the shelter roof from the wall forms. A minimum to two mats of number 8 rebar at 10 inches on center is needed, for roof spans greater than 16 feet, increase the rebar size, decrease the spacing, and thicken the roof unless steel support beams and columns are used to offset the increase load. You may also consider pouring lateral concrete support beams (and even using high tensile pre-stressed concrete slabs for the roof, if it is in your budget).
-
22Pour your concrete walls using the same pump you hired for the floor pour. Make sure the concrete is slumped correctly and that you vibrate it to consolidate the materials while pouring. Using the services of a testing laboratory will help ensure the concrete reaches its required strength.
-
23Allow the concrete walls to set/cure a minimum of 7 days before removing the forms. You will want to leave the outside forms in place until the roof has been cast in place.
-
24Set up shoring for the roof forms. You may choose to rent metal shoring systems from a form company, but you will need to install a minimum of one 4X4 tee jack at 32 inch cents both ways with the top of the tee 1 inch below the form joist bottoms. Assuming you are using 2X6 pine joists for your form, and the ceiling is 8 feet high, your tee jacks will be 7 feet 5 inches tall. Install diagonal bracing to keep your tee jacks plumb and in line. For the uninitiated, a tee jack is a vertical post built from a 4X4 with a horizontal Tee on top, also usually a 4X4.
-
25Finish fabricating and installing all of your tee jacks. After your tee jacks are in place, lay out your joists on 12 to 16 inch centers, then deck the joists with either form panel metal sheeting (preferred) or a minimum 3/4 form ply sheeting.
-
26Install your rebar reinforcing on top of the platform you have built to act as your ceiling form. You will have two or three mats of rebar, minimum, so tie your first mat of number 8 rebar on ten inch centers supporting it on rebar chairs sold for this purpose, the support and tie of the second mat using standees to maintain the correct spacing between mats.
-
27Place the bomb shelter roof with concrete. As with the walls, higher strength concrete is required, with a minimum yield of 4000 psi, but a preferred design mix of 5000 psi or 850 flexural strength. Allow this concrete placement to cure for a minimum of 7 days before removing the shoring support system. After 28 days, the outside forms can be removed, and backfilling can commence.
-
28Backfill around the wall perimeter in lifts, using compaction equipment to ensure the soil is compacted in 8 to 12 inch lifts. If you have installed an air supply duct underneath the slab, you can backfill to the top, otherwise, you will want to install this duct work when you reach the elevation required.
-
29Backfill the excavation over the roof of the shelter carefully, and avoid using heavy equipment directly over the top of it, especially until the first four or five feet of fill has been installed and compacted. Do not backfill the access ramp yet, as you will need to construct a tunnel entrance to allow access first.
-
30Construct an entrance to your bomb shelter. You will need to create a tunnel at least 50 feet long to reach the door of your bomb shelter. Depending on the size of your door, using a concrete pipe or structural tubing like asphalt coated galvanized steel pipe in 10 or 12 feet diameter is the most practical method. Since tunnel failure can turn your refuge into a tomb in short order, care in choosing and constructing your entrance venue is just as important as designing and building the shelter itself.
-
31Finish constructing your entrance tunnel and backfilling the excavation. Restore the vegetation over the top, connect the utilities and air supply ducts, and you are finished.


Advertisement
Community Q&A
-
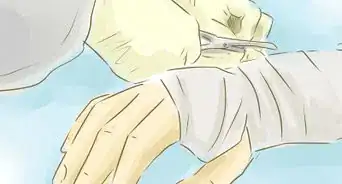
QuestionIf I put in air-ducts, how do I prevent them from being a weak point in the bomb shelter?
 Community AnswerYou put the inlet (and outlet or exhaust) far away from the shelter and connect that duct to just a hole or its own room. Then, a separate pipe is used to draw air from that inlet chamber. Yes, a very unlucky indirect hit can kill your air system, but you'll have plenty of time (hours) before the air runs out or you should be able to turn your outlet into a temporary (days) inlet.
Advertisement
Warnings
- The weight of the materials described in this project are thousands of tons, all due diligence should be exercised when designing, handling, and accommodating them.⧼thumbs_response⧽
Advertisement


References
- ↑ https://www.bankrate.com/finance/weather/natural-disasters/nuts-bolts-fallout-shelter.aspx
- ↑ https://www.bankrate.com/finance/weather/natural-disasters/nuts-bolts-fallout-shelter.aspx
- ↑ https://www.skilledsurvival.com/underground-survival-bunker/
- ↑ https://www.skilledsurvival.com/underground-survival-bunker/
- ↑ https://www.youtube.com/watch?v=q11c29qdmJ0
About This Article
Advertisement