This article was co-authored by Mark Spelman. Mark Spelman is a General Contractor based in Austin, Texas. With over 30 years of construction experience, Mark specializes in constructing interiors, project management, and project estimation. He has been a construction professional since 1987.
This article has been viewed 488,772 times.
Carports are standalone structures useful for protecting your car, boat, or other motor vehicle from the elements. Some are built on top of secure foundations while others are freestanding structures. If you've been parking your vehicles outside, investing in a protective structure to house them in can increase the life of your vehicles and even increase the value of the home if you build your project to code. Learning to prep the ground, plan the appropriate kind of structure, and build it from the ground up is a lot easier than you may think.
Steps
Preparing the Ground
-
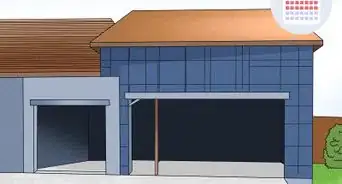
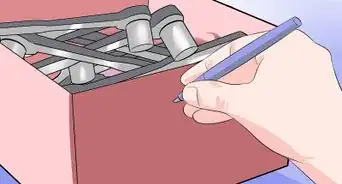
1Get the necessary building permits. Check with your local city planning office to make sure your building project is up to code. Additions and construction on residential property can significantly affect the property value of the home, making it important to clear projects with the city. In some areas, you'll likely need to produce structurally sound building drawings bearing the signature of a licensed structural engineer.[1] To obtain the necessary permits, you'll likely need to produce:
- Proof of property ownership
- Permit application worksheets, provided by the city
- Construction drawings
-
2Purchase the necessary building materials. You can build carports from wood or metal, depending on the style and type of precipitation from which you hope to guard your vehicle. Depending on the climate where you live, different materials and designs may be more or less appropriate. Feel free to customize the basic design and use whatever materials are available or cheap, depending on the type of carport you want to make. It's a good opportunity to experiment.
- Pressure-treated lumber may be more appropriate for drier climates, but will prove to be more durable and customizable in the long run regardless of the climate. A wooden structure built properly will be much sturdier than other structures. If you want a long-term place to park a car, go with lumber.
- "Galvanized metal" carports are much cheaper and quicker to install, though ultimately less sturdy in the long run. If you need a quick, cheap place to house a daily-driver, it's a good option. Often, pre-fabricated carports made of galvanized metal are the best bet for a DIYer in need of a quick project.
Advertisement -
3Measure the ground. To accommodate an average-sized car, measure a rectangle at least 16 feet (4.9 m) long and nine feet wide. Plot this rectangle on the ground. A basic carport requires six posts, one at each corner of the rectangle, and two more at the middle positions along the 16 foot (4.9 m) length.
- If you've got a bigger car or truck, or you want to make a carport for multiple vehicles, make the necessary adjustments to accommodate for the size structure you hope to create.
-
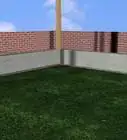
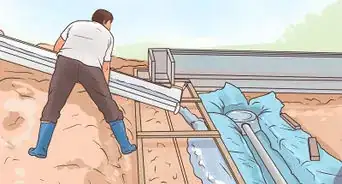
4Level the ground if necessary. Remove any grass in layers with a shovel, raking over the under layers with a metal rake, tamping it with foot-pressure and the same rake. It doesn't need to be perfect, but you might consider measuring for grade to make sure your ground is as flat as possible.
- If you want to build a carport on an existing concrete pad, or the end of your driveway, that's perfectly appropriate. Measure the dimensions of your concrete pad and shape the structure to the ground, rather than the other way around. You can either build the structure with the poles to either side of the pad, anchoring them in the ground.
-
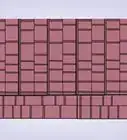
5Pour ground cover, if necessary. Bare ground is fine in some cases, but consider putting down a layer of crushed granite to avoid tracking dirt into the house and wearing down the ground around the carport over time. If you don't want to lay gravel, consider laying some dark weed matting down to keep grass and weeds from re-growing.
- The best idea would be to pour concrete, or build on top of pre-existing concrete slab. This will give your carport the most life and durability.
-
6Consider using a pre-fab carport kit. The materials and the time can make building a carport a fairly intensive project, which might mean that a pre-fabricated kit might be more appropriate, given your wishes and your abilities.
- Metal building materials are usually available for cheaper than the price of a lumber carport kit, complete with installation instructions. You can put it up in a day or so.


Building the Beams
-
1Dig the holes for the posts. Equally space hole posts around the perimeter of your measured outline for the carport, then use post-hole diggers to dig the holes. The holes should be at least two feet deep, and at least 4 feet deep for a more stable structure if you live in a high-wind climate, an area that receives lots of heavy snowfall or wherever frost occurs at grade.
-
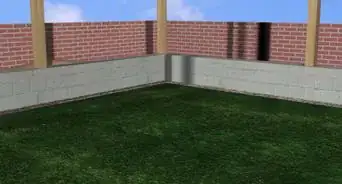
2Set the six posts. For the simplest kind of structure, you'll need heavy-duty posts at least nine feet high on one side of the carport and 11 feet (3.4 m) high on the other side to give the roof enough of a slant to clear any amount of rainwater. The three higher posts should be on the side of the carport closest to the house to divert water away from the foundation of the home.
- To set the posts, pour concrete six inches deep in the two-foot deep hole, then plant the post into the hole so it rests on the bottom. After the concrete has hardened, this will become your post footer, now you can back fill the hole with soil and tamp in the layers. Pour more concrete until the hole is filled. Use a level and make adjustments as the concrete is hardening to ensure that the post is perfectly vertical. Allow the concrete to harden for at least one full day before nailing on the beams.
-
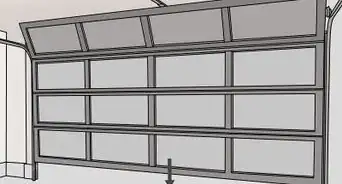
3Fasten the front and back beams first. To secure the walls of the carport, you'll basically build a simple rectangular box approximately 16 feet (4.9 m) long, nine feet wide, and roughly seven feet high, secured onto the posts.[2]
- Secure two supporting crossbeams flat on the top of the shorter corner posts and extend to the higher corner posts about two feet down from their tops. Next, nail them to the higher posts using T-shape hangers that can be purchased at any hardware store. Before nailing the beams down through the T-shape hangers, make sure they are level.
-
4Fasten the side beams. Nail crossbeams across your posts to secure them to the proper code specifications. The beam on the lower side should be nailed on top of the front and back beams, which themselves have been already nailed to the top of the corner posts. If necessary, you can shim to connect them by nailing on top of the middle post on the lower side, making the beam level across all three posts.
- It's important to make your structure as secure as possible, especially if you live in snowy, windy, or other severe climates. For load-bearing specifications, you need to research the requirements in your area. There's no single, universal way of doing it, so defer to your local guidelines always.


Building the Roof
-
1Fasten the rafters to the side beams. The six 2” x 4” x 10' rafters that will support the roof can be fastened to the core box in one of two ways: the notch method or the hanger method. In either case, the front rafter and back rafter should be fastened flush with the front beam and the back beam. The remaining four rafters should be arranged equidistant from each other, along the length of the 16-foot side beams, about every 3–4 feet (0.9–1.2 m).[3]
- To notch the rafters, the idea is to rest them on edge of the beams. To do this, put the front rafter in position, and note where it comes into contact with the side beams with a pencil mark. At that point, notch the rafter with the circular saw so that in the finished position the rafter sinks about 1/3 of the four inches onto the beam. Once you are satisfied with how this first rafter rests on the side beams, take it down and use it as a template to notch the other five rafters. When fastening the rafters, angle nails through the side of the rafter into the beam below. Note that notching will not work if you need it to remain flush with the beam.
- To hang the rafters, buy some metal joist hangers at the hardware store. There are many different shapes and styles of metal hangers that fasten 2” x 4”s to other structural elements in a variety of orientations. The relevant angle in this structure, the angle of the rafters to the beams, is about 25 degrees. These metal hangers can bend to accommodate small variations, so don't worry about finding the perfect one. Unlike with the notch method, with the hanger method the rafters rest on top of the beams. Your nails will go through the hanger into the rafter, then into the beam.
-
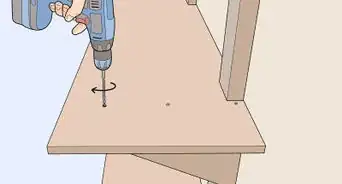
2Fasten the plywood roof boards to the rafters. Arrange the plywood sheets so that they produce a six-inch overhang on the front and back of the carport as well. This way you will have a uniform look to the carport.
- Buy plywood sheets as large as you can get them. Typically, they come in 4' x 8' sheets, but sizes vary. The entire roof surface is 10' x 17'. Cut elements with the circular saw to produce the fewest number of seams. The fewer the seams, the less potential for water leakage.
- The core box of your carport is nine feet wide and the rafters are ten feet long. This means that when the roof elements are in place, you will need enough plywood for about a six-inch overhang on either side of the cart port. If you want it to be longer, accommodate by buying more plywood.
- Plywood comes in a variety of thicknesses. For this project you can use ½ inch thick plywood.[4]
-
3Check the stability of the structure. Now that the roof is in place, your structure should be quite solid. Nothing you do from this point in the process to the end will improve the carport's overall stability, so if there is excessive movement, you will have to add stability braces on the outside of the structure to reinforce it.


Finishing the Job
-
1Caulk the plywood roof seams. To keep the elements out, it's important to cover the roof with tar paper or a synthetic paper and create as waterproof a surface as possible before shingling over it. There's no sense in creating a carport to keep your car out of the rain if it leaks.
- Would it be smarter to insulate the structure? Maybe, but probably not cost-effective. Remember, you're not building an addition to your house, you're building a simple structure to keep junk off your car.
-
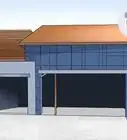
2Fasten shingles on top of the plywood roof elements. Visit the hardware store and buy enough three-tab shingles to lay over the plywood and finish the surface of the carport. It might be a good idea to nail some weather sheeting over the plywood before you lay the shingles for an extra layer of protection.
- Alternatively, if you don't want to shingle the roof, you could skip the plywood roof step altogether and install a metal roof over the shingles. A slanted aluminum roof is common in outbuildings and you'll be that much closer to being finished. It might be a good idea, if you can stand the look of it and the loud sound of rain on metal.
-
3Reinforce the joints with metal plates. For extra stability in the places where the structure meets, it's a good idea to reinforce with metal bracing. Your hardware store sells a variety of metal plates that can be nailed onto the various joints in the structural composition, especially where the posts meet the beams, where the beams meet the rafters, and at other places.
-
4Stain the wooden elements. Since you've gone to all the work, it's a good idea to treat the exposed wood with a coat of protecting stain. This will increase the life of the wood and keep you from having to repeat the project in a few years.
- It's a good idea to restain regularly to keep the life of the structure up. Revisit your work periodically to catch up with repairs before they become a major problem.


Expert Q&A
Did you know you can get expert answers for this article?
Unlock expert answers by supporting wikiHow
-
QuestionWhat size of posts would I use for a 16ftx10ft carport?
 Mark SpelmanMark Spelman is a General Contractor based in Austin, Texas. With over 30 years of construction experience, Mark specializes in constructing interiors, project management, and project estimation. He has been a construction professional since 1987.
Construction ProfessionalYou can use 10 foot or 12 foot posts for the carport. Either should work fine for you.
Support wikiHow by unlocking this expert answer.
Things You'll Need
- Hammer
- Drill
- Circular saw
- Level
- Post hole digger
- Concrete mix
- Three 4" x 4" x 9' posts
- Three 4" x 4" x 11' posts
- Six 2" x 4" x 10' rafters
- Two 2” x 4” x 16' side beams
- Two 2” x 4” x 9' front/back beams
- Plywood to cover the 10' x 17' roof area
- Metal hangers
- Nails
- Roof shingles
- Paint


References
About This Article

If you want to build a carport, you’ll need to secure permits from your city planning office and, depending on the building codes, you might also need to hire a structural engineer. Once your plans are approved, you can purchase a pre-fabricated carport made of metal and canvas or use pressure treated lumber to build one. Your carport should be at least 9” wide and 16” deep. For a carport made of lumber, lay 6 posts in the ground, fasten your beams, and then add the roof. For tips from our Contractor reviewer on what you’ll need to get permits, read on!