This article was co-authored by Ryaan Tuttle and by wikiHow staff writer, Hunter Rising. Ryaan Tuttle is a Home Improvement Specialist and the CEO of Best Handyman, Inc. in Boston, Massachusetts. With over 17 years of experience, he specializes in building home service businesses, focusing on creating scalable and efficient brands. With the help of his global team, the companies have achieved over 10+ million in sales and received recognition through magazine features, and enjoy partnerships with wikiHow and Jobber field service software. Boston Magazine and LocalBest.com have named Best Handyman Boston the Best Handyman in Boston. Ryaan holds Construction Supervisor and Home Improvement Contractor Licenses.
There are 9 references cited in this article, which can be found at the bottom of the page.
wikiHow marks an article as reader-approved once it receives enough positive feedback. In this case, several readers have written to tell us that this article was helpful to them, earning it our reader-approved status.
This article has been viewed 584,562 times.
Do you need to make a clean, watertight seal for your current DIY project? Whether you’re sealing a tub, filling in cracks around windows, or adding a clean edge to baseboards, a caulking gun makes application so much quicker and simpler. Almost all caulking guns work the same way, so we’re able to help no matter what kind you have. Keep reading and we’ll walk you through your caulking project from start to finish.
Just here to learn how to load a caulk gun? Jump straight to the section here.
Things You Should Know
- Cut a 45-degree angle in the tip of a tube of caulk with a knife or using the hole next to the gun’s trigger.
- Pull back the metal rod on the gun and load the tube of caulk into the gun. Hold the gun at a 45-degree angle to the crack you’re filling.
- Squeeze the trigger and slowly move the gun to apply the caulk in a smooth line.
- Run your finger over the line of caulk to fill in the gaps and smooth it out.
Steps
Cleaning and Masking the Area
-
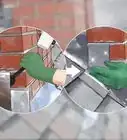
1Clean off all the old caulk with a putty knife. Place the sharp end of the putty knife at the base of the old caulk. Then, grab the handle and push the knife forward. Keep pushing forward until you remove all the caulk.
- Alternatively, you can use a caulk removal tool or a utility knife.[1]
- To make caulk easier to remove, apply a caulk softener, wait 20-30 minutes, and then scrape it with a carpet or putty knife.[2]
- By removing the old caulk that may be cracking, you're avoiding building a new layer on weak foundations.[3]
-
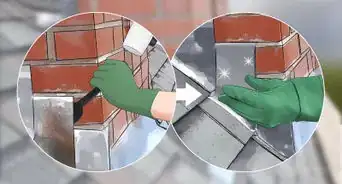
2Wash the surface with alcohol, bleach, and hot water. Wet a cloth with rubbing alcohol and set it on the crack to soften any leftover caulk. Then, wet a rag with warm water and diluted bleach to disinfect the surface. Then, rinse the area with a different rag soaked in hot water. Dry the surface with a towel when you’re finished since new caulk won’t adhere when it’s wet.[4]
- Caulking traps anything inside the crack so make sure all dirt is completely removed.
- If you see any caulk or grime left over, use a plastic scraper to lift it up.
- If you're removing silicone caulk from tiles, heat it up with a hair dryer or apply a commercial solvent.
Advertisement -
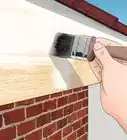
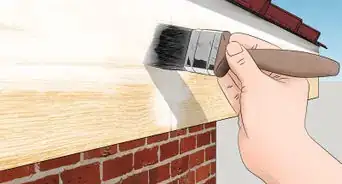
3Protect the surrounding surface with painter's tape. Stick one long strip above the crack and one right below it. This tape keeps the caulk off of anything nearby so it doesn’t stick or harden where you don’t want it. It also acts as insurance in case you make a mistake later on.[5]
- Using painter's tape also makes the edges of your caulk line clean and smooth.


Loading the Caulk Gun
-
1Press the caulk gun’s release trigger to pull the rod back. Look for a small metal trigger on the back of the caulking gun where the long metal rod connects. Press the trigger down with your thumb to loosen the rod that runs through the entirety of the frame. With your other hand, pull the rod as far back as you can and hold it.[6]
-
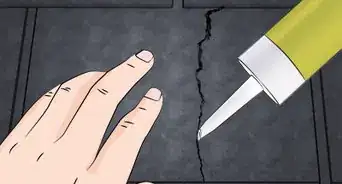
2Cut the nozzle on a tube of caulk to a 45-degree angle. Use a pair of scissors to cut the nozzle so it’s about the size of the crack. If the crack is large, consider cutting the nozzle close to the tube so more caulk comes out. If the crack is small, cut the nozzle near the end to be more precise.[7]
- This choice is permanent, so think carefully about the thickness before you make the cut. It's better to start closer to the end of the nozzle and make the opening bigger if you need to.[8]
-
3Pierce the nozzle with the gun’s piercing rod or a nail. Check the front of the caulk gun for a short metal piece that folds out. Stick the metal piece into the end of the caulk’s nozzle until you feel it poke through the tube. If your caulk gun doesn’t have a small metal rod, then use a sharp nail to puncture the tube.[9]
- Check the instructions that came with the tube of caulk you’re using to see if there’s a specific way to pierce the tube.
-
4Insert the tube of caulk into the gun. Keep holding the steel rod back, and put the flat end of the caulk tube into the back of the frame. Position the nozzle so it slots into the hole at the front of the gun. Squeeze the large trigger on the gun lightly to make sure the tube is snug and level.[10]
- If you need to, ask a friend or family member to help keep the rod back as you work on inserting the caulking tube.


Applying the Caulk
-
1Pull the trigger and move the gun over a piece of paper to practice. Hold the gun at a 45-degree angle with the nozzle facing downwards. Then, over a piece of paper, press the trigger at the back of the gun while moving the caulking gun steadily in one direction. The caulk will come out in a smooth, steady stream when you do it correctly.[11]
- If you move the caulking gun too fast, the caulk will look too thin and uneven. If you move the caulking gun too slowly, the caulk will be clumpy and unworkable. Take your time to find a good balance between the two.[12]
- It may take a few squeezes of the trigger to get your caulk gun started for the first time. Just let the pressure off the trigger and try squeezing it again.
-
2Hold the caulking gun at 45 degrees to the crack. Hold the caulking gun with both hands so one is on the trigger and the other is supporting the end of the gun. Tilt the entire gun at a 45-degree angle so the caulk flows out evenly. The caulk should start to flow towards the nozzle.[13]
- Although the trigger will push some of the caulk out of the tube, by holding the gun at 45 degrees, gravity helps with the process.
-
3Press the trigger to push the caulk into the nozzle. Once you push the trigger, the steel rod will push the back of the caulk tube to force it out of the nozzle. Press the trigger firmly and steadily to apply the caulk in a slow, controlled manner.[14]
-
4Move the caulking gun across the length of the crack. As the caulk comes out of the nozzle, slowly move the caulking gun along the entire crack. Try to move in a single, steady motion so the caulk fills the crack evenly.[15]
- If you missed any spots, don't worry. Just come back and fill them in with a second pass.
-
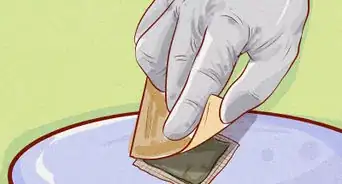
5Smooth the caulk line with your finger. Put on a disposable glove and wet the tip of your finger with some warm water. Quickly drag your finger along the line of caulk to smooth it against the surface and create a clean finish.[16]
- Wearing a glove helps prevent caulk from sticking to your hands since it can be difficult to clean off.
-
6Remove any painter's tape and let the caulk dry. Peel off all the painter's tape and leave the caulk to dry. Each caulk tube will direct you with the precise time to wait until it's completely dry. Generally, it takes at least 24 hours for the caulk to completely solidify.[17]


Expert Q&A
-
QuestionShould I smooth out the line of caulk?
 Barry ZakarBarry Zakar is a professional handyman and the founder of Little Red Truck Home Services based in the San Francisco Bay Area. With over ten years of experience, Barry specializes in a variety of carpentry projects. He is skilled at constructing decks, railings, fences, gates, and various pieces of furniture. Barry also holds his MBA from John F. Kennedy University.
HandymanYou don't have to, especially if you're happy with the bead you put down. However, if not, you can wet your finger and use it to smooth down the caulk before it dries. -
QuestionHow do you remove old caulking?
 Ryaan TuttleRyaan Tuttle is a Home Improvement Specialist and the CEO of Best Handyman, Inc. in Boston, Massachusetts. With over 17 years of experience, he specializes in building home service businesses, focusing on creating scalable and efficient brands. With the help of his global team, the companies have achieved over 10+ million in sales and received recognition through magazine features, and enjoy partnerships with wikiHow and Jobber field service software. Boston Magazine and LocalBest.com have named Best Handyman Boston the Best Handyman in Boston. Ryaan holds Construction Supervisor and Home Improvement Contractor Licenses.
Home Improvement SpecialistYou can buy a plastic caulk removal tool from Home Depot or Lowe's. It helps you pull out the caulking. -
QuestionCan I use an Olfa knife to remove the old caulk?Ryaan TuttleRyaan Tuttle is a Home Improvement Specialist and the CEO of Best Handyman, Inc. in Boston, Massachusetts. With over 17 years of experience, he specializes in building home service businesses, focusing on creating scalable and efficient brands. With the help of his global team, the companies have achieved over 10+ million in sales and received recognition through magazine features, and enjoy partnerships with wikiHow and Jobber field service software. Boston Magazine and LocalBest.com have named Best Handyman Boston the Best Handyman in Boston. Ryaan holds Construction Supervisor and Home Improvement Contractor Licenses.
Home Improvement SpecialistAn Olfa knife helps remove old caulk. It has a super-sharp thin blade that can get all the caulking out.
Things You’ll Need
- Putty knife
- Painter's tape
- Rubbing alcohol
- Bleach
- Caulk
- Caulking gun
- Scissors
- Piece of paper


References
- ↑ Ryaan Tuttle. Home Improvement Specialist. Expert Interview. 13 January 2021.
- ↑ Barry Zakar. Handyman. Expert Interview. 20 August 2020.
- ↑ Ryaan Tuttle. Home Improvement Specialist. Expert Interview. 13 January 2021.
- ↑ https://www.bobvila.com/articles/how-to-remove-caulk/
- ↑ https://todayshomeowner.com/painting/guides/homeowners-guide-to-caulk/
- ↑ https://youtu.be/C3QmFIk3EPM?t=405
- ↑ https://todayshomeowner.com/painting/guides/homeowners-guide-to-caulk/
- ↑ Barry Zakar. Handyman. Expert Interview. 20 August 2020.
- ↑ https://youtu.be/jufcpLs-Hkk?t=69
- ↑ https://youtu.be/61CSfFkQQbk?t=80
- ↑ https://todayshomeowner.com/painting/guides/homeowners-guide-to-caulk/
- ↑ Barry Zakar. Handyman. Expert Interview. 20 August 2020.
- ↑ https://www.energy.gov/energysaver/caulking
- ↑ Barry Zakar. Handyman. Expert Interview. 20 August 2020.
- ↑ Barry Zakar. Handyman. Expert Interview. 20 August 2020.
- ↑ Barry Zakar. Handyman. Expert Interview. 20 August 2020.
- ↑ https://www.thisoldhouse.com/bathrooms/21015082/laying-down-a-perfect-bead
- ↑ https://www.energy.gov/energysaver/caulking
- ↑ https://www.thisoldhouse.com/bathrooms/21015082/laying-down-a-perfect-bead
About This Article

To use a caulking gun, press the release trigger at the back of the gun, pull back the metal rod, and insert the caulk tube into the frame. Then, secure the tube by pushing the metal rod back into the frame. Next, cut off the tip of the tube, and position the nozzle at a 45 degree angle over the crack you want to seal. Finally, squeeze the trigger as you steadily move the nozzle along the crack. To learn more, including how to smooth over the caulk after applying it, read on.