This article was co-authored by wikiHow staff writer, Hunter Rising. Hunter Rising is a wikiHow Staff Writer based in Los Angeles. He has more than three years of experience writing for and working with wikiHow. Hunter holds a BFA in Entertainment Design from the University of Wisconsin - Stout and a Minor in English Writing.
There are 9 references cited in this article, which can be found at the bottom of the page.
wikiHow marks an article as reader-approved once it receives enough positive feedback. In this case, 93% of readers who voted found the article helpful, earning it our reader-approved status.
This article has been viewed 130,774 times.
Learn more...
Fascia boards are found around the edges of your roof and usually support your home’s rain gutter system. Over time, these boards may start to rot or need to be replaced due to damage. Luckily, replacing a fascia board is as easy as taking out the old board and fitting a new one in its place. Once you’ve installed a new board, all you need to do is seal the seams and paint it to match your home. With a short afternoon renovation, you can have new fascia boards that will last for years!
Steps
Removing the Existing Fascia Board
-
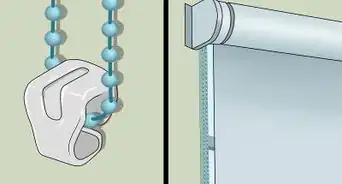
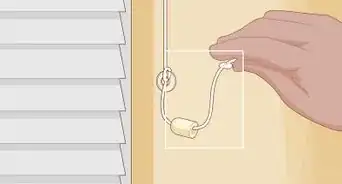
1Uninstall the gutter system from the fascia board you’re replacing. Unscrew the gutters from behind your existing fascia board with an electric screwdriver. Then, locate the brackets underneath your gutter holding them in place and unscrew them so you can lift the gutter up and away from the fascia. Remove the gutter brackets from your fascia so you can reuse them on the new board.[1]
- Work with a partner so you don’t damage your gutters when you remove them.
- If your fascia board doesn’t have any gutters, you may skip this step.
-
2Cut the board into 3 ft (0.91 m) sections with a reciprocating saw. Mark out 3 ft (0.91 m) sections along your fascia board with a pencil. Make vertical cuts into the fascia board between your roof rafters. Cut out each 3 ft (0.91 m) section one at a time until you’ve removed the full board.[2]
- This step is not required, but it makes it easier to remove the board in pieces.
Advertisement -
3Pound the boards off of the rafters from behind with a hammer. Keep the fascia board steady with your nondominant hand. Hold a hammer with your dominant hand behind your existing fascia boards and start pounding it to loosen the nails. Continue hitting the board until the nails behind it come out from the rafters. Once the board is loose, pull it off from your home.[3]
- If the fascia board is rotting, try to break off as much of the rotting wood as possible before sawing through the boards.
Tip: Make sure there’s a rafter at the end of your fascia board so you have a place to fasten it.
-
4Saw through any nails going into your roof with a blade meant for metal-cutting. Some boards are connected from the top through the roof as well as the rafters. Put a blade meant for cutting metal onto your reciprocating saw and cut along the top seam of the board so you have a flat surface for your new board.[4]
- Don’t pound the nail back into the roof since it may damage the shingles above it.


Measuring and Cutting the Fascia Board
-
1Measure the length of your roof where you’re installing your fascia board. Use a tape measure to find how long your roof is where you’re putting in the new fascia. Make sure to double check your measurements so your cuts are precise.[5]
-
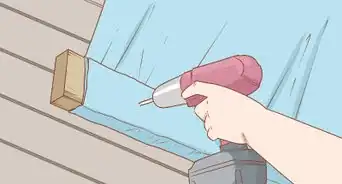
2Cut the board to the length you need with a circular saw. Use a board made for outdoor use so it doesn’t develop any rot, such as outdoor-treated spruce, pine, or cedar. Set the board on saw horses or a sturdy work surface so the end you’re cutting hangs over the edge. Turn on your circular saw and cut through the wood.[6]
- Wear safety glasses as you work with a circular saw so your eyes are protected.
-
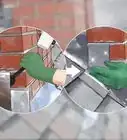
3Miter the end of your board to make a clean seam with another. Mitered corners hide seams by cutting the ends of your boards to 45-degree angles. Set the angle on your circular saw to a 45-degree angle and trim the end of your board.[7]
- You can also rent a miter saw if you want to make more precise cuts, but a circular saw will work if it’s all you have.
- Miter cuts only need to be made if you’re putting your fascia on a corner.


Installing the New Board
-
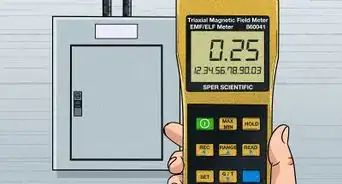
1Mark the locations of your rafters on the drip edge above the fascia. Fascia boards need to be secured to the rafters in order to stay in place. Use a pencil to mark the locations of the rafter boards so you know where to place your nails later on.[8]
- Drip edges are metal flashing pieces along the edge of your roof to help water flow away from your fascia.
- If you don’t have a drip edge, mark the measurements on the edge of your roof or on the fascia board itself.
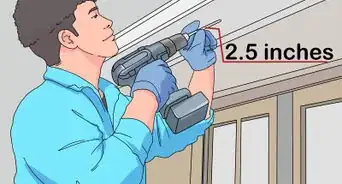
Tip: Rafters are usually spaced 12 in (30 cm), 16 in (41 cm), or 18 in (46 cm) apart on center. If you aren’t able to make marks, use the measurement between your rafters as a guide.
-
2Use 1-2 nails through each rafter to secure your fascia board. Hold the board in place, and use 2 in (5.1 cm) nails and a hammer to secure it in place. Place your nails in line with the marks on your drip edge and place it in the center of your fascia board. Drive 1-2 nails in per rafter so it doesn’t move around. Make sure each end of your fascia board is nailed into a rafter so they don’t bow out or break your seal.[9]
- Have a partner help you hold the board in place while you nail it so it’s kept straight.
-
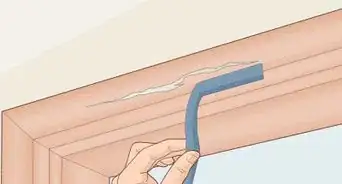
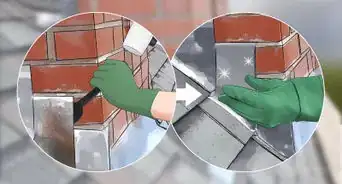
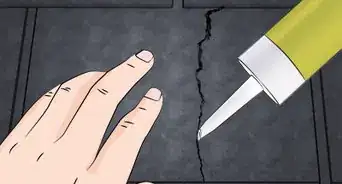
3Cover all of the seams with body filler. Use a bonding body filler putty so water can’t get in between the seams and damage the wood. Mix the filler with a putty knife on a flat sheet of cardboard or on a plate and scrape it onto your fascia board. Go over the seam 2-3 times so the putty gets pushed into it. Then, cover all of your nails with the putty as well. Wait for 1 day for your putty to completely set.[10]
- Body filler can be purchased from your local hardware store.
- Only mix a small amount of the body filler at a time since it dries quickly.
-
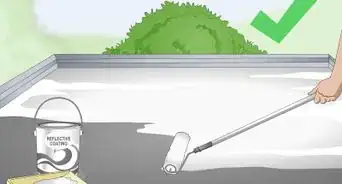
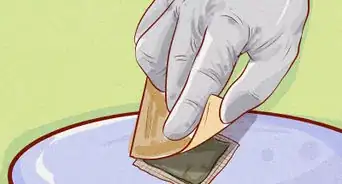
4Paint the new fascia board if you want it to match the rest of your home. Once the fascia board is sealed, paint 1-2 coats of outdoor primer onto the wood and let it dry for 6 hours. When the primer is dry and evenly coats the surface, use a layer of outdoor paint to help protect your wood and blend it into the rest of your home. Let the first layer of paint dry completely before applying another coat.[11]
- Use any leftover paint you may have from the last time your house was painted.


Warnings
- Never step on the paint shelf on top of your ladder.⧼thumbs_response⧽
- Always maintain 3 points of contact while you climb your ladder.⧼thumbs_response⧽
- Wear eye protection while working with saws and power tools.⧼thumbs_response⧽
Things You’ll Need
- Ladder
- Electric screwdriver
- Safety glasses
- Reciprocating saw
- Hammer
- Circular or miter saw
- 2 in (5.1 cm) nails
- Body filler putty
- Putty knife
- Outdoor primer
- Outdoor paint
- Paintbrush
- Foam roller


References
- ↑ https://heightslibrary.org/materials/hrrc/19-Gutters/FASCIA_BOARD_REPAIR.pdf
- ↑ https://youtu.be/9PPUOL5JkdU?t=91
- ↑ https://youtu.be/MUXInBIwtJw?t=20
- ↑ https://youtu.be/9PPUOL5JkdU?t=106
- ↑ https://youtu.be/MUXInBIwtJw?t=219
- ↑ https://youtu.be/MUXInBIwtJw?t=219
- ↑ https://youtu.be/9PPUOL5JkdU?t=238
- ↑ https://youtu.be/MUXInBIwtJw?t=270
- ↑ https://heightslibrary.org/materials/hrrc/19-Gutters/FASCIA_BOARD_REPAIR.pdf
About This Article