This article was co-authored by Barry Zakar. Barry Zakar is a professional handyman and the founder of Little Red Truck Home Services based in the San Francisco Bay Area. With over ten years of experience, Barry specializes in a variety of carpentry projects. He is skilled at constructing decks, railings, fences, gates, and various pieces of furniture. Barry also holds his MBA from John F. Kennedy University.
This article has been viewed 88,898 times.
Water damage and nesting animals can really take a toll on your home’s eaves, but the good news is that fixing rotted eaves is actually a pretty simple project that you can do yourself. The best part? You'll never have to climb onto your roof. We’ll walk you through everything you need to do to repair your eaves so they’re rot-free. Check out the steps below to get started!
Steps
Removing the Damaged Materials
-
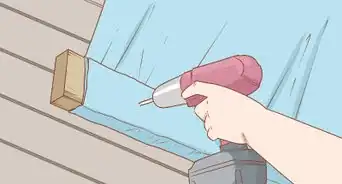
1Remove the gutters and roof flashing if needed. In order to give yourself clear access to the eaves, you may first need to detach the drainage structures covering them. Unscrew the gutters at the brackets, then pull out the nails holding them in place and lower them down safely. Do the same for flashing where it overlaps the edges of the overhang.
- Set up a ladder on a flat stretch of ground directly beneath the section of gutter you’re removing and station a friend or helper nearby to stabilize it while you’re working.[1]
- For larger projects, consider renting and assembling a full scaffolding around your roof. A scaffolding will also be much safer to work on, and won't require any additional assistance for support.
-
2Pry off the shingle mold. Starting at one corner of the roof, wedge a pry bar into the narrow space at the top of the shingle mold (the thin wooden strip that sits just below the shingles). Force the mold away from the roofing a few inches at a time, then lift off the entire piece in one section. Hold onto the old shingle mold if it looks to be in good shape. You can reuse it later.[2]
- If you’re having trouble getting the shingle mold to budge, try scoring the upper and lower edges with a utility knife.[3]
- Be careful not to damage the piece by wrenching on it with the pry bar.
Advertisement -
3Pull away the rotten fascia. With the shingle mold out of the way, you’ll be able to simply work the fascia (the vertical boards framing the outside of the eaves) free by hand. Due to their deteriorated state, they should come away easily. Don’t discard the old fascia just yet—it will come in handy for cutting your replacement materials.[4]
- Use your pry bar to loosen sections that have become stuck or jammed.[5]
- Keep a large waste bin or similar container nearby to dispose of all the rotten roofing materials together when you’re finished with your project.
-
4Remove the old soffit. The soffit is the wide horizontal board that encloses the underside of the eaves. Like the fascia, a decaying soffit should be soft enough to pull out manually. Grab the exposed edge of the board and give it a sharp tug downward to dislodge it.[6]
- Don’t be surprised if the soffit breaks apart while you’re attempting to pull it free. Waterlogged boards will often be soggy and prone to crumbling.
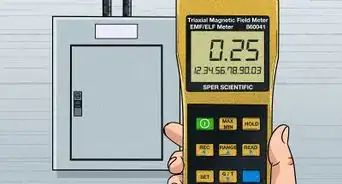
- Take caution when removing the old soffit. It’s not uncommon for birds, squirrels, and insects like bees and termites to build their nests behind these enclosures.[7]
-
5Cut away rotten or damaged rafters. Examine the condition of the rafter (the thick beam running the length of the overhang). Assuming it’s in good shape, you can leave it in place and install the new materials around it. If it shows signs of rotting, water damage, or other wear you’ll need to chop it out using a reciprocating saw.[8]
- To make the removal process easier, cut the rafter in 1–2 feet (0.30–0.61 m) sections, then pause to rip each section individually.
- If your eaves are upheld by multiple rafters, you'll need to remove and replace them one at a time in order to avoid compromising your roof's stability.


Cutting New Boards for the Eaves
-
1Gather your materials for the new eaves. Head down to your local home improvement center and shop for boards to replace the worn-out soffit and fascia. It’s important that the new boards match the old ones in terms of width and thickness—you can cut them to the right length later. It may help to bring along a small section of the old materials for reference.[9]
- In addition to wood, you also have the option of choosing a material like cellular PVC, fiber cement, aluminum, or galvanized steel for your new eaves. These materials will be stronger, longer-lasting, and more weather-resistant than ordinary boards.[10]
- Make sure you also pick up enough pressure-treated lumber to cut new shingle molds and rafters, if necessary.
-
2Cut new lumber for the rafters if needed. If your supports are in need of replacing, saw the new beam to match the old one. Remember to use only pressure-treated lumber for the rafters. It will hold up much better to moisture and stress.[11]
-
3Install the new rafters. Clamp the replacement beam to the wooden backboard at the rear of the eave enclosure to hold it in place. Fasten the rafter with 4" (10 cm) wood screws. When you've successfully replaced one rafter, it will be safe to begin removing the next one.[12]
- Since the rafters are a critical part of the eaves’ support structure, it will be necessary to make sure they're in good condition before you begin installing the new components for your eaves.
- Press on the newly-installed beam to double check that it’s solid and secure before moving on.
-
4Cut the new soffit. Using a section of the rotted soffit as a template, saw the replacement material to the right size. This can be done with a handsaw, though you’ll get the most precise and efficient results with a circular saw or table saw. Ideally, the soffit should be made up of only 1 or 2 boards to minimize leaking.
- If you don’t have enough intact soffit to serve as a template, measure the underside of the eaves from one side of the house to the other and mark the dimensions on the new board.
- The fewer pieces you use to fashion the soffit, the less chance there will be of water, insects, and other destructive forces finding their way in.
-
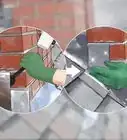
5Cut the replacement fascia. Trim the fascia boards to the correct length the same way you did the soffit. Be sure to cut the edges where the boards will meet to opposing 45 degree angles so they’ll fit together properly.[13]
- If your home’s eaves feature any unique angles or projections, it may be necessary to measure and mark these features on the fascia board prior to sawing to confirm that everything will line up the way it’s supposed to.
- Some materials, like aluminum or steel, may need to be measured and cut in-store by a home improvement specialist before you bring them home.


Installing and Protecting the New Materials
-
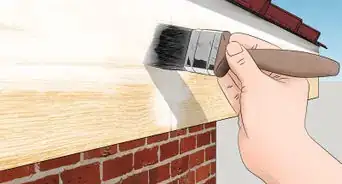
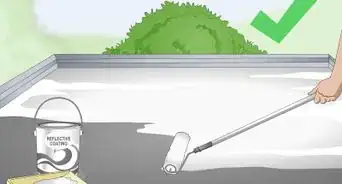
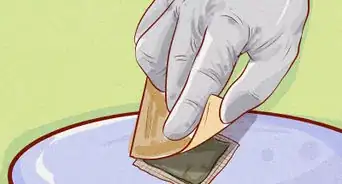
1Apply a coat of weatherproofing sealant to wood fascia and soffits. Before you put the new roofing components in place, you’ll want to make sure that they’ll be able to stand the test of time. The best way to do this is to treat them with a wax or resin finish. Brush the sealant onto both sides of your materials, then let them sit until they're dry to the touch.[14]
- It should only take 1-2 hours for the sealant to dry into a functional finish.
- Once it’s set into the wood, the sealant will help repel moisture, mold, grime, and other messes, preventing rotting in the future.
-
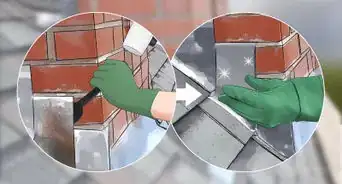
2Attach the new soffit. Align the soffit board with the underside of the eave so that its edges are flush with the rafter. Then, nail it into place. For a sturdier hold, sink a nail every 4–6 inches (10–15 cm).[15]
- 1.5 inches (3.8 cm) wood screws will also be strong enough to get the job done.
- It may help to have an assistant hold the board in place while you fasten it down.
-
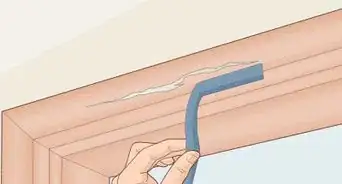
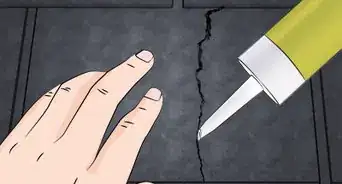
3Spread caulk around the edges of the soffit. Use a caulk gun to fill in any gaps, cracks, or crevices you happen to spot in the new soffit. This will provide further protection against water and insect-related damage. Allow the filler to harden before modifying the soffit in any way.[16]
- You can also use roofing cement or wood putty in place of traditional caulk.[17]
-
4Attach the new fascia. Position the replacement boards over the rafter and secure them using galvanized nails or 2.5 inches (6.4 cm) wood screws. Repeat this process for each section of the roof where the eaves are beginning to show signs of deterioration. Once the new fascia is in place, you can fill the nail holes and paint the boards to match the rest of your home’s trim.
- By the time you finish your project, your new overhang will be solid, watertight, and ready to stand up to a stiff downpour or a family of nesting squirrels.


Expert Q&A
Did you know you can get expert answers for this article?
Unlock expert answers by supporting wikiHow
-
QuestionCan I just cut straight into the eave?
 Barry ZakarBarry Zakar is a professional handyman and the founder of Little Red Truck Home Services based in the San Francisco Bay Area. With over ten years of experience, Barry specializes in a variety of carpentry projects. He is skilled at constructing decks, railings, fences, gates, and various pieces of furniture. Barry also holds his MBA from John F. Kennedy University.
HandymanYes, but you want to make sure you're cutting in at an angle. It'll be much easier to fit the replacement piece if you miter it.
Support wikiHow by unlocking this expert answer.
-
QuestionHow big are eaves?Barry ZakarBarry Zakar is a professional handyman and the founder of Little Red Truck Home Services based in the San Francisco Bay Area. With over ten years of experience, Barry specializes in a variety of carpentry projects. He is skilled at constructing decks, railings, fences, gates, and various pieces of furniture. Barry also holds his MBA from John F. Kennedy University.
HandymanThey're different on some buildings, but usually they're 2x6 boards. If you're replacing a piece and you aren't sure how big it is, cut it out and take it with you to the store.Support wikiHow by unlocking this expert answer.
-
QuestionWhich eaves typically need to be repalced?Barry ZakarBarry Zakar is a professional handyman and the founder of Little Red Truck Home Services based in the San Francisco Bay Area. With over ten years of experience, Barry specializes in a variety of carpentry projects. He is skilled at constructing decks, railings, fences, gates, and various pieces of furniture. Barry also holds his MBA from John F. Kennedy University.
HandymanI've noticed that vertical bar rafters tend to have a lot of problems. These are the ones at the edge of the roof that stick out in the front and back of the house. They're typically ornamental, but they just get absolutely destroyed by bad weather. Luckily, they're pretty easy to replace.Support wikiHow by unlocking this expert answer.
wikiHow Video: How to Repair Rotted Eaves
Warnings
- Should you discover any large nests or insect hives while replacing your home’s eaves, call an exterminator or pest control specialist.⧼thumbs_response⧽
- Always take the proper safety precautions anytime you’re operating automated saws and other power tools.⧼thumbs_response⧽
Things You'll Need
- Wooden soffit and fascia boards
- Cellular PVC, fiber cement, aluminum, or galvanized steel replacement materials (optional)
- Pressure-treated lumber
- Hammer
- Nails
- Electrical drill
- 1½” (3.8 cm) and 2½” (6.4 cm) wood screws (optional)
- Circular saw, table saw, or handsaw
- Utility knife
- Measuring tape or yard stick
- C-clamp
- Wax or resin weatherproofing sealant
- Ladder
- Work gloves


References
- ↑ https://homesteady.com/how-8747263-repair-dripping-eaves.html
- ↑ https://www.thisoldhouse.com/how-to/how-to-repair-rotted-soffit
- ↑ https://www.todayshomeowner.com/video/how-to-replace-damaged-eave-fascia-boards/
- ↑ https://homesteady.com/way-5783360-diy-dry-rot-wood-eaves.html
- ↑ https://www.taylormaderoofingllc.com/how-to-repair-a-rotted-soffit/
- ↑ https://www.taylormaderoofingllc.com/how-to-repair-a-rotted-soffit/
- ↑ https://www.thisoldhouse.com/how-to/how-to-repair-rotted-soffit
- ↑ Barry Zakar. Handyman. Expert Interview. 16 July 2020.
- ↑ Barry Zakar. Handyman. Expert Interview. 16 July 2020.
- ↑ https://www.todayshomeowner.com/video/how-to-replace-damaged-eave-fascia-boards/
- ↑ Barry Zakar. Handyman. Expert Interview. 16 July 2020.
- ↑ https://www.taylormaderoofingllc.com/how-to-repair-a-rotted-soffit/
- ↑ https://www.todayshomeowner.com/video/how-to-replace-damaged-eave-fascia-boards/
- ↑ https://www.thisoldhouse.com/how-to/how-to-repair-rotted-soffit
- ↑ https://www.thisoldhouse.com/how-to/how-to-repair-rotted-soffit
- ↑ https://www.todayshomeowner.com/video/how-to-replace-damaged-eave-fascia-boards/
- ↑ https://homesteady.com/how-8747263-repair-dripping-eaves.html
About This Article

Over time, weather and nesting animals can rot your home’s eaves, which are the overhanging edges of your roof. Fortunately, repairing rotten or weathered eaves is a relatively simple project. Your first step will be prying away the bottom and sides of the old eaves. Your new boards will have to match the old ones in terms of width and thickness, so when you go to your local home improvement center you may want to bring them a sample of your old eaves so they match. When you’re ready to install your new eaves, apply a weatherproof coating to the new pieces. Once the new eaves are ready, you can secure them using stainless steel nails. If there are any cracks and crevices, seal them up with caulk to keep water, animals, and insects out. To learn how to pick the best material for your eaves, keep reading!