X
wikiHow is a “wiki,” similar to Wikipedia, which means that many of our articles are co-written by multiple authors. To create this article, 15 people, some anonymous, worked to edit and improve it over time.
This article has been viewed 225,016 times.
Learn more...
A closet is often the most under appreciated room in a house - until you need one. Then the storage space it represents becomes a valuable asset. It does not take a professional to build a closet only a willingness to set aside some time and have access to both hand tools and basic power tools.
Steps
-
1Decide where to locate your closet. This can be the most difficult part of the process. The most logical place would be an alcove, the end of a hallway or on a wall without windows or doors to work around.
-
2Lay out the walls and doors. Whether it is a wall or walk-in closet will depend on the amount of room available to you.Advertisement
-
3Remove any base or ceiling trim and carpet from the area you have laid out for construction. Be careful not to break the trim, since you will want to reuse it.
-
4Install the framing, beginning with the base and top plate. Attach the base with deck screws to the floor and the top plate to the ceiling. Use 4-inch (10.2 cm) toggle bolts and construction adhesive.
- Nail or screw the end studs to side walls and to the top and base plates and rough in the door opening by nailing the studs to the top and bottom plates. Studs traditionally are on 16 inches (40.8 cm) spacing. Just use the spacing you have if width of your wall is greater than 16 inches (40.8 cm) but less than 24 inches (61.2 cm). Split the difference for better support of the sheathing if the width is greater than 24 inches (61.2 cm).
- Rough in the door framing. This will include trimmer studs on each side of the door. Dimensions are normally 6 feet (1.8 m), 10.5 inches (1.83 m x 26.7 cm) tall attached to the wall studs and a doubled 2 x 4-foot (5.1 X 10.2 cm) door header nailed to the door trimmer with the end nailed to the wall stud.
- Place short studs (called cripples) between the door header and ceiling plate. This will normally be centered on 16 inches (40.8 cm). The framing is complete.
-
5Hang .5-inch (1.27 cm) sheetrock or sheathing on the walls. Both sides of the framing use sheetrock screws. Cut sheetrock to size using a utility knife and a straight edge as a guide. Run the edge of sheathing to the roughed-in door openings.
- Score the sheetrock with a utility knife. Begin breaking the sheetrock off with hand pressure and then with a straight edge (along the back side of the sheetrock). The sheetrock should snap off in one piece if it is scored deep enough.
-
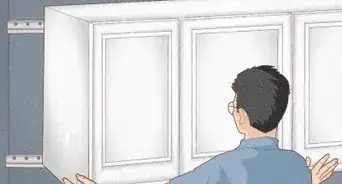
6Position the doors in the closet. How to do this will depend on the type of doors chosen.
- Insert the door into your rough opening if you are using a traditional prehung door (as for a walk-in-closet). Then, with a level, plumb the door using shims to keep it aligned. Install the trim supplied by the manufacturer around the door.
- The use of a bi-fold door requires that you first trim out the door opening. Use trim similar to the floor trim you salvaged or that matches the trim in the room. Hang the door in place and adjust to fit, following manufacturer's instructions.[1]
- Install the accessories, however elaborate or simple, that fit your needs.


Advertisement
Community Q&A
-
QuestionHow do I install sliding doors?
 Community AnswerInstall according to manufacturer's instructions. They're usually easy to follow.
 -
QuestionHow do I expand my closet space?
 Community AnswerMove the hanging rod up and then install another hanging rod below your clothes hanging on the top rod. You can also add shelves a few inches above the hanging rods to accommodate non-hanging items. Plastic totes are very good for placing on the floor. There are even shallow closet shelves that screw to the back or even front of the door.
 -
QuestionHow far between studs?
 Community Answer16" on-center or left edge to left edge. This translates to 14 1/2" actually between studs. However, if you know exactly where hanging rods will be going for 1 or 2-tier hanging then you may want a double stud there or blocking in between studs.
Advertisement
Warnings
- You will probably not need a building permit to install a closet. However, if you are adding electrical lighting or plugs, you may need an electrical permit which requires a licensed electrician to do the work. Check your local building codes.⧼thumbs_response⧽
- Make sure that there are no existing electrical lines or plumbing in the way before installing or drilling into any existing walls.[3]⧼thumbs_response⧽
Advertisement
Things You'll Need
- Framing hammer
- Pry bar
- Crosscut hand saw
- Electrical miter saw
- Power drill -- electrical or battery powered.
- Utility knife
- 4 foot (1.22 m) level
- 4 inch (10.2 cm) x 1/4 inch (.5 cm) toggle bolts
- 3 inch (7.6 cm) deck screws
- 16 P framing nails
- Construction adhesive
- 2 x 4 inch x 8 foot (2.4 m) (5.1 x 10.2 cm x 2.44 m) Douglas fir or pine for framing
- .5 inch x 8 foot (2.4 m) (1.3 cm x 2.44 m) sheetrock
- 1.5 inch (3.8 cm) sheetrock screws or nails
- Tape and embedment compound
- 3 inch (7.62 cm) putty knife


References
About This Article
Advertisement