This article was co-authored by Norman Raverty and by wikiHow staff writer, Amy Bobinger. Norman Raverty is the owner of San Mateo Handyman, a handyman service in the San Francisco Bay Area. With over 27 years of experience, Norman has expertise in all five of the general building trades (carpentry, ceramic tile, drywall, electrical, plumbing).
This article has been viewed 75,637 times.
Whether you play darts as a casual pastime or you’re a pro at hitting the bullseye, sooner or later one of your darts is going to miss. To avoid damaging your wall or bending your dart tips, it’s a good idea to hang your dartboard in a cabinet. Luckily, installing your own dartboard cabinet is easy.
Steps
Finding the Right Location for Your Cabinet
-
1Make sure there's at least 8 feet (2.4 m) between the board and throwing area. You'll need about 8 feet (2.4 m) between yourself and the board, plus additional space to account for your arm movements while you throw.
- Just in case a stray dart misses goes way off course, don't hang your dartboard cabinet near any valuable paintings or close to anything fragile.
-
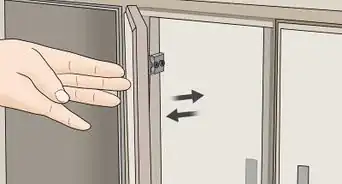
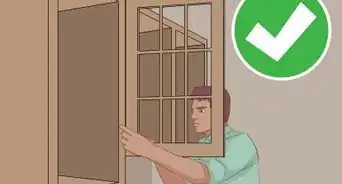
2Measure the wall to make sure the cabinet will fit when it's open. Don't just measure the width of your cabinet when it's closed, or else the doors might be obstructed when the cabinet is fully unfolded.Advertisement
-
3Measure a height of 5 feet 8 inches (1.73 m) for a regulation board. Regulation height for the bullseye of a dartboard is 5’8”, or 68 inches (1.7 m). If you're playing on a league or you just want to go by the official rules, hang your cabinet so your bullseye will be at this exact spot.
-
4Measure so that the bullseye is at eye level if you are just playing for fun. If you're not concerned with having a regulation board, you can adjust the cabinet to a height that will be comfortable for you. Centering the cabinet so the bullseye will be at about eye level.


Finding a Stud and Leveling the Cabinet
-
1Use a stud finder to locate the studs behind your walls. Slide the stud finder across the wall until it indicates that it has detected a stud. Once you've found the first stud, mark it with an X at the height you decided on for your bullseye.
-
2Locate the next stud. You'll need to anchor your cabinet in 2 studs to make sure it's secure. You can either use the stud finder again or you can measure 16 inches (41 cm) from the first spot, since that is the standard width between studs. Mark this spot with a pencil as well.[1]
-
3Use wall anchors to secure your dartboard if you can't find studs. If you don’t have a stud finder or if there are no studs where you want to hang your board, you will need to use wall anchors to attach your cabinet to the wall. These are plastic or metal pieces which you place into the wall so the screws have something to attach to. Depending on the style of anchor you choose, you may have to drill a hole first, or they may be self-drilling.[2]
-
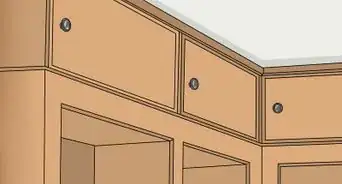
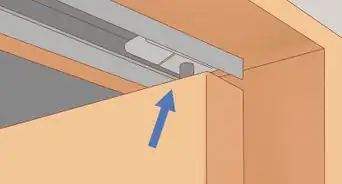
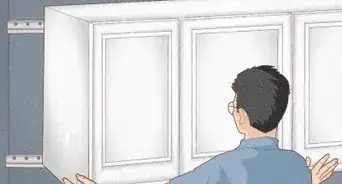
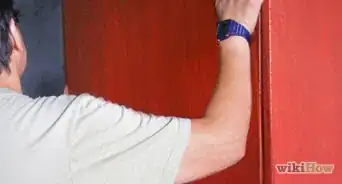
4Center the cabinet over your studs at the bullseye mark. Most cabinets are made so that the bullseye will be located at the center of the cabinet. If this is the case, the mark you made to indicate your dartboard's height will be the center of your cabinet. Center the cabinet, then use your pencil again to mark where the pre-drilled screw holes are located.
-
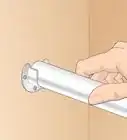
5Use a level to make sure the cabinet hangs straight. You can purchase a level at a hardware store, or you can download a levelling app on your smartphone. Simply place the level on the top of the cabinet and adjust the angle until the indicator on the level is in the middle.[3]
- If you are using a laser level, attach it to the wall and hang the cabinet so the top is parallel to the laser line.[4]


Mounting the Cabinet
-
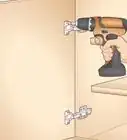
1Drill holes if your cabinet doesn't have them. Most dartboard cabinets come with pre-drilled holes for easy installation. In your cabinet, if your cabinet doesn’t have pre-drilled holes for the wall screws, you will need to drill 4 holes, one near each corner. Make sure the distance between the holes doesn't exceed 16 inches (41 cm) or you might not be able to anchor the cabinet in your studs.
-
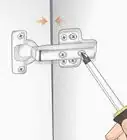
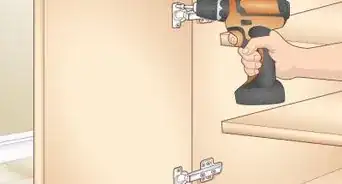
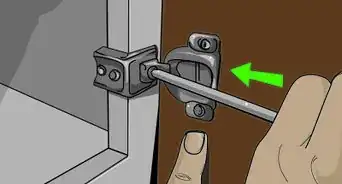
2Use screws to mount the cabinet to the studs in the walls. Most dartboard cabinets come with all of the hardware you will need to mount it. Use a cordless drill to secure the cabinet using the provided screws.
-
3Use a #8 screw if your cabinet doesn’t have screws with it. A #8 screw, also known as a 5⁄32 inch (4.0 mm), is a standard screw for installation projects. Look for one in about a 2” (51mm) length.[5]
-
4Adjust the cabinet as needed. After you hang your cabinet, check it again with the level and measure the height of the bullseye. If you need to make any adjustments, remove the screws, shift the cabinet until it's in the right location, then resecure the cabinet with the screws.


Things You’ll Need
- Dartboard cabinet and hardware
- Stud finder
- Pencil
- Wall anchors (optional)
- Drill/screwdriver
- 4 2” (51mm) #8 screws


References
- ↑ https://www.bhg.com/home-improvement/walls/how-to-use-a-stud-finder/
- ↑ http://www.popularmechanics.com/home/interior-projects/how-to/g1320/what-to-know-about-hollow-wall-anchors/
- ↑ https://www.familyhandyman.com/carpentry/plumb-bobs-and-levels-an-essential-guide/view-all/
- ↑ https://www.familyhandyman.com/tools/how-to-use-a-laser-level/view-all/
- ↑ https://www.bobvila.com/articles/how-to-choose-the-right-screw/#.Wl4rna6nGM8
About This Article

Before you hang your dartboard cabinet, make sure the wall is wide enough to fit the cabinet and that there's at least 8 feet of space between the throwing area and the wall. Once you've found a suitable wall, use a stud finder to locate the studs. Then, use a tape measure to measure a height of 5’8” on your wall. Use screws to mount the cabinet into the wall studs and a level to make sure the cabinet is even. Keep reading to learn how to choose the right location for your dartboard!