This article was co-authored by wikiHow Staff. Our trained team of editors and researchers validate articles for accuracy and comprehensiveness. wikiHow's Content Management Team carefully monitors the work from our editorial staff to ensure that each article is backed by trusted research and meets our high quality standards.
There are 10 references cited in this article, which can be found at the bottom of the page.
The wikiHow Video Team also followed the article's instructions and verified that they work.
This article has been viewed 54,357 times.
Learn more...
Whether you’re growing your own green beans or simply stocking up in the summer months, canning green beans is a great way to keep them fresh for years to come. As they’re a low acid food, green beans need to be canned with pressure. Although this may seem daunting at first, by cooking your green beans, preparing your jars, and using a pressure-canner properly, you’ll be able to can green beans easily.
Steps
Cooking the Green Beans
-
1Wash the green beans in cold water. Put the beans into a large bowl and fill it with cold water. Use your hands to swish the green beans around, before pouring out the water and repeating. Continue this process until the water is clear and the beans are clean. Strain the beans and toss them lightly to dry them.[1]
- If there are still flecks of dirt in the water, or you cannot get them completely clean, don’t worry too much. Blanching the beans will sterilize and remove any other impurities left on the green beans.
- If you choose to raw-pack your green beans, or can them without cooking them first, you will need to make sure the beans are completely clean.
-
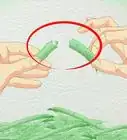
2Snap the end off the beans and break them into bite-sized pieces. Working methodically through each bean individually, pick it up and snap off the two ends. Throw the snapped ends into a scrap bowl, and break the beans into bite-sized pieces around 2 inches (5.1 cm) long. Put the broken beans into a new bowl and repeat until all of the beans have been destemmed.[2]
- Snapping, or “snitting” the green beans simply removes the tougher ends that won’t be tender and delicious once canned.
- The ends of your green beans can be used for compost or feed to animals if you don’t want to waste them.
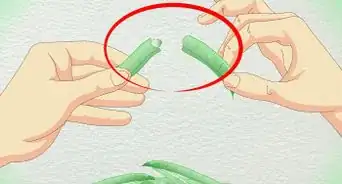
- If your beans have strings in them, you should remove them at this point as well. As you snap the ends off, pull down the length of the bean to get rid of the strings.
Advertisement -
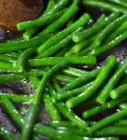
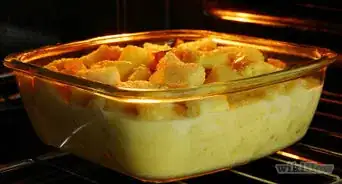
3Cook the green beans for 5 minutes in boiling water. Transfer the green beans to a large pot and cover them with cold water. Place the pot over a medium-high heat and bring it to a boil. Once the water begins to boil, set a timer to cook the green beans for 5 minutes, or until just cooked and tender.[3]
- Cooking the beans isn’t necessary, but it will allow you to get more beans into each jar when you can them.
- If you choose not to cook the beans, it is referred to as cold-packing or raw-packing. Make sure the green beans are clean when you put them in the jars and skip this step. Cold-packing still requires the rest of the processing needed in hot-packing your green beans.
-
4Strain the green beans, keeping the water they were cooked in. Once they have been given time to cook, take the green beans off the heat and strain them immediately into a bowl to keep the cooking water. In a different bowl, cover the green beans in cold water to stop the cooking process.[4]
- Return the water used to cook the green beans to a low heat, keeping it hot until you can the green beans.


Filling the Jars with Green Beans
-
1Sterilize the canning jars in boiling water. Bring a large pot of water to a boil and place each of your canning jars in it for 10 minutes. Use jar tongs or kitchen tongs to lift the jars out of the water, resting them upside down on a tea towel until they’re ready to be used.[5]
- If you have a big enough pot to boil all of the jars at once, you can also leave the jars in the water until you’re ready for them.
- Boiling the jars will sterilize them and remove anything on the inside that could rot and ruin your green beans.
- Make sure you use jars specifically designed for canning when canning green beans. As you are pressure-canning them, it is very important that they’re thick, strong, and can withstand heat.
- You'll need roughly 1 US pint (0.47 L) jar for every 1 ounce (28 g) of green beans that you have. Sterilize a few extra jars so that you have them ready if you need them. You can always return them to storage if you don't use them, but they'll need to be sterilized again before used to can anything else.
-
2Use hot water to sterilize the jar lids. Place the lids you’ll be using to seal the jars in a shallow bowl, spreading them out slightly. Pour over hot, but not boiling water, and leave them to sit for at least 10 minutes or until you are ready to use them.[6]
- Do not use boiling water when sterilizing the jar lids. The rubber seal that holds the lid in place may melt in boiling water, preventing your jars from sealing properly.
- You can also sterilize the jar rings with the same method, but as they will not come in contact with the beans and will be removed after the jars are sealed, this isn’t necessary.
-
3Fill the jars with green beans, leaving around 1 inch (2.5 cm) of headspace at the top. Use a jar funnel or work carefully with your hands to add green beans into each of your sterilized jars. Work one jar at a time, shaking the jars slightly as you add green beans to fill any gaps.[7]
- Pack the green beans tightly so as to not waste any space in the jars, and to stop you from using more jars than you need to.
-
4Add 1 teaspoon (5g) of canning salt to each jar. Once the jars are full of green beans, sprinkle approximately 1 teaspoon (5g) of canning salt over the beans. This will help keep the water the beans are canned in clear and make your overall finished product look much better in the long run.[8]
- The salt shouldn’t impact the flavor of the beans too much, but you can leave it out if you don’t have any or don’t want any added salt.
-
5Cover the beans with the remaining cooking water. Use a ladle or something similar to lift the hot cooking water out of the pot and pour it over the green beans. Pour the water in carefully, making sure to maintain the same 1 inch (2.5 cm) of headspace left when adding the green beans.[9]
- Keep the jars warm as you work to prevent them from cracking when you pour in the hot water. Take the jars out of the boiling water used to sterilize them only as you need them.
- Don’t worry if the beans aren’t quite covered by the bean water. They will shrink slightly and move around as they are pressure-canned.
-
6Scrape down the sides to remove any air bubbles. Use a chopstick, wooden skewer, or another non-metallic object to scrape down the sides of the jars and push the beans towards the center. This will agitate any air bubbles left in the jars and push them towards the surface.[10]
- Metallic objects, such as knives or metal skewers, will scratch the glass and may weaken it. Use plastic or wooden tools to prevent damage to your jars.
-
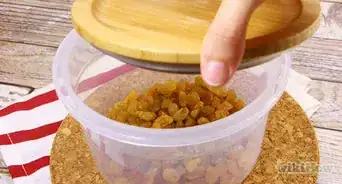
7Wipe down the jars and attach the lids. Use a clean cloth or towel to wipe down the rim of the jars, removing any stray salt or water. Lift a sterilized lid out of the water and place it over the jar, before securing it tightly in place with a jar ring. Repeat for each jar until all of them are cleaned and sealed.[11]
- Just before tightening the lid, make sure that there is adequate headspace in each jar. This is the last chance you will have to check before canning the beans.


Pressure-Canning Your Green Beans
-
1Place the jars into a pressure canner and add 3 US quarts (2.8 L) of water. With the wire rack sitting at the base of your pressure-canner, sit each of the sealed jars in your pressure canner. Pour over 3 US quarts (2.8 L) of water to fill the bottom of the canner.[12]
- The amount of water needed may vary between different pressure-canners. Always follow the manufacturer’s instructions for your specific pressure-canner for the best results.
- The jars don't need to be submerged in the water. The water is used to create steam that will build up the pressure needed to can your jars.
-
2Lock the lid of the pressure-canner in place. Sit the lid of the pressure-canner of the top and rotate it until it locks in place. Most canners will have a series of arrows or markings along the edge to indicate how to rotate the lid in order to lock it in place. Follow the manufacturer’s instructions for your specific canner if you’re uncertain.[13]
- Make sure the lid is locked in place securely, as it will be holding in a lot of pressure. If the lid isn’t on properly, the pressure-canner may explode.
-
3Put the sealed canner over a high heat until it is constantly steaming. With the lid locked in place, bring the pressure-canner to your stovetop and set it over a high heat. After around 10 minutes, the water inside the canner should have begun to boil and turn into steam. Wait until there is a constant flow of steam coming out of the valve on the top before proceeding.[14]
- Make sure that the valves on the pressure-canner are open and there are no weights on it at this point. You are only heating the canner at this point, not sealing anything quite yet.
-
4Add a 10 pounds (4.5 kg) weight to the canner and cook for 20 minutes. Once the canner has heated up and is produce steam, you can begin building pressure inside it. Place the 10 pounds (4.5 kg) on the top of your canner, or set the dial gauge on the canner to 11 to build up the pressure. Start a timer and leave the green beans to cook for 20 minutes.[15]
- The way you specific pressure will vary between different pressure-canners. Follow the manufacturer’s guidelines for your specific canner in order to be safe.
- The amount of pressure needed will increase if you’re at a higher altitude. If you’re more than 1,000 feet (300 m) above sea level, use a 15 pounds (6.8 kg) weight instead.
-
5Turn off the heat and leave the canner to cool. Without moving or adjusting the canner in any way, turn the heat off and leave the canner to cool down. Give the canner at least 45 minutes to begin to cool down and reduce the pressure.[16]
- If you try and move the canner at this point, there is a chance that steam will be released very quickly, which may harm you. Give the canner plenty of time to cool down before touching it.
-
6Take the lid off the pressure-canner and let the jars to cool. Carefully rotate the lid of the pressure-canner to unlock it. Lift it up, raising the side away from you first to vent the steam, before lifting the lid off entirely. Leave the jars in the open canner, or lift them out with jar tongs, and leave them to cool for at least 12 hours.[17]
- For extra safety, stand slightly back from the pressure-canner as you lift the lid away. Any steam inside will be very hot, so you don’t want it hitting you in the face.
-
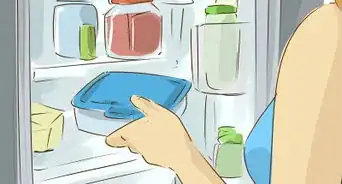
7Store the jars in your pantry for up to 3 to 5 years. Once the jars have been given time to cool, write the date on the lid and store them in your pantry until they’re ready to be used. Green beans should easily last 3 to 5 years if kept in a cool, dry place out of direct sunlight. Once opened, store the green beans in the fridge and use within 1 week.[18]
- Before storing them, press down on the lid to make sure your green beans are properly sealed. If the lid moves at all, you will need to pour the green beans into a sterilized jar. Use a new lid and repeat the process to try and seal the jar again.
- You can remove the jar rings before you put the beans in storage. If you choose not to, loosen the rings slightly so that they don’t rust in place.


Community Q&A
-
QuestionHow do I can string beans without a pressure cooker?
 Community AnswerNon-acidic items MUST be pressure canned. If you were pickling them in a relatively strong acid, then boiling is enough, but for regular green beans, you must pressure can.
 -
QuestionHow can I make my smoothie less frothy?
 Community AnswerAdd a tablespoon of honey for less froth and foam to form on the smoothie.
 -
QuestionHow can I shell green beans and add them to soup?
 Community AnswerRemove the beans from the shells and cook them. Then, add them to whatever soup you desire.
Warnings
- Be very careful when moving the hot jars or interacting with the pressure-canner while it’s still hot. Steam is hotter than boiling water, so it can easily cause burns if you’re not careful.⧼thumbs_response⧽
Things You’ll Need
- Large bowls
- Pot
- Strainer or slotted spoon
- Canning jars
- Jar lids
- Jar rings
- Canning salt
- Jar funnel
- Jar tongs or kitchen tongs
- Rubber spatula, chopsticks, or something similar
- Cloth
- Pressure canner


References
- ↑ https://morningchores.com/canning-green-beans/
- ↑ https://www.simplycanning.com/canning-green-beans.html
- ↑ https://youtu.be/iajHOJOW0Ec?t=52
- ↑ https://www.simplycanning.com/canning-green-beans.html
- ↑ https://www.simplycanning.com/pressure-canning.html
- ↑ https://www.simplycanning.com/pressure-canning.html
- ↑ https://youtu.be/iajHOJOW0Ec?t=69
- ↑ https://morningchores.com/canning-green-beans/
- ↑ https://youtu.be/iajHOJOW0Ec?t=80
- ↑ https://youtu.be/dbvbeIXUqWg?t=87
- ↑ https://morningchores.com/canning-green-beans/
- ↑ https://morningchores.com/canning-green-beans/
- ↑ https://www.simplycanning.com/pressure-canning.html
- ↑ https://www.simplycanning.com/pressure-canning.html
- ↑ https://www.simplycanning.com/canning-green-beans.html
- ↑ https://youtu.be/iajHOJOW0Ec?t=139
- ↑ https://youtu.be/dbvbeIXUqWg?t=298
- ↑ https://www.stilltasty.com/fooditems/index/16474
About This Article

To can green beans, start by washing them, breaking them into small pieces, and boiling them for 5 minutes. Then, transfer the green beans to some sterilized glass jars, leaving 1 inch at the top of each jar. Next, add 1 teaspoon of canning salt to each jar, and cover the green beans with the water you boiled them in earlier. Finally, put the lids on the jars and seal them using a pressure canner. To learn how to use a pressure canner, scroll down!