This article was co-authored by wikiHow Staff. Our trained team of editors and researchers validate articles for accuracy and comprehensiveness. wikiHow's Content Management Team carefully monitors the work from our editorial staff to ensure that each article is backed by trusted research and meets our high quality standards.
There are 7 references cited in this article, which can be found at the bottom of the page.
This article has been viewed 28,983 times.
Learn more...
Whether you plan on making large faces or giving more definition to small figures, learning the techniques for making detailed work is important. Raw wood needs to be stripped and smoothed out before it can be carved. Then, cut away the excess wood with a variety of common wood carving tools, including chisels, V-tools, and knives. Once you have the face's basic shape, add details like hair strands and wrinkles to give your face additional detail and depth.
Steps
Preparing Raw Wood for Carving
-
1Find a strong piece of wood that is the right size for your project. You can make a face out of any piece of wood as long as you can find a piece big enough for your project. Some types of wood are more commonly used than others. Soft, inexpensive pieces of wood without much grain are good for beginners. Once you get more used to carving, you may wish to use stronger, sturdier, and more colorful wood.
- Basswood and butternut are a few types commonly used by beginners. You can often find them sold in premade blocks.
- Cottonwood, black walnut, and oak are a few options popular with experienced carvers. These woods are sturdier, have a noticeable grain, and are often used in commercial products.
- Woods come in various shapes and sizes, and qualities. With the right tools, you can even carve a face into an unrefined piece of lumber. You may find wood blocks easier to work with at first as you practice carving small details like eyes and hair.
-
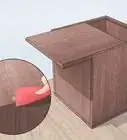
2Clamp the wood in place or hold it in place. Larger pieces of wood need to be held down to a flat surface so they don't slide around as you work. Try pinning them down to a workbench with a store-bought clamp or vice. If you are going to work on a small piece of wood, use a clamp when smoothing it out. You can then hold it in your hand as you carve the face.[1]
- Be careful with smaller pieces of wood. Keep a firm grip on the block and make sure the carving tools you use aren't close to your body.
Advertisement -
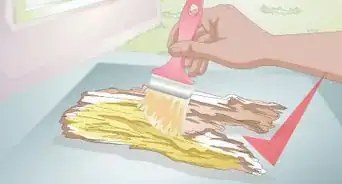
3Strip the wood with a drawknife if your wood has outer bark. To use the drawknife, lay the wood on a flat surface. Then, place the knife at the end of the wood and while gripping the 2 handles, pull the knife towards you to gradually scrape away the bark. Smaller, lighter pieces of wood must be clamped while you work to avoid accidents.[2]
- You can get a drawknife online or at most tool supply stores.
- If you wish to avoid refining a piece of wood, look for premade wood blocks. They are available at most craft and hobby stores and after you take them home, you can begin carving them right away.
-
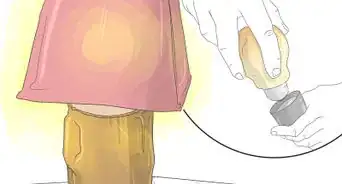
4Slice off the soft sapwood underneath the bark with an axe. Sapwood is usually a light white or tan color. Because it is softer than the wood underneath it, it needs to be removed. Starting at 1 end of the wood, chop down into the softwood. Position the axe blade almost horizontal against the wood, then stroke it towards the opposite end of the wood piece to shave off the parts you need to remove.[3]
- Most pieces of wood will have a thin ring of sapwood. If you look at the cut end, you may be able to see where the darker, harder heartwood begins. Wood from younger trees may have more sapwood to remove.
- If you don't have an axe, try using a carving knife or another sharp implement
-
5Check the wood for holes and other features that may affect your work. Every piece of wood is unique, so you owe it to yourself to give the wood a good inspection. Find out what features speak to you and decide how you will incorporate them into your carving. Holes, knots, and bumps are a few features that look more unique and natural when incorporated into carvings.[4]
- For example, insect holes and discolorations can make a face look rustic. The face doesn't have to be perfect. These imperfections may end up making your carving more endearing.
- You can try incorporating rough spots into a beard or nose, for example, giving these features texture and making them more attention-grabbing.


Crafting Facial Features
-
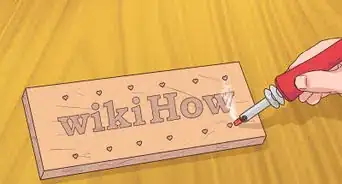
1Draw lines to indicate the face's center and hairline. Don't worry, you will end up shaving off these lines as you go. Choose which side of the wood you will carve into the face. In the center of the piece of wood, use a permanent marker to draw a line from the hairline to the chin. Finish by making a dotted line from side to side across the nose and hairline.[5]
- Even professionals use these lines for guidance. Keep in mind that they are estimates. Your carving will evolve as you cut away the wood.
- If you're carving a block of wood, consider making 1 of the corner edges your centerline. Carving the facial features out of a sharp edge is easier than doing it on a flat surface.
- Keep your marker handy, especially if you're a beginner. Use it when necessary to outline features before carving them. This can be handy for cutting small details like eyes.
-
2Make notches below the brow and the bottom of the nose. For a face carving with no body, a simple way to outline the nose is by placing the brow notch ⅓ of the way down the centerline and the nose bottom ⅔ of the way down. On each spot, make a V-shaped cut with a carving knife or hammer and chisel. Do this by cutting down diagonally, then meeting the first cut with a second cut from the opposite side, forming the letter V.[6]
- Plan on making the notches about ⅓ of the width you want the finished face to be.
- Start small with the V-cuts. Repeat the cuts and scrape away the excess wood to widen the notches.
- A carving knife is good for small blocks of wood. When carving larger pieces, you may find a hammer and chisel to be more effective.
-
3Carve around the nose with a knife to finish outlining it. Make small, diagonal cuts up from the ends of the bottom notch. Extend these cuts to about the halfway point between the centerline and where you plan on the side of the face beginning. Then, cut diagonally back towards the center of the nose and up to the brow notch.[7]
- Use a carving knife or gouge to remove the excess wood around and along the nose. Shave away wood between the nose and side of the face to add detail like cheeks.
- Shaping features correctly can be a little tricky until you are familiar with facial proportions. Take some time to observe people and pictures to get an accurate idea of the how the nose should look.
- Work slowly. You can always remove excess wood, but you can't reverse mistakes. Any mistakes you make need to be covered up, such as by deepening or evening out cuts.
-
4Create the mouth by outlining the lips with a V-tool. Position the mouth about ⅓ of the way between the nose and chin. Tracing this part with a marker is often very helpful. When you're ready, use a V-tool or gouge to cut directly into the lines you traced. Then, use a knife to shave away the excess wood around the mouth to add definition to the lips and chin.[8]
- A lot of wood carvers make faces with thick mustaches. Mustaches are often way easier to plan and carve than lips. The lines for the mustache usually start beside the nostrils, curve down to the top of the chin, then come back up to meet above the top lip.
- A V-tool is a handy tool used to make quick V-cuts, giving facial features plenty of immediate definition. They come in a variety of sizes and can be found online or at some craft supply stores. If you don't have one, you can also continue using a knife or chisel.
-
5Smooth out the eye sockets and outline the eyes with a V-tool. Before beginning the eye outlines, flatten out the area around the nose top and brow notch as needed with a carving knife. Then, begin the eyes right beside the bridge of the nose. Make 2 curving lines to create almond-shaped eyes that end ⅔ of the way towards the face's side. Finish the design by carving a circle in each eye to create the pupils.[9]
- You can add definition to this area by adding a few extra lines. For instance, use the V-tool to make another line below the lower edge of the eye, defining the lower eyelid.
-
6Make notches in the side of the wood for ears if needed. Turn the wood block over on its side and make V-cuts with a V-tool to outline the ears. Keep these cuts level with the eyes and the bottom of the nose. A rule of thumb for realistic ears is making them proportionate to the nose, so use the original nose notches you made as a guideline.[10]
- Remember that when people look at the face from the front, they only see the front edge of each earlobe. A couple of notches is enough to create the ear shape. You don't need to spend lots of time making detailed ears.
- Some wood carvers may forgo the ears or choose to cover them with long hair. If this is part of your design, you can leave the ears off without a problem.


Detailing the Face
-
1Carve lines inside the mouth and on facial hair to add detail. Depending on your design, the amount of detail work you need to do to the lower part of the face may vary. You can use the V-tool to trace a line across the mouth, differentiating the lips. If your carving has a beard or mustache, use the V-tool to add volume by carving lines running from the nose and mouth down towards the chin.[11]
- Smooth out the chin area as needed before adding the fine detail. For example, ensure the lower chin and beard area is beneath the mustache. Shave wood from the lower area before adding fine details.
-
2Round the edges off the top of the wood to form the head. When rounding out the shape of the face, keep in mind your plans for the hair. Measure out how much wood you need to leave above the hairline to carve whatever hairstyle you plan on giving the face. Using a knife or chisel, gradually cut away the excess wood from the top of your piece until it is about level with the ears.[12]
-
3Cut lines in the hair area with a V-tool to give it depth. Creating hair is similar to detailing beards and mustaches. The first step is to continue removing excess wood until you have a general shape for the hairstyle. Then, use your carving tools to make a series of small, vertical lines running from the head to the top of the hair, forming a few individual hair strands.[13]
- The hair does not need to be super long or detailed. You can add a few lines above the hairline to indicate that the hair exists, or you can work all the way up to the top of your piece of wood.
- You can add lines around the ears and down the side of the wood block to indicate long hair.
-
4Finish the face with smaller details like wrinkles and eyebrows. Check over your piece to see where you need to deepen existing lines and add more details. Scrape away any excess wood as needed with a knife or chisel, then use a V-tool or gouge to create smaller lines. For example, add small marks around the eyes and wavy lines in the forehead to indicate age.[14]
- Eyebrows are done similarly to other types of hair. Indicate them by using the V-tool to carve a few lines up from the eye.
- Check over your whole piece before you finish. Look for any spots where you can improve the face's definition. You may need to go over it a few times before it looks the way you envisioned.
-
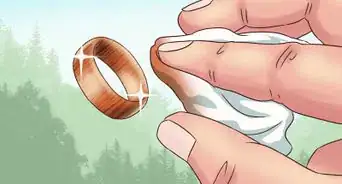
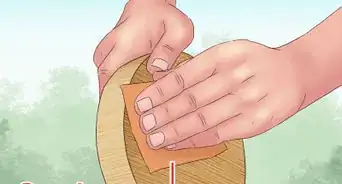
5Sand the wood smooth if you want to eliminate rough edges. Some people like the rough look of a finished wood carving, so sanding isn't an obligation. If you choose to sand it, get a piece of 220-grit sandpaper and lightly rub it down. This will remove splinters so you don't have to worry about pricking your fingers as you enjoy your finished piece.[15]
- V-tools and gouges can leave some sharp edges, so pay attention to the areas you cut with them. Wear off sharp edges around the cuts to give the face a softer, more natural look.


Community Q&A
-
QuestionHow do you sand the wood?
 TonyCommunity AnswerGet some pieces of wood and some sanding pieces, you can find them at good hardware stores. Take the strips and gently rub them across any rough spots, or ridges to smooth them out. You can also use electric wood sanders, if needed.
Warnings
- Using sharp carving tools such as knives and saws can be dangerous. Wear a glove to protect your hand from sharp edges.⧼thumbs_response⧽
Things You'll Need
- Wood log or block
- Carving knife or hammer and chisel
- V-tools
- Gouges
- 220-grit sandpaper
- Clamp
- Drawknife for raw wood
- Axe for raw wood
- Hammer
- Chisel


References
- ↑ http://www.thewoodcarverscabin.com/workshop/how-to-carve-a-wood-spirit/
- ↑ http://www.thewoodcarverscabin.com/workshop/how-to-carve-a-wood-spirit/
- ↑ http://www.thewoodcarverscabin.com/workshop/how-to-carve-a-wood-spirit/
- ↑ http://www.thewoodcarverscabin.com/workshop/how-to-carve-a-wood-spirit/
- ↑ http://www.carvingmagazine.com/wood-carving/projects/27-carving-a-bark-woodspirit
- ↑ https://www.youtube.com/watch?v=yx2XFXzY9wg&feature=youtu.be&t=220
- ↑ https://www.youtube.com/watch?v=VinOD6g7xEc&feature=youtu.be&t=304
- ↑ https://www.youtube.com/watch?v=yx2XFXzY9wg&feature=youtu.be&t=317
- ↑ http://www.carvingmagazine.com/wood-carving/projects/27-carving-a-bark-woodspirit
- ↑ https://www.youtube.com/watch?v=aYLvYlBpdRw&feature=youtu.be&t=611
- ↑ http://www.carvingmagazine.com/wood-carving/projects/27-carving-a-bark-woodspirit
- ↑ https://www.youtube.com/watch?v=aYLvYlBpdRw&feature=youtu.be&t=795
- ↑ http://www.carvingmagazine.com/wood-carving/projects/27-carving-a-bark-woodspirit
- ↑ http://www.carvingmagazine.com/wood-carving/projects/27-carving-a-bark-woodspirit
- ↑ http://www.carvingmagazine.com/wood-carving/projects/27-carving-a-bark-woodspirit
About This Article