This article was co-authored by wikiHow Staff. Our trained team of editors and researchers validate articles for accuracy and comprehensiveness. wikiHow's Content Management Team carefully monitors the work from our editorial staff to ensure that each article is backed by trusted research and meets our high quality standards.
This article has been viewed 146,118 times.
Learn more...
A hand-crafted wooden ring is a rustic yet regal accessory that makes a bold statement, and only takes a few dollars to create. To fashion your own wooden rings, all you need is a block of dense scrap wood, along with access to a drill press, vice, and Dremel tool or automated belt sander. After marking and drilling a hole in your raw materials using one of your own rings as a guide, you'll gradually sand the wood until it begins to take shape. Then, follow up with one more light sanding to bevel the edges and work out any remaining rough spots. Finish by applying a coat of beeswax or a natural oil to protect the wood from damage and impart a smooth, polished luster.
Steps
Cutting the Wood Blank
-
1Choose a strong, dense wood. Since the finished ring needs to be fairly thin, it’s important to pick out a type of wood that can hold up to intensive sawing, drilling, and sanding. Rich species African Padauk, mahogany, cocobolo and Brazilian walnut are good choices for this sort of project. As a general rule, the darker the color, the more resilient the wood will be.
- Softer woods are more likely to crack or splinter during the shaping process.
- Look for sample wood billets at local stores that specialize in home improvement and woodworking. A large piece of scrap wood will typically only cost you a few dollars—if you’re lucky, you might even be able to find some for free.[1]
-
2Mark a 1⅜” (3.5 cm) square on the block. Measure 1⅜” (3.5 cm) from the end of the scrap wood, then draw a line straight down the width with a pencil. This line indicates where you’ll be cutting the square blank that will serve as the raw material for your ring.[2]
- If the piece of scrap wood you’re using is larger than 1⅜” (3.5 cm), it may be necessary to measure and mark both vertically and horizontally.
Advertisement -
3Saw the blank off the block. Use a bandsaw or circular saw to cut along the line you just drew. Be sure to saw the wood across the grain, not with it. Otherwise, your ring will be structurally unsound and may break before you’re finished. When you’re done, you’ll be left with a flat, slender square similar in appearance to a drink coaster.
- This square block of wood is commonly referred to as a "blank." You'll transform the blank to a finished ring through repeated sanding and shaping.
- If you don’t have access to a power saw, you can also do it the old fashioned way using a handsaw, though this will require more time and labor due to the density of the wood.
-
4Mark the blank where the finger hole will go. Take your pencil or a felt-tipped marker and scribble a small, bold dot at the center of the wooden square. This is where you’ll place the tip of the drill bit to carve out the ring’s finger hole.
- Don’t worry about getting the placement just right—you’ll be removing a lot of excess material from the outer edges, so you’ll have plenty of room for error.


Drilling the Finger Hole
-
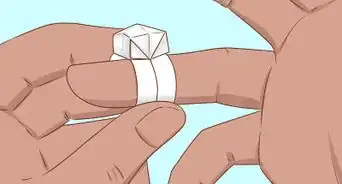
1Select a drill bit slightly narrower than your ring finger. You’ll get the best results using a wood bore or spade bit with a flared tip. Compare the width of the bit with the diameter of your ring finger for reference. It should be just slightly narrower than your finger.[3]
- The pointed tip of the drill bit will mark the placement of the finger hole, while the angled corners bore out the outer edges of the ring.
- To be certain that the ring will come out the right size, take one of your own rings and slide the bit inside. It should be able to fit without touching.
-
2Secure the blank in a vice or C-clamp. Situate the wood widthwise so that the dot you made to mark the finger hole is facing upwards, then twist the hand crank or dial clockwise to tighten the clamps. This will help hold the blank in place so you can concentrate on drilling.
- If you don't have access to a vice or C-clamp, try using a pair of pliers to grip the outermost edge of the wood.[4]
- Under no circumstances should you attempt to hold the blank by hand.
-
3Drill halfway through the blank. Position the tip of the bit over the dot in the center of the wood and turn on the drill. Apply a modest amount of pressure—you don’t want to drill all the way through just yet. Stop drilling when you’ve opened up a small hole with a shallow circle carved around it.[5]
- Drilling straight through a piece of wood with a spade bit can result in splintering.
-
4Turn the blank over and finish drilling the hole. Remove the blank from the vice or clamp, flip it over, and resecure it. Double check that the drill bit tip is aligned with the hole. Then, repeat the drilling process from the opposite side, guiding the drill steadily until it bores the rest of the way through.[6]
- By drilling halfway through the blank at a time, you can minimize the risk of chipping or breaking your materials.
-
5Sand the inside of the finger hole. Switch on your Dremel tool and insert the rotary head into the hole to buff the surface that will rest against your finger. You can also touch it up with a folded square of sandpaper. The inner face should be totally smooth, with no visible points or edges that could scratch you.
- If you take the manual approach, start with a medium-grit sandpaper (around 80 grit) and follow it up with a few passes with a high-grit one (100-120 grit) to get the most seamless texture.
- Hold off on testing the ring’s fit until you’ve sanded it thoroughly. Being impatient to try it on is a good way to get splinters!


Sanding and Shaping the Ring
-
1Draw a ring shape around the circumference of the hole. Grab your pencil or marker and free-hand a circle roughly 2-3mm larger than the inside edge of the ring. Together, the two circles will determine the ring’s thickness. Don’t worry about making this circle too perfect, as you’ll be sanding it into the proper shape later on.[7]
- For more precise dimensions, try tracing with the aid of a scribing compass.
- Due to the risk of breakage, it’s not recommended that you go any thinner than about 2mm.
-
2Cut off the squared corners of the blank. Draw a short line across each corner where it intersects with the edge of the outer circle. Then, clamp the ring to your work surface and use a pull saw to cut off the corners. If you have a jig that can secure little pieces like the blank, you could trim the corners with a band saw or table saw. This will leave the blank with a rough octagonal shape.
- Measure, mark, and saw the corners carefully to avoid cutting into the body of the ring.
- Wear safety goggles, make sure the ring is secure in the clamp or jig, and be really careful when cutting off the corners of the blank.
-
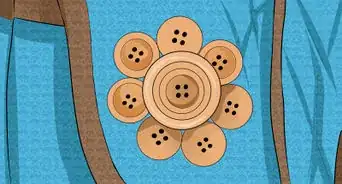
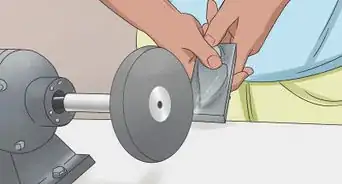
3Sand the ring into its finished shape. Hold the outer edge of the blank lightly against the Dremel tool or belt sander. Rotate the wood gradually to ensure that the band turns out as even and symmetrical as possible. Continue sanding down the blank little by little, using the circular outline as a guide. Be careful not to bear down too hard—remember, you can always sand off more if needed, but you can’t put it back on.[8]
- Work carefully and be patient. Shaping is the most time-consuming part of the process, and it may take a little while for you to end up with a ring you’re happy with.


Finishing the Ring
-
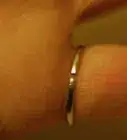
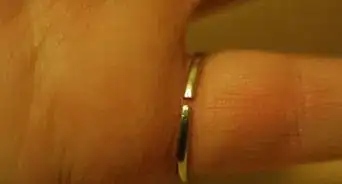
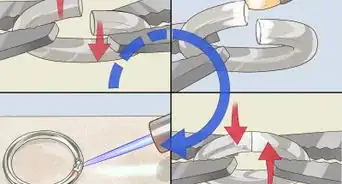
1Bevel the edges of the ring. Once you’re satisfied with the basic shape of your ring, tilt it at a 30-45 degree angle and press it gently into the sander or Dremel. Rotate the ring until you’ve sanded down the entire circumference, then turn it over and smooth the opposite side. Once again, be careful not to remove too much wood from the edges of the ring.[9]
- Doing your sanding by hand will offer you greater control over how much material you’re taking off if you’re concerned about damaging the ring after all the hard work you’ve put into it.
- Beveling wears down the squared corners, making the ring more comfortable to slide on and off.
-
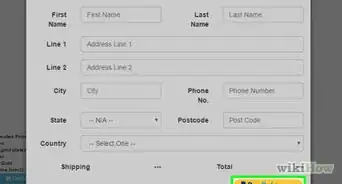
2Heat temper the ring to strengthen the wood (optional). While it’s not a necessity, a few quick passes with a heating gun can provide added durability and a more customized fit. Set the ring on a heat-safe surface and position the nozzle of the gun 6 inches (15 cm) above it. Wave the gun back and forth slowly until the wood just begin to smoke or darken around the edges.[10]
- Exposure to intense heat will cause the fibers in the wood to draw up, making them stronger.
-
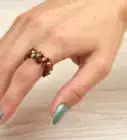
3Apply a coat of oil or wax to preserve the wood finish. Dab a small amount of beeswax or linseed, walnut, or tung oil onto a clean cloth and rub it over the completed ring inside and out. Wipe off any excess oil or wax and give the finish a few minutes to dry before trying on your new ring. Once it’s been treated, you’ll be able to wear it fearlessly in virtually any set of conditions.[11]
- Waxes and oils act as a natural buffer against dirt, moisture, and scratches, and will keep your ring from cracking or splitting over time.
- No need to worry if you’re unable to track down a fancy finish—the natural oils secreted by your skin will coat the ring with enough wear.[12]


Community Q&A
-
QuestionIs it possible to do this without a machine?
 SylghoulsTop AnswererSure, it's possible to whittle this project using a pocketknife instead of the drill bit in Part 2, and using sandpaper instead of a Dremel tool. Just be advised that it may take considerably longer this way, so you will need to be patient.
 -
QuestionHow thick should the wood be?
 Luc1dCommunity AnswerThat depends on how thick you want your ring to be. Probably 5-7mm is best for a ring but you could make it thicker or thinner to suit you.
Warnings
- Steer clear of softwoods like pine, spruce, and cedar. The grain in these types of woods is so weak that you’re unlikely to even get past the drilling phase without breaking them.⧼thumbs_response⧽
- Be extremely careful while operating power saws, belt sanders, and other automated tools. Even a small slip has the potential to result in serious injury.⧼thumbs_response⧽
- Take your time. If you damage your materials or end up with a ring that's the wrong size, you'll have no choice but to start over from scratch.⧼thumbs_response⧽
Things You'll Need
- Scrap hardwood
- Band saw, circular saw, or pull saw
- Electric drill or drill press
- 5/8"-3/4" wood bit or spade bit
- Clamps
- Belt sander or Dremel tool
- Medium- to high-grit sandpaper
- Woodworking wax or oil (for finishing)
- Tape measure or ruler
- Pencil or felt-tipped marker


References
- ↑ https://wolfandiron.com/make-wooden-wedding-ring/
- ↑ https://wolfandiron.com/make-wooden-wedding-ring/
- ↑ https://makezine.com/projects/use-your-drill-press-to-carve-a-wooden-ring/
- ↑ https://www.apartmenttherapy.com/four-ideas-for-making-clamps-d-107603
- ↑ https://wolfandiron.com/make-wooden-wedding-ring/
- ↑ https://wolfandiron.com/make-wooden-wedding-ring/
- ↑ https://woodgears.ca/pantograph/rings.html
- ↑ https://wolfandiron.com/make-wooden-wedding-ring/
- ↑ https://www.youtube.com/watch?v=U1XwQt86mi8&feature=youtu.be&t=194
About This Article

To make a wooden ring, start by cutting out a square piece of strong, dense wood, like mahogany or Brazilian walnut. Then, mark a point at the center of the wooden square, and secure the square in a vice or a C-clamp. Next, drill through the square at the point you marked using a drill bit that's slightly narrower than your ring finger, and draw a ring shape around the hole. Finally, cut off the corners of the wooden square, and sand the edges of the ring until it's round and smooth. To learn how to heat temper and seal your wooden ring, scroll down!