X
wikiHow is a “wiki,” similar to Wikipedia, which means that many of our articles are co-written by multiple authors. To create this article, volunteer authors worked to edit and improve it over time.
This article has been viewed 70,467 times.
Learn more...
Soldering is the process of heating metals and permanently binding them through the use of an added solder. Whether you need to use this technique for jewelry making or a number of other household projects, soldering jump rings is a common technique for do-it-yourself enthusiasts. Read the following article to learn how to solder jump rings for your at-home projects.
Steps
-
1Select extra-easy solder temperament.
-
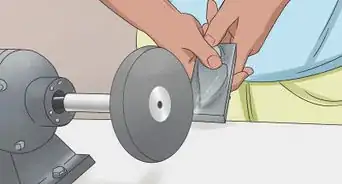
2There is only one temperament of solder that requires a lower heat (called low-temperature solder). Jump rings, therefore, do not require a solder that melts at a very high temperature.
- Cut extra-easy solder into very small chips using tin snips that do not exceed .03 inch (1 mm) squares.
Advertisement -
3Place all cut solder into a designated container and do not confuse or mix it with other varieties of solder.
-
4Open the jump ring with a set of pliers using needle-nose pliers if the ring is small.[1]
-
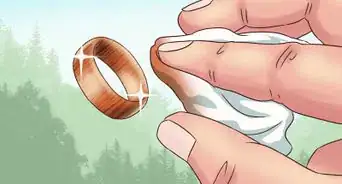
5Apply flux to both ends of the opened jump rings with a small, fine paintbrush.
- Flux is an agent that assists the solder in flowing into the joint. Flux comes in a variety of forms, but one common form is borax.
-
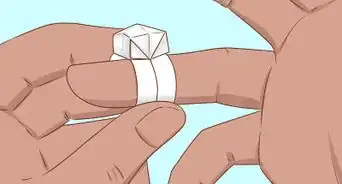
6Close the jump ring with the pliers ensuring that the two ends of the jump ring are flush against one another.[2]
-
7Place your jump ring on a charcoal block.[3]
- Before soldering jump rings, the joint should be touching the block.
-
8Pick up one extra-easy solder chip with the tip of the small, fine paintbrush.[4]
-
9Place the solder chip on the joint.[5]
-
10Turn on your soldering torch.
-
11Heat the jump ring as well the charcoal block and do not directly heat the solder.[6]
- When you solder metal jump rings, the solder will flow to the hottest place.
-
12Watch for the solder to melt.
- The solder will have a liquid appearance at this stage.
-
13Watch for the solder to flow.
-
14This entire process will happen very quickly. Immediately remove the heat.
-
15Place the jump ring into a pickle solution.[7]
- A pickle is a solution that removes a layer of oxidation on the soldered metal.
-
16Wait until you have soldered all jump rings, as they can all be added into the pickle at the same time.
-
17Remove the jump ring(s) from the pickle solution using copper tongs.
-
18Rinse the jump rings with water.
-
19Repeat the process on all jump rings requiring soldering.


Advertisement
Community Q&A
-
QuestionCan I use a soldering iron instead?
 T. ChinsenTop AnswererAs long as the temperature of the soldering iron can reach the temperature of the solder, it can be used to solder the ring. Keep in mind that the metal also has to absorb enough heat to melt the solder. The solder torch provides a burst of high heat, while an iron gives a slower rate of heat on its tip.
Advertisement
Warnings
- Don't use a pickle solution on silver-plated items as the solution can actually remove a layer of silver, exposing the base metal.⧼thumbs_response⧽
- Don't apply an overabundance of flux into the jump ring joint. When you solder jump rings, you apply a flame, and the flux can bubble up from the heat. This can displace the solder chip.⧼thumbs_response⧽
Advertisement
Things You'll Need
- Extra-easy solder
- Tin snips
- Pliers (needle nose pliers, if necessary)
- Flux
- Small, fine paintbrush
- Charcoal block
- Soldering iron
- Jump rings
- Pickle
- Copper tongs
- Water


References
- ↑ https://www.youtube.com/watch?v=_Gf3aM6Wz3g
- ↑ https://www.youtube.com/watch?v=y6nQ92aKxeo
- ↑ https://www.youtube.com/watch?v=_qfbCNjtxNI
- ↑ https://www.youtube.com/watch?v=_Gf3aM6Wz3g
- ↑ https://www.youtube.com/watch?v=KeTxwCs8Fg0
- ↑ https://www.youtube.com/watch?v=KeTxwCs8Fg0
- ↑ https://www.youtube.com/watch?v=_qfbCNjtxNI
- http://www.stellaceleste.com/htm/soldering/soldering.htm
About This Article
Advertisement