wikiHow is a “wiki,” similar to Wikipedia, which means that many of our articles are co-written by multiple authors. To create this article, 13 people, some anonymous, worked to edit and improve it over time.
This article has been viewed 67,961 times.
Learn more...
Most vehicles are now equipped with an Exhaust Gas Recirculation (EGR) valve to reduce emissions. Several symptoms can point to EGR valve problems: failed emissions test, poor idling, or random changes in engine speed. There are a few methods for testing an EGR if you’re unsure that it’s defective. If the EGR is faulty, it takes only a few steps and tools to replace it.
Steps
Testing with a Scan Tool
-
1Use a car scan to test the EGR valve. A scan tool reads information from your On-board Diagnostics, version II (OBD-II) system. This system collects information from the sensors in your engine. If the sensor detects something wrong, it reports it as an error code to the OBD-II. A scan tool allows you to read this code. The scan tool plugs into OBD-II data link connector, which is usually located under the dash.[1]
-
2Locate the OBD-II data connector. The most common location for the OBD-II connector is under the dash by the steering wheel. The owner's manual should have the exact location if you have trouble finding it.Advertisement
-
3Turn the ignition to the on position. Place your key in the ignition and turn it to on, but do not start the engine. You only want the electrical systems running.
-
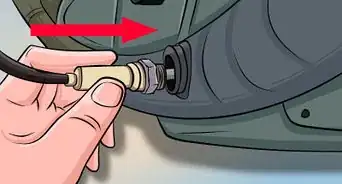
4Connect the scan tool to the OBD-II data link connector. The scan tool will prompt you to fill in some information about your vehicle. It usually requires information about the make, model, engine, and year of the vehicle.
- Most scan tools draw power from the vehicle’s battery and do not require a separate power source.
-
5Read the results. The scan tool will display any error codes the OBD-II reports. If the result is in the P0400 to PR409 range, then the EGR valve may be faulty.[2]


Testing with a Multimeter
-
1Use a multimeter to test the EGR valve. A multimeter tests the electrical wiring in your vehicle. The multimeter has a few settings, but you only need to set it to Volts for this test. The multimeter has black (negative) and red (positive) leads with metal clamps that connect to the wiring in your engine.[3]
- It’s recommended that you use a digital multimeter for this test. A digital multimeter will display only the test results. An analog multimeter will be harder to read because every possible result on its range is printed at the top.
-
2Set the multimeter to read Volts. A large “V” denotes the voltage setting. The range for the volts is located between two bold lines.
-
3Find the EGR valve. Consult your owner’s manual to find the exact location of the valve as it varies depending on the make and model of your vehicle. Once you have located the valve, look for an electrical connector on top of it. This connector will have the circuits you need to test.
-
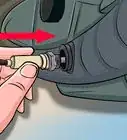
4Clip the multimeter’s read lead onto the “C” circuit. Each circuit on the EGR is labeled from "A" to "E." [4]
-
5Clip the multimeter's negative lead to a ground in the engine. The easiest and closest ground is the negative post on the vehicle’s battery.
-
6Look the readings. If the results on the multimeter show a reading above .9 Volts, then something (most likely carbon) is blocking the EGR valve. If the multimeter shows little or no voltage, then the EGR valve is most likely faulty. If the reading is between .6 and .9 Volts, then this means the EGR valve is working properly.[5]


Replacing The EGR
-
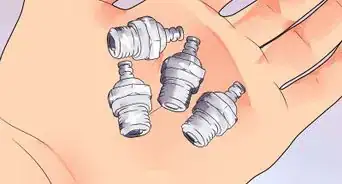
1Purchase the correct EGR valve for the make and model of your vehicle. Check with your owner’s manual to find the right one. If you cannot find the correct EGR there, check a parts manual or with an associate at an auto parts stores.[6]
-
2Let your engine cool. Wait for several hours before you begin working on your vehicle. You can injure yourself very easily while working on a hot engine so let it set a few hours.
-
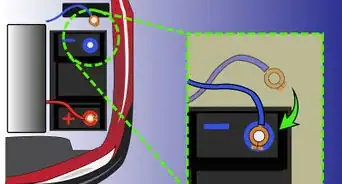
3Disconnect the battery. Use a wrench to loosen the clamps on the battery’s two terminals. Be sure to wait at least 5 minutes after disconnecting the battery before you begin working on the engine. You want the system to discharge completely.
- Always wear the appropriate safety gear before working on your engine.
-
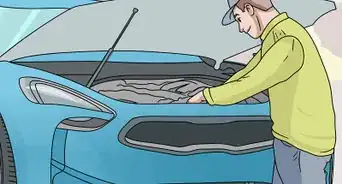
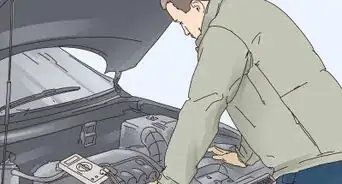
4Locate the EGR. The EGR is usually located on either the top or backside of the engine. Consult your owner’s manual if you need help finding it.
-
5Disconnect the vacuum line. Twist and pull each line until they slide off the EGR valve. Each line connects with a specific port. Label each one so that you can easily reconnect them.
-
6Disconnect the electrical cable. The electrical cable is located on top of the EGR valve. Grab the electrical cable with your hands and pull it.
- If the electrical cable is held in by a clip or clamp, use a flat-bladed screwdriver to press it down and release it.
-
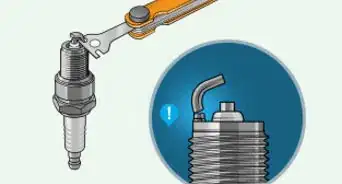
7Use a wrench to remove the bolts on the EGR valve's mount. Use lubricant spray on the bolts because they are usually very tight.
-
8Take out the old EGR valve. Now that you removed the bolts, use your hands to remove the valve from its mount.
- Inspect the valve for signs of carbon buildup. Sometimes this buildup causes the valve to malfunction. If you find buildup, clean it off and reinstall the valve. Test the valve again to see if it works after cleaning it.
-
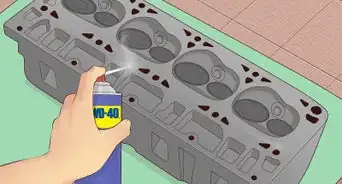
9Clean the valve base and passages. Use a scratch awl or something similar to remove any carbon buildup. Clean any debris or building in the gasket case.
- Use carburetor or intake cleaner to help remove the carbon.
-
10Install the new EGR valve. Thread the bolts through the EGR and gasket onto the mount with your hands first. Then use a socket wrench with a swivel extension to tighten the mounting bolts when you seat the EGR valve in the engine.
- When purchasing a new valve, see if it comes with a new gasket. You will have to purchase one if it doesn’t.
-
11Reconnect the electrical cable. Plug the cable back into the top of the EGR valve using your hands.
-
12Hook up the vacuum line. Reattach the line with using your hands. Make sure that it’s tight to prevent leaks.
-
13Reconnect the battery. Attach the engine leads to the battery terminals. Use a wrench to tighten the bolts.
-
14Clear your scan tool. If you used a scan tool to test your EGR valve, clear any error codes related to the valve. Then test again to see if any error codes appear.
-
15Listen for leaks. Start your engine and listen for any leaks near the EGR valve. The two possible places leaks might occur will be with the vacuum hose or exhaust. Drive the vehicle to make sure that it runs correctly. Pay close attention to the idling and gas mileage of your vehicle as poor performance in these areas indicate that the EGR valve is faulty.


Community Q&A
-
QuestionHow long would this process take?
 Community AnswerIt depends on the vehicle. I've done it on a '99 Expedition, and that took about 15 minutes. Make sure you check the EGR hose, too; if it's rotten or leaking, it can cause your engine to idle roughly.
 -
QuestionWhat do I do if I changed the EGR valve and now the engine rushes up to 3500 RPM and stays there?Community AnswerYou have a vacuum leak. The gasket for the EGR probably didn't seat right when you installed it, or you didn't use the one it comes with.
-
QuestionWhat is the location of the EGR valve on my 2007 Infiniti G35 V6?
 Community AnswerDriver-side upper rear behind the solenoid.
Things You'll Need
- Lubricant Spray
- Socket Wrench with swivel extension
- Safety Glasses
- New EGR valve for your vehicle (if you don't know the part #, an auto parts store or website can help you find it)
- OBD2 scan tool (for vehicles built 1996 and later)
- Multimeter (auto-ranging is preferred)
- Scratch awl
- Flat-blade screwdriver


-Beetle-Step-5-Version-3.webp)


References
- ↑ http://www.popularmechanics.com/cars/how-to/maintenance/4267896
- ↑ http://easyautodiagnostics.com/gm/4.3L-5.0L-5.7L/egr-valve-tests-1
- ↑ http://www.familyhandyman.com/electrical/how-to-use-a-multimeter/view-all
- ↑ http://easyautodiagnostics.com/gm/4.3L-5.0L-5.7L/egr-valve-tests-2
- ↑ http://easyautodiagnostics.com/gm/4.3L-5.0L-5.7L/egr-valve-tests-2
- ↑ http://www.ebay.com/gds/How-to-Replace-EGR-Components-/10000000178532985/g.html
About This Article
To change an EGR valve, start by purchasing the correct piece for the make and model of your vehicle. The next step is to allow your engine to completely cool down, disconnect the battery, and wait 5 minutes while the system fully discharges. You'll then need to locate the EGR, and disconnect the vacuum line and the electrical cable before removing the bolts on the EGR mount. After you remove the old EGR valve, clean any buildup and install the new ERG valve by threading the bolts through it and the gasket to secure it to the mount. Finally, you'll need to reconnect the electrical cable, vacuum line, and battery. To learn how to test your new EGR valve, keep reading!


-Beetle-Step-5-Version-3.webp)


