X
wikiHow is a “wiki,” similar to Wikipedia, which means that many of our articles are co-written by multiple authors. To create this article, 17 people, some anonymous, worked to edit and improve it over time.
This article has been viewed 211,608 times.
Learn more...
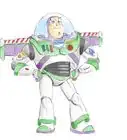
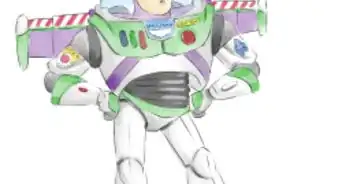
The first Toy Story movie came put in 1995 - if you've got a battery powered Buzz Lightyear toy from 1995, you'll likely have changed his batteries more than once already! Maybe your Buzz Lightyear is new to you or perhaps he's a model from the 2019 movie and this is the first time the batteries have run down. Whatever the scenario, the process for changing the batteries in a Buzz Lightyear action figure toy is the same. See below for details.
Steps
-
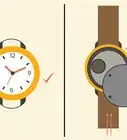
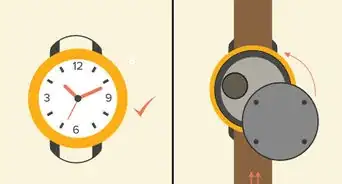
1Locate the three screws that hold the battery pack cover in place. Look directly at the back of Buzz at center section of his wings assembly. There are two screws at the top spaced about 2 inches (5.1 cm) apart in the green painted sections and one at the bottom center below the lavender colored section.
-
2Note that on newer models the green screws in his pack are fake, and there is no switch on the belt. Just pull the back of his jet pack cover straight off, it is mounted with rubber balls and sockets. Then use a small Philips screwdriver to remove the battery cover to find 2 AA batteries.Advertisement
-
3Unscrew all three screws until back plate comes off.
-
4Replace the two/three AA batteries.
-
5Replace battery cover and tighten the three screws.
-
6Make sure "On-Off" switch, which is located on the back of Buzz's black waist, is in the "On" position
-
7(Some do not have a switch)
-
8Press any button to test.


Advertisement


About This Article
Advertisement