This article was co-authored by Patrick Johns. Patrick Johns is a Home Improvement Specialist and the Owner of CatchAll Handyman Services. With more than 28 years of experience, he has worked on a variety of home improvement projects, such as carpentry, plumbing, and door and window installations in both commercial and residential properties.
This article has been viewed 171,925 times.
Tub and shower faucets function similarly to sink faucets; they each have handles that are used to twist cartridge-based valves hidden below a decorative finish. At the base of these cartridges is a washer that helps to prevent leaks and drips from happening by keeping the cartridge thoroughly shut off. When these washers wear out, you may find your tub faucet or shower head beginning to drip. Replacing the shower faucet washer is much like replacing a sink faucet washer, with the only differences being the orientation of the cartridges; in the wall, instead of on the sink.
Steps
-
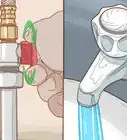
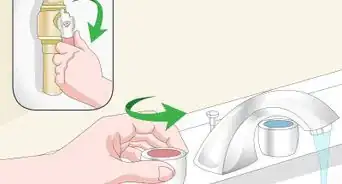
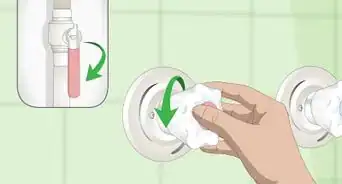
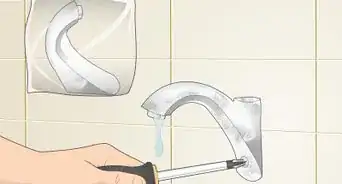
1Turn off the water at the nearest water valve. If you are unable to locate a close valve, shut off the water at its main source where it enters the house.[1]
-
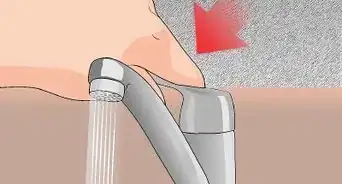
2Look on the sides of the faucet handles for a small screw. It is usually at the base of the handle, near the escutcheon or decorative portion. It may be beneath or on the underside of the faucet handle.[2]Advertisement
-
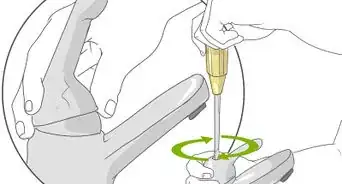
3Use a screwdriver to remove this screw and set it aside.
-
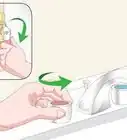
4Lift the faucet handle off of the escutcheon and set it aside.
-
5Look for the screws holding the escutcheon to the wall. They are usually hidden by the handle; once the handle has come off, they should be easily seen.
-
6Remove the screws holding the escutcheon to the wall.
-
7Take off the escutcheon and set it aside. This will expose the faucet cartridge.
-
8Grasp the cartridge with a pair of pliers.
-
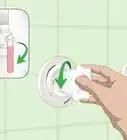
9Turn the cartridge with the pliers counterclockwise until it comes loose and slips out of the wall.
-
10Turn the cartridge upside down to see the washer at its base.
-
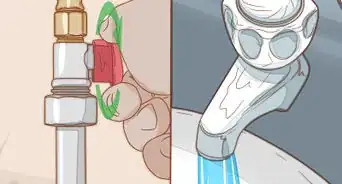
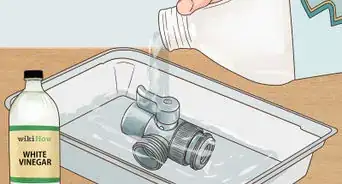
11Remove the old washer from the cartridge by using a screwdriver to loosen the screw holding it in place. Grasp the cartridge with the pliers to help it loosen, if you are having difficulty.[3]
-
12Slip the new washer into the place left by the old one.
-
13Insert the end of the cartridge into the wall.
-
14Grasp the end of the cartridge with the pliers.
-
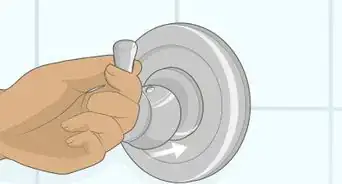
15Twist the pliers clockwise to lock the cartridge back into place.[4]
-
16Set the escutcheon back over the cartridge.
-
17Screw the escutcheon back into place.
-
18Screw the handle back onto the escutcheon.
-
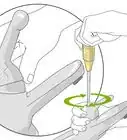
19Run a thin bead of silicone caulk around the edge of the escutcheon to seal it into place.[5]
- Cut the tip of the caulk tube off at a 45-degree angle with a utility knife.
- Squeeze the tube slowly and carefully to fill the gap around the escutcheon.
-
20Turn on the water at its source.
-
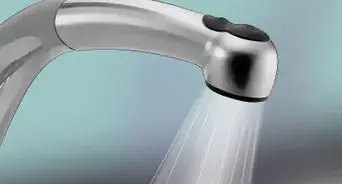
21Test the cartridge and new washer to ensure no drips occur.


Community Q&A
-
QuestionWhere do I turn off the main water line?
 Community AnswerUsually, it's extremely close to the water meter. There should be a shut-off valve both immediately before and after the water meter. Both can be turned off if one isn't doing the trick. If neither shut off the water completely, then you'll need a plumber to replace both with ball type valves for vastly improved predictability and reliability.
 -
QuestionWhat do I do if the cartridge just spins and doesn't come out?Community AnswerMake sure you removed the large outermost nut, an extremely common setup. You can also both push and pull to free the possible O-ring(s), or you can spray some oil into the back. It should just pop out, but some corrosion or buildup may need to be overcome. If nothing's working, then call a plumber and they'll grease up everything so future replacements are uneventful.
-
QuestionDo I have to turn off the water to do this?Community AnswerYes, you must turn off the water. The washer holds back the water pressure from the main line. If you remove the handle and washer without cutting off the water supply, water will spray everywhere.
Warnings
- Make sure the tub you are standing in is dry to help prevent slips and falls.⧼thumbs_response⧽
Things You'll Need
- Small flathead screwdriver
- Phillips screwdriver
- Pliers
- Silicone caulk
- Utility knife


References
- ↑ https://www.familyhandyman.com/plumbing/valves/how-to-locate-your-gas-shutoff-valve-and-water-shutoff-valve/
- ↑ https://www.youtube.com/watch?v=y_DWX2oTYxo
- ↑ https://www.familyhandyman.com/plumbing/faucet-repair/how-to-repair-a-leaking-tub-faucet/
- ↑ https://www.youtube.com/watch?v=DBvKx4_1TZE
- ↑ https://todayshomeowner.com/video/tip-for-smoothing-silicone-caulk/
About This Article