This article was co-authored by Allen Lee. Allen Lee is a Home Improvement Specialist and the Owner of Honest Lee Handyman Services, a licensed and insured handyman business servicing Sacramento, California, and surrounding areas. Working with homeowners and businesses to get their small repairs done in a timely and efficient manner, Honest Lee Handyman Services provides gutter and dryer vent cleaning along with fixture, fence, drywall, and toilet repairs.
There are 8 references cited in this article, which can be found at the bottom of the page.
This article has been viewed 18,149 times.
Cleaning your gutters isn’t the most exciting job in the world — it’s dirty, it’s physical, and it’s a nightmare for anyone who is afraid of heights. Unfortunately, not doing so at least twice a year (once in the spring and again in the fall) can create serious problems for your house’s roof and siding. As long as you know how to clean your gutters safely and efficiently, though, you can accomplish this necessary task with little worry!
Steps
Removing Large Debris
-
1Set up your workspace with tools, tarp, and ladder. Before anything else, make sure you have all your tools available — there’s nothing worse than having to stop halfway through a project because you didn’t plan ahead! Once you are ready to begin, set up your ladder on solid, level ground to ensure stability, and spread a tarp underneath to collect debris.[1] [2]
- It doesn’t matter where you begin this project, since you will eventually clear the entire area of your gutters.
-
2Wear appropriate clothing to protect yourself from nicks and cuts. You want to wear durable clothing, in order to limit the risk of suffering minor bruises from large debris or even from the metal of the gutter itself. Long-sleeved shirts are a good idea, as are work pants and rubber gloves. Of course, cleaning your gutters is a messy task, so wear clothes that you can get dirty![3]
- It's a good idea to wear latex gloves under your work gloves, for extra protection.[4]
Advertisement -
3Remove the largest debris by hand. Before incorporating your tools, you should get rid of the largest debris using only your hands. This includes branches or twigs, or perhaps even an errant tennis ball or two — anything large that may have wound up in your gutter. Be careful to ensure your safety by practicing proper ladder technique.


Removing Small Debris
-
1Clear smaller debris with a scoop. Once you have removed the branches and twigs — and tennis balls! — from your gutter, use the scoop to clear out smaller debris, such as leaves and other accumulations. Make sure you clear as much as you can (safely!) in one spot before moving your set-up to the next location. And since you’ve set up your tarp beneath you, remember that you can just toss the debris straight onto the ground.[5]
- If you don’t have a scoop, a child’s sandbox shovel works great as well!
- If the scoop is uncomfortable, try simply using your hands for greater maneuverability.
-
2Flush the gutter with a garden hose. Once you've gotten rid of everything that you can collect with your hands and scoop, you need to get rid of the finest debris. Remove the strainers from the downspout and place a garden hose at the opposite end of the gutter. Set the nozzle to the spray function, and spray the hose down the length of the gutter. The rest of the debris will get swept away![6]
-
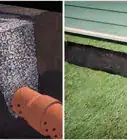
3Dispose of the debris via compost or dumpster. Once you have finished clearing your gutter, you're going to have a tarp full of debris! If you have a compost pile, the easiest way to dispose of the debris is by adding it to the pile.[7] However, if this is not an option, there are two alternatives: Either bring the debris to the dump or call your local Waste Management to schedule a pick-up.[8]
- Before bringing debris to the dump, call to make sure they accept yard waste!


Troubleshooting
-
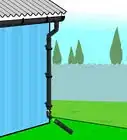
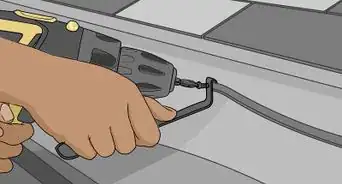
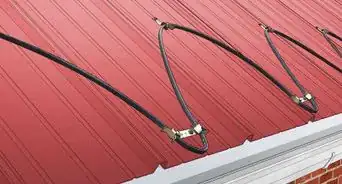
1Remove clogs in the downspouts with a garden hose. Flushing your gutters doubles as a check for clogged downspouts, so if your gutters aren't draining quickly you know you have a problem! The simplest way to remove a clog is by aiming the nozzle of your hose directly into the top of the spout. If the direct flow doesn't clear the clog, use a plumber's snake. If the clog still won't clear, call a professional.[9]
-
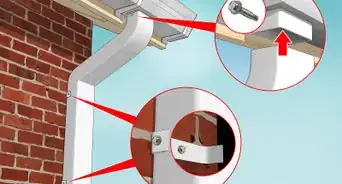
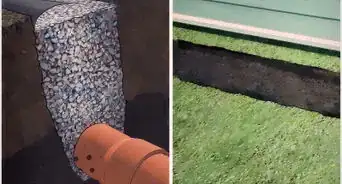
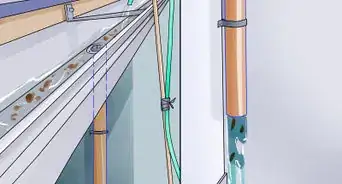
2Drain standing water by re-sloping your gutters. If standing water remains in one of your gutters after a successful flushing, it likely means the gutter isn’t sloped correctly. Detach the gutter hangers and adjust the slope slightly, making sure that the water now flows freely into the downspout. Maintain this new angle, and reattach the hangers.[10]
-
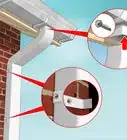
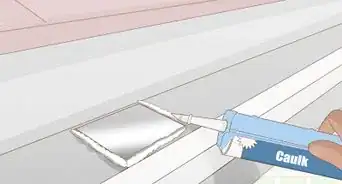
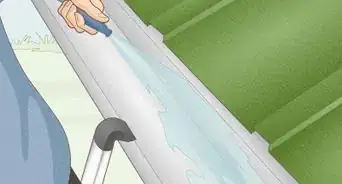
3Repair leaking gutters with gutter sealant. If the leak is coming from the seams of the gutter, first check that every gutter section is held tightly in place against each other. Apply gutter sealant to all of the joints, being sure to cover both sides. If the leak is coming from the end cap instead, add sealant along the inside of the joint as well.[11]


Warnings
- Avoid standing on the top three rungs of the ladder.⧼thumbs_response⧽
- Keep your waist between the rails of the ladder.⧼thumbs_response⧽
- Don’t reach out any further than you feel comfortable while standing on the ladder.[12]⧼thumbs_response⧽
Things You’ll Need
- Ladder
- Scoop
- Garden hose


References
- ↑ Allen Lee. Home Improvement Specialist. Expert Interview. 10 July 2020.
- ↑ https://www.familyhandyman.com/roof/the-right-way-to-clean-your-gutters
- ↑ https://www.familyhandyman.com/roof/the-right-way-to-clean-your-gutters
- ↑ https://www.homedepot.com/c/ah/how-to-clean-gutters/9ba683603be9fa5395fab90ce752a5b
- ↑ https://www.artofmanliness.com/articles/how-to-clean-your-gutters
- ↑ https://www.homedepot.com/c/ah/how-to-clean-gutters/9ba683603be9fa5395fab90ce752a5b
- ↑ https://www.budgetdumpster.com/resources/how-to-dispose-of-yard-waste.php
- ↑ https://lifehacker.com/how-to-get-rid-of-yard-waste-1729293206
- ↑ https://www.artofmanliness.com/articles/how-to-clean-your-gutters
About This Article