This article was co-authored by Patrick Coye. Patrick Coye is the owner and operator of Patrick’s Painting & Home Improvement in Alexandria, Virginia. With over 15 years of experience in residential construction, Patrick specializes in painting, wallpaper removal/installation, drywall, staining decks and fences, and kitchen cabinetry painting. To date, Patrick and his team have painted over 2,000 houses and stained over 800 decks. Patrick's Company won a "Top Job" award from the American Painting contractor magazine in 2020.
There are 8 references cited in this article, which can be found at the bottom of the page.
wikiHow marks an article as reader-approved once it receives enough positive feedback. In this case, several readers have written to tell us that this article was helpful to them, earning it our reader-approved status.
This article has been viewed 289,758 times.
Even though oil paints dry at a slower rate than other varieties, they can still warp the shape of your brush and clog between the bristles if not dealt with right away. Setting up your cleaning supplies before you paint minimizes the chance of this happening. After that, cleaning your brush is a straightforward practice of gradually removing paint, first with dry materials like paper towels or newspaper, and then with paint thinner or soap.[1] Once your done, proper clean-up and storage will help extend your brush’s life.
Steps
Cleaning Your Brush
-
1Remove excess paint, then thin the remaining paint. Using your cleaning rags or similar material, wrap around the metal where the bristles connect with the brush (known as a “ferrule”), and squeeze with moderate pressure so the paint is pushed out of bristles at end of stroke/bristles. Next, pour either paint thinner or safflower oil into your container.[2] Fill the bottom until it is deep enough to submerge the brush’s head. Dunk the bristles into the liquid. Then:
- Brush the bottom of the container to dislodge paint.[3]
- Remove the bristles from the liquid.
- Squeeze out more excess paint as before. You can gently push the brush on the side of the jar if it doesn't seem that the spirits saturated it, but don't swish too much.
- Be cautious as you clean, since excess paint will now be runnier. Try to keep the spirits transparent when wetting the brush in thinner.
-
2Repeat if desired. To be as thorough as can be, set up two more containers. Fill their bottoms with more thinning agent. Thin your brush’s paint in the second container and squeeze it clean as before. Then repeat with the third container. Note that the liquid in each container should appear less clouded by paint than the one before, with the third appearing relatively clear.[4]
- Be aware that your brush will still appear stained by the paint afterward. This is normal.[5]
Advertisement -
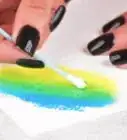
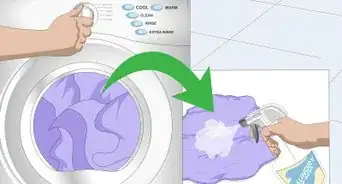
3Wash the brush with dish soap. First, squirt some liquid soap into one palm. Hold the brush by your other hand. Dip the bristles into the soap and brush them back and forth across your palm. Then:[6]
- This is where you can submerge the brush. Notice that this is water, however, and not a harsh, chemical solvent.[7] Also, be careful at how hot the water is in this stage as this can warm up the glue holding the bristles together inside the ferrule, which can deteriorate it as well.
- Continue brushing until a lather forms.[8]
- Stop once the lather turns the same color as your paint.
- Rinse the brush and your hand under warm water.
- Repeat until the lather no longer turns color.
Finishing Up
-
1Squeeze the bristles again. As before, use a clean rag or similar materials. Wrap it around the ferrule and push out any remaining soap or paint.[9] If the bristles still seem to hold a lot of soap, rinse them more thoroughly and repeat. If they hold any paint, wash and rinse again.
- The bristles may still appear stained, even after cleaning. This is to be expected and does not mean they’re still dirty.[10]
-
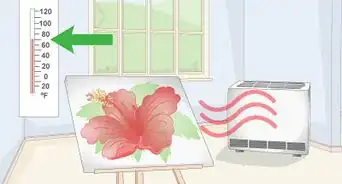
2Dry your brush.[11] Dry the brush on its side on a flat surface without any pressure on the end of the bristle. If it is a flat or fan brush, the flat side should be down, parallel to the floor. If the brush isn't huge or heavy and has some memory to its bristles, let it hang off of the edge of a flat surface just at the ferrule. .
- Drying your brush thoroughly will prevent mildew from growing. A few wipes is usually all that's needed, unless it's a thick watercolor brush. Most often, however, if you've purchased a $70 number 7 sable watercolor brush, you will get a lot more life out of it if you stick to watercolors with it. This leads to optional step 7.
- If you're in a hurry, aim a fan at the bristles. They should be dry unless they're any bigger than an inch and a half. Continue pressing and blotting the bristles with clean rags or similar material as before to remove all moisture. Use new sections of rag or new rags each time so you can tell how wet they are afterward. Continue until the rag remains dry after use.
-
3Reshape your brush. Use your fingers to gently press the bristles at their base. Sculpt back into their original shape.[12] Always work from the base to the tip to avoid squashing your bristles.
-
4Condition the bristles if necessary. If your brush is old, gauge how dry and coarse the bristles have become as you reshape them. If they feel brittle, wet them again. Then use your fingers to rub in a tiny dab of hair conditioner. Rinse, dry, and reshape your brush afterward.
- Apply this technique sparingly, only when necessary. Applying conditioner each and every time you wash your brush will cause the bristles to grow misshapen.
- If you need your brushes to be dry and not oily (or waxy-feeling) upon returning to the studio, you may want to skip this step. However, conditioning your brushes should extend their lifespan.
- You can also condition with mineral oil, or a product from an art-supply store. Don't trust the brush-restorers at hardware stores, as they'll eat brushes nearly down to the ferrule; they're made for contractors' commercial paintbrushes, not yours. Your brush will never be restored to store-bought quality, but the process can still help.
-
5Store your brush properly. If possible, use a container with a lid to keep moths out.[13] Stand the brush upright with the bristles on top to preserve their shape. When storing several brushes in one container, be sure that you can reach the handle of each one without disturbing the bristles of any surrounding brushes. Use more than one container to ensure this if necessary.[14]
-
6Save your used thinning agent. Seal the container and let the liquid rest overnight. Wait for the paint to settle to the bottom. Then pour the clear liquid on top into a second container. Seal and label both containers.[15] Store them in a safe place out of reach of children or pets. Be aware that paint thinner is flammable, so keep it away from flames, heat sources, and excessive heat.[16]
- For future projects, dump your dirty thinner into the container with the paint remnants.
- Allow them separate and then transfer the clean liquid back into your thinner’s container.
- Repeat until the container holding the separated paint is full.
-
7Dispose of materials properly. Contact your local government. Find out if and when they collect hazardous materials such as solvents and paint with curbside pickup. If they will not pick it up, ask where drop-offs are accepted. Do not dispose of such chemicals down a house drain, sewer, or into the ground, since they are toxic.[17]
- Safflower oil (a cooking oil that is safe to dispose down the sink) makes a great substitute for paint thinner if disposing of hazardous chemicals correctly is too burdensome.


Ensuring a Quick and Thorough Cleaning
-
1Don’t wait. Plan to clean your oil brush as soon as you are done using it. Do so even if you intend on coming back to your painting project in the near future. Always clean your brush promptly to ensure a thorough job with minimum damage to the bristles.[18]
- If you are going to resume painting shortly, don’t soak your brush in paint thinner in the meantime as a substitute for cleaning. Over time, paint thinner will eat away at the glue that binds the bristles to the handle.
- Although oil paints dry at a slower rate than other types, it is still easier to clean your brush before they have a chance to dry at all.[19]
-
2Protect yourself and your surroundings. Set up your cleaning station before you begin painting. Have a pair of cleaning gloves and protective eyewear ready to protect yourself from chemicals. Lay out newspaper, old towels, or drop cloths to keep surfaces clean.[20]
-
3Set up your cleaning supplies.[21] Assemble them before you begin your project. Make sure you have what is needed before you really need it. Guarantee a quick and easy clean-up without having to search for this or that while the paint dries in your brush. At the very least, you will need:[22]
- Cleaning rags, newspaper sheets, paper towels, or similar materials
- One sealable container with a lid.
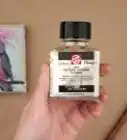
- Paint thinner (mineral spirits or turpentine, depending on your medium) or safflower oil[23]
- Soap (preferably designed specifically for paint brushes; if not, dish-washing soap or shampoo is acceptable)[24]


Community Q&A
-
QuestionWhat if I used watercolor brushes, and the paint won't come out? (I don't have paint thinner.)
 Community AnswerA cheap way to clean them is to use baby shampoo and scrub them on your hand, then use cold water.
Warnings
- Don't aim a hot hair dryer at them if you're using acetone to speed up drying, as it will also burn your house down.⧼thumbs_response⧽
- If you're using lead-based (flake white or cremnitz white) and you're pregnant: don't. Use titanium or zinc white instead. It'll take over your colors sooner when mixing that beautiful periwinkle, but it won't harm your baby.⧼thumbs_response⧽
- Google search 'studio safety policies' and read up on links to academic websites as to what universities and art schools have in place to keep their students safe. It will do the same for you. When you're working with oils, thinners, and pigments, you're working with harsh chemicals. And extremely flammable chemicals, in case you haven't read the warnings on the containers of medium and thinner you're using.⧼thumbs_response⧽
- If you don't throw out your used, saturated paint rags every day, and especially if you're using linseed oil, they can spontaneously combust and burn your house down. Don't store the trash can housing them anywhere near an open flame, a heater, in a hot attic, or near anything flammable that you won't laugh nefariously at it's demise.⧼thumbs_response⧽
- Don't throw used paint thinner down the drain. Several art schools had to ban oil paints in general because of this, and many syllabi list an automatic +F to any students caught doing this.⧼thumbs_response⧽
- If you have sensitive skin, maybe you don't want to be painting with oils (if you're a Sunday-Painter, or pregnant, or both, perhaps it's not worth it).⧼thumbs_response⧽
Things You’ll Need
- Cleaning gloves
- Protective eyewear
- Newspaper, old towels, dropcloth, or similar materials (for surfaces)
- Paper towels, cleaning rags, newspaper, or similar materials (for brush)
- Paint thinner or safflower oil
- At least one sealable container
- Soap (paint brush cleaner, dish soap, or shampoo)
- Warm water for rinsing
- Hair conditioner (optional)


References
- ↑ Patrick Coye. Painting Specialist. Expert Interview. 22 July 2020.
- ↑ http://emptyeasel.com/2007/01/26/how-to-clean-your-paint-brushes-after-oil-painting/
- ↑ Patrick Coye. Painting Specialist. Expert Interview. 22 July 2020.
- ↑ http://www.dummies.com/home-garden/home-painting/how-to-clean-oil-paint-from-paint-brushes/
- ↑ http://emptyeasel.com/2007/01/26/how-to-clean-your-paint-brushes-after-oil-painting/
- ↑ http://emptyeasel.com/2007/01/26/how-to-clean-your-paint-brushes-after-oil-painting/
- ↑ Patrick Coye. Painting Specialist. Expert Interview. 22 July 2020.
- ↑ http://www.winsornewton.com/na/discover/tips-and-techniques/other-tips-and-techniques/care-and-cleaning-of-brushes-us
- ↑ http://emptyeasel.com/2007/01/26/how-to-clean-your-paint-brushes-after-oil-painting/
- ↑ http://www.winsornewton.com/na/discover/tips-and-techniques/other-tips-and-techniques/care-and-cleaning-of-brushes-us
- ↑ http://www.winsornewton.com/na/discover/tips-and-techniques/other-tips-and-techniques/care-and-cleaning-of-brushes-us
- ↑ http://www.winsornewton.com/na/discover/tips-and-techniques/other-tips-and-techniques/care-and-cleaning-of-brushes-us
- ↑ http://www.winsornewton.com/na/discover/tips-and-techniques/other-tips-and-techniques/care-and-cleaning-of-brushes-us
- ↑ https://www.craftsy.com/blog/2013/09/caring-for-your-paint-brushes/
- ↑ https://www.thisoldhouse.com/more/recycling-paint-thinner
- ↑ https://extension2.missouri.edu/wm6005
- ↑ https://www.thisoldhouse.com/more/recycling-paint-thinner
- ↑ http://emptyeasel.com/2007/01/26/how-to-clean-your-paint-brushes-after-oil-painting/
- ↑ https://www.craftsy.com/blog/2013/09/caring-for-your-paint-brushes/
- ↑ http://www.dummies.com/home-garden/home-painting/how-to-clean-oil-paint-from-paint-brushes/
- ↑ http://www.dummies.com/home-garden/home-painting/how-to-clean-oil-paint-from-paint-brushes/
- ↑ http://emptyeasel.com/2007/01/26/how-to-clean-your-paint-brushes-after-oil-painting/
- ↑ Patrick Coye. Painting Specialist. Expert Interview. 22 July 2020.
- ↑ https://www.craftsy.com/blog/2013/09/caring-for-your-paint-brushes/
- Videos provided by Lena Danya
About This Article

To easily clean your oil paint brushes, wipe the brushes on a rag to remove excess paint, and then dip them in paint thinner to loosen up the remaining paint. Then, wipe the brushes in the rag again to absorb the pain that was loosened by the thinner. After that, dip the brush in dish soap and swirl it in a bowl of water to remove all of the paint thinner. Finally, wrap a clean rag around the brush and squeeze the bristles to remove the excess moisture before laying the brush flat to dry. For tips on reshaping and storing your brushes, scroll down!