This article was co-authored by Erik Bakirov. Erik Bakirov is a Cleaning Specialist at Room413 Cleaning in Los Angeles, California. Erik specializes in deep, move-in, and move-out cleaning services. Room413 matches homeowners with reliable and trustworthy cleaning services. They also promote environmentally friendly cleaning products.
There are 7 references cited in this article, which can be found at the bottom of the page.
This article has been viewed 38,637 times.
Rubber flooring is a durable choice for high-traffic areas in your home or business. To keep your rubber floor looking its best though, regular cleaning is paramount. By doing routine cleaning, removing tough stains and establishing a regular maintenance routine, you can keep your rubber floor in good condition for years to come.
Steps
Doing Routine Cleaning
-
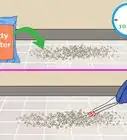
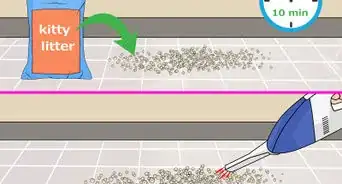
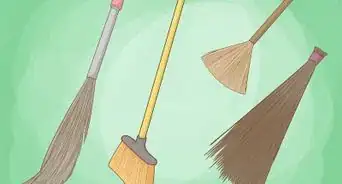
1Vacuum the floor thoroughly. To begin cleaning, dry vacuum the rubber floor thoroughly to remove all grit and dirt. Work from one side of the room to the other so you don’t miss any spots. Dirt can cause rubber floors to wear unevenly and lose their shine.
-
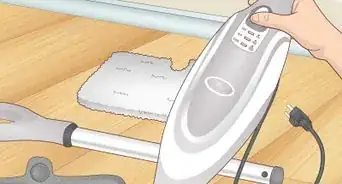
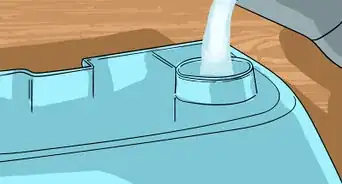
2Create a cleaner of water and soap.[1] Pour ¼ cup (60 ml) of mild dish soap into a bucket and then fill with warm water. Do not be tempted to use more soap, which can cause a filmy residue on your floor. The level of soap indicated is dilute enough to clean without leaving a film.Advertisement
-
3Mop with warm water and mild dish soap.[2] Mop your floor with the soapy water, starting at the area farthest from the door of the room and working your way toward the exit. Wring your mop periodically. By doing the exit to the room last, you can leave without stepping on the newly mopped floor.
-
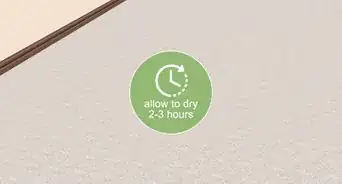
4Allow the area to air dry. There is no need to towel your newly washed rubber floor. Simply let it air dry. If your rubber floor is in a poorly ventilated area of your house, open a window so the mopped floor will dry more quickly.
-
5Avoid harsh cleaners for routine cleaning. Some solvents and acids can soften or erode rubber flooring if used regularly. While rubber is very durable with normal wear and tear, using harsh chemicals for routine cleaning can crack and deteriorate your rubber. Stick to plain soap and water whenever possible.[3]
-
6Do not clean rubber flooring within 72 hours of installation. Rubber flooring is softest immediately after installation. It cures, becoming harder and more durable over time. Manufacturers typically recommend not cleaning it for the first 72 hours after installation. Attempting to do so earlier could cause permanent damage to your floor.


Removing Tough Stains
-
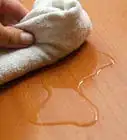
1Use a vinegar solution for water-based stains. For occasional water-based stains, for example beverages or sweat, treat your rubber floor with a white vinegar solution. Mix a solution that is 50% water and 50% white vinegar. Use a towel to rub the mixture on the stained area in small circles to lift as much staining as possible.[4]
- When finished, mop the area with mild dish soap and water just as you would when performing routine cleaning.
- Allow the area to air dry.
-
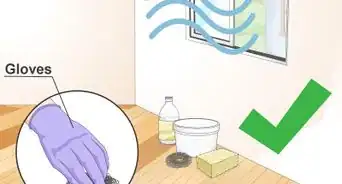
2Use turpentine on oil-based stains. Turpentine is highly toxic and should be handled with care. Wear rubber gloves, ventilate the area well, and secure all pets and children elsewhere before handling. Pour up to 3 teaspoons of turpentine on a clean, dry cloth, and blot the area to lift staining.[5]
- When finished, mop with soap and warm water as normal, allowing the area to air dry.
- Turpentine is a last resort for severe, oil-based staining. Used to excess, it can even stain your rubber floors.
-
3Lift paint stains with paint thinner. If you get some paint on your rubber floor, use a small amount of paint thinner to clean the drips. Wear rubber gloves, ventilate the area well, and secure all pets and children elsewhere before beginning work. Pour a small amount of paint thinner on a clean, dry cloth and wipe the dripped areas in a short sweeping motion, using a new part of the cloth each time. The bits of paint will begin to peel and lift.[6]
- Sweep paint flecks up into a dustpan and discard.
- When finished, mop with soap and warm water as normal, allowing the area to air dry.


Maintaining Your Clean Floor
-
1Clean up spills right away. Standing water can damage the underlying adhesive that secures the rubber to your floor. Be diligent about wiping up any spills or standing water right away to keep your rubber crack-free and in good condition.
-
2Establish a regular cleaning routine. Vacuuming your rubber floor every other day will help minimize surface dirt and keep your floor looking bright and new. Less grit on your floors means fewer surface scratches. Mop with soap and water as directed once a week.
- Creating a calendar reminder can help you remember to clean your floor regularly.
-
3Treat your floor with special care the first 6-12 months. Rubber floors harden over time, which actually makes them more resistant to dirt and wear as they age. To extend the life of your rubber floor, try to take particularly diligent care of it during the first 6-12 months by vacuuming and mopping as scheduled.[7]


Things You'll Need
- Mild dish soap
- Water
- White vinegar
- Towel
- Mop
- Bucket
- Turpentine
- Paint thinner
- Clean cloths
- Dustpan

References
- ↑ Erik Bakirov. Cleaning Specialist. Expert Interview. 7 January 2021.
- ↑ Erik Bakirov. Cleaning Specialist. Expert Interview. 7 January 2021.
- ↑ http://www.rubberflooringinc.com/assets/pdf/maintenance/RubberFlooringCleaningandMaintenanceInstructions.pdf
- ↑ https://www.realsimple.com/home-organizing/cleaning/all-natural-cleaning-solutions/vinegar-0
- ↑ http://theflooringproguys.com/clean-maintain-rubber-floor-tiles/
- ↑ https://projects.truevalue.com/paint/exterior/prep_cleanup_and_safety/use_paint_thinner_properly.aspx
- ↑ http://www.parish-supply.com/documents/608.pdf
- ↑ http://www.thekitchn.com/all-about-rubber-kitchen-floors-kitchen-flooring-spotlight-175233
About This Article