This article was co-authored by wikiHow Staff. Our trained team of editors and researchers validate articles for accuracy and comprehensiveness. wikiHow's Content Management Team carefully monitors the work from our editorial staff to ensure that each article is backed by trusted research and meets our high quality standards.
This article has been viewed 43,283 times.
Learn more...
Hats require a little more care than other garments. Black hats in particular need to be cleaned with the right detergent to keep their color. First, you need to assess how well the material will react to water and what cleaner is safe to use. After spot-cleaning any areas that are especially dirty, you have a few options on how to proceed depending on its condition and materials, but hand-washing is generally considered to be the best method. Finally, air-drying is preferred over machine-drying in order to preserve your hat’s shape.
Steps
Determining Durability
-
1Check the care-label. Always start by checking the manufacturer’s instructions regarding cleaning for your particular hat. Expect different hats to be made of different materials, some of which are more easily damaged by water and/or scrubbing. If the care label is missing or unreadable, contact the manufacturer if possible. Otherwise, assume that it’s made of fragile materials.[1]
- Never machine-wash a hat unless the care label specifically states that it’s safe to do so.
-
2Assess the age. Keep in mind that older hats (pre-1980s) are more likely to have cardboard in the brim and/or cap. Expect these to not stand up to water at all. If your hat appears to be that old, skip any step that involves soaking it.[2]
- Do the same if your care label is missing and you think any particular part of your hat looks like it’s made of fragile materials.
Advertisement -
3Use a mild bleach-free detergent. Always use a mild laundry detergent, since harsher cleaners may affect its color. Never use bleach or any detergent in which bleach is an ingredient, because bleach will definitely ruin your black hat. If it's made of wool or felt, use a detergent specifically designed for wool.[3]
-
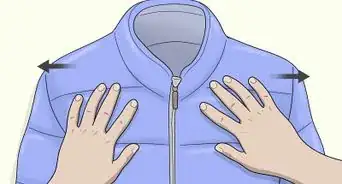
4Test for colorfastness. Before you attempt any cleaning, make sure the hat’s colors won’t run when washing. Dampen a white or light-colored cloth with water and a drop of detergent. Rub this underneath the hat’s brim or the inside of the hat if it’s made from the same material as the outside. Check the cloth for any staining from the hat. If the cloth is stained black, don’t proceed any further. Have the hat dry-cleaned instead.[4]
-
5Spot-clean the rest of the hat if it’s fragile. If you’re unsure of your hat’s materials and/or think that part of it is particularly delicate, stick to spot-cleaning only. Repeat the previous step. This time, however, give the whole hat the same treatment.[5]


Hand-Washing Your Hat
-
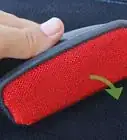
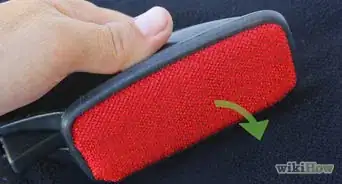
1Spot-clean heavily soiled areas before washing. Start filling a sink or bucket with cool water and add a few drops of mild laundry detergent. Dampen a clean cloth in the soapy water, wring out the excess, and rub it over the dirty area(s). Work up a foam by scrubbing the area(s) with a toothbrush. Dampen a new cloth with plain water and wipe the area(s) until no traces of soap remain.[6]
- Scrub gently around stitches. Forceful scrubbing may weaken these.[7]
- Also be gentle with wool and felt hats for the same reason.
-
2Handwash for best results. Expect machine-washing to run a higher risk of affecting the shape and color of your hat. Hand-wash whenever you can, and never machine-wash a wool or felt hat.
-
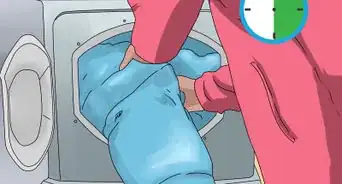
3Soak the hat in warm water and a mild detergent. Start by soaking the hat in the soapy water for at least 20 minutes. You can leave it soaking for up to 2 hours, depending on how dirty it is.[8]
-
4Scrub the hat with a toothbrush and rinse. Scrub out any remaining dirt or stains with a toothbrush. Remember to be gentle around stitches. Rinse out the soap with running water, then shake out the excess water or let it drip back into the sink or onto a towel.[9]
-
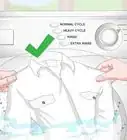
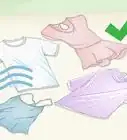
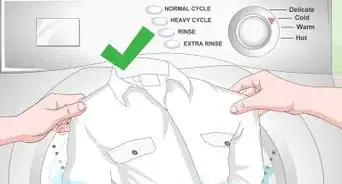
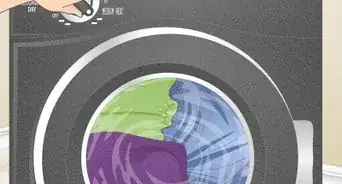
5Machine-wash with caution. Use a front-loading machine, not a top one, if machine-washing. Start by treating soiled areas with a stain pre-treatment and give it about ten minutes to set in. Then insert the hat into a hat form if you can find one for your specific hat. Wash the hat with like-colored garments or on its own. Use mild detergent, cold water, and the delicate cycle.[10]
- Expect the central agitator in the basin of top-loading machines to damage the hat’s shape.
- Refrain from using your dishwasher. These use hot water, and many dishwashing detergents have bleach, so expect dishwashers to ruin your hat’s shape, size, and color


Drying Your Hat
-
1Pat it dry after washing. Whether you washed it by hand or a machine, use a towel to blot out the excess moisture immediately afterward. Absorb as much water as you can. Reduce its water-weight to help preserve its shape as it air-dries. Be gentle as you do, though. Avoid crushing, denting, or otherwise marring the hat’s shape.[11]
-
2Fit it onto a head-shaped form. Ideally, use a mannequin head that’s roughly the same size as your own. Otherwise, use a similarly sized round object (like a ball or rolled-up towel) to fit your hat onto. Set this on top of a dry towel to absorb any excess water that drips.
- Wool hats lose their shape very easily. For best results, wear it as it dries if possible.
-
3Allow the hat to air-dry. Never use a machine dryer. Expect the heat to shrink or otherwise warp the hat’s shape. Let it dry on its own instead.[12] Place fans around it to dry it faster if desired.[13]
- A hair-dryer set to a low setting and held from a safe distance (a foot or more) is safe to use to make drying even quicker.
- Depending on the internal components, losing shape may not be as much of an issue for certain styles of hats. However, you still want to set it on something like a coffee can to keep the brim from resting on the wet towel.


Things You’ll Need
- Sink or bucket
- Water
- Towels
- Mild bleach-free detergent
- Toothbrush
- Machine washer (optional)
- Hat form (optional)
- Fans (optional)
- Hair dryer (optional)
- Mannequin head or similarly shaped object

References
- ↑ http://cleanmyspace.com/clean-your-baseball-cap/
- ↑ http://www.artofmanliness.com/2016/09/08/how-to-clean-a-baseball-cap/
- ↑ http://cleanmyspace.com/clean-your-baseball-cap/
- ↑ http://www.artofmanliness.com/2016/09/08/how-to-clean-a-baseball-cap/
- ↑ http://www.artofmanliness.com/2016/09/08/how-to-clean-a-baseball-cap/
- ↑ http://cleanmyspace.com/clean-your-baseball-cap/
- ↑ http://www.artofmanliness.com/2016/09/08/how-to-clean-a-baseball-cap/
- ↑ http://www.artofmanliness.com/2016/09/08/how-to-clean-a-baseball-cap/
- ↑ http://www.artofmanliness.com/2016/09/08/how-to-clean-a-baseball-cap/
About This Article