This article was co-authored by wikiHow Staff. Our trained team of editors and researchers validate articles for accuracy and comprehensiveness. wikiHow's Content Management Team carefully monitors the work from our editorial staff to ensure that each article is backed by trusted research and meets our high quality standards.
There are 11 references cited in this article, which can be found at the bottom of the page.
The wikiHow Video Team also followed the article's instructions and verified that they work.
This article has been viewed 85,840 times.
Learn more...
If your Keurig is sputtering, operating slowly, or brewing only partial cups of coffee, one or both of your unit’s needles may be clogged. Cleaning your Keurig’s needles is a fast and easy process, which should take you no longer than around 5 minutes or so. All you need is a paper clip and running water or a dishwasher. After unclogging the needles, your Keurig should run like new again.[1]
Steps
Accessing the Needles
-
1Turn off and unplug your Keurig. This is an important safety step. Disconnecting your Keurig will help protect you from electric shock and burns.[2]
-
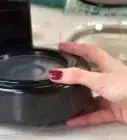
2Take the pod holder out of your machine. To do this, simply lift the handle on your Keurig as if you were getting ready to put in a K-Cup. Then, grab the top of the pod holder with one hand, and use your other hand to push the pod holder up from underneath.[3]
- The pod holder is the place where you insert your K-Cups.
Advertisement -
3Remove the funnel from the pod holder. Grab onto the top of the pod holder with one hand and the funnel with your other hand. Then, pull the two pieces apart.[4]
- The funnel is the piece that fits onto the bottom of the pod holder.
- Taking these two pieces apart might be a little difficult to do if this is your first time doing it. If you can’t pull the 2 pieces apart, try placing them under hot running water to loosen the connection.

Unclogging the Needles
-
1Insert a paper clip into the tube at the bottom of the pod holder. To clean the exit needle, flip the pod holder upside down. Then, straighten a paper clip and insert it into the small tube. Move it around for 10-30 seconds to loosen up any clogs that have built up around the exit needle.[5]
- You won’t be able to poke all the way through this tube, so don’t press too hard when you meet resistance.
-
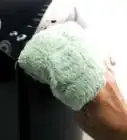
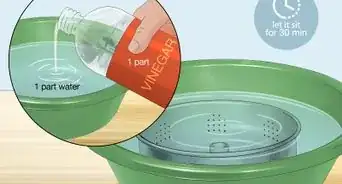
2Rinse the pod holder and funnel with running tap water. As you’re rinsing the 2 pieces, use a clean cloth or sponge to loosen up and wipe away any caked-on grime. This rinsing will also help clean the exit needle.[6]
- Take care not to accidentally poke your finger with the exit needle.
- You can also clean the pod holder and funnel in a dishwasher, but only if you put them on the top rack.
- Set the 2 pieces on a dry towel to dry.
-
3Locate the entrance needle under the brewer head. Lift your Keurig’s brewer handle to open the place where you insert your K-Cups. The entrance needle is located on the underside of the top half.[7]
- If you look closely, you’ll see that there are openings on both sides of the needle.
- The entrance needle is very sharp, so be careful when you’re cleaning it.
-
4Remove particles from the entrance needle with a paper clip. Take the paper clip you straightened in the earlier step and insert it into the openings on both sides of the entrance needle. Move it around to help loosen up and knock away any caked-on grime.[8]

Finishing the Clean
-
1Put the pod holder and the funnel back together. Wait until the pod holder and funnel are completely dry. Then, align the side slots and push the 2 pieces together.[9]
- Push the pieces until you hear a click.
-
2Reinsert the pod holder into your Keurig. Align the tabs on the pod holder with the matching openings on the machine. Position the pod holder so that the side with 2 tabs is on the bottom and the side with 1 tab is on top. Once the pod holder is aligned, push down on its top until it snaps into place.[10]
- The white arrow on the holder’s rim should be on top and centered.
-
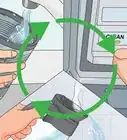
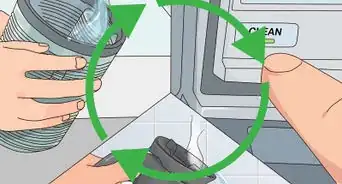
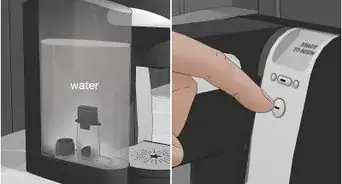
3Run 2 brew cycles with water only. After you close your machine, place a large mug on your unit’s tray, and fill your water reservoir with water. Select the largest cup size and start a brew cycle. Two water-only rinse cycles should be enough to flush out any grime that you loosened up.[11]
- After the second rinse cycle, you can insert a K-Cup and enjoy a fresh cup of coffee!

wikiHow Video: How to Clean a Keurig Needle
Things You’ll Need
- Clean metal paperclip
- Running tap water or a dishwasher
- Dry towel
- Large mug
Warnings
- Keurig needles are sharp, so take care when cleaning them.⧼thumbs_response⧽


References
- ↑ https://housewifehowtos.com/clean/how-to-clean-a-keurig/
- ↑ https://youtu.be/g23afr4NijA?t=24
- ↑ https://youtu.be/g23afr4NijA?t=32
- ↑ https://youtu.be/g23afr4NijA?t=42
- ↑ https://youtu.be/-wb1reWYVeY?t=78
- ↑ https://youtu.be/-wb1reWYVeY?t=103
- ↑ https://youtu.be/-wb1reWYVeY?t=134
- ↑ https://youtu.be/-wb1reWYVeY?t=150
- ↑ https://youtu.be/-wb1reWYVeY?t=167
About This Article

The needles on a Keurig can sometimes get clogged up, so try cleaning them if your Keurig isn’t working properly. You’ll need to unplug the Keurig and take out the pod holder, then separate the funnel from the bottom of the pod holder so you can access the needles. To clean the exit needle, turn the pod holder upside down and slide an unbent paperclip into the small tube at the bottom. Wiggle it around for 30 seconds to loosen any clogs, then rinse the pod holder and funnel in warm, soapy water. Keep reading to learn how to clean the entrance needle!