This article was co-authored by Andrii Gurskyi and by wikiHow staff writer, Danielle Blinka, MA, MPA. Andrii Gurskyi is the owner and founder of Rainbow Cleaning Service, a New York City cleaning company specializing in apartments, homes, and moving cleanup using non-toxic and artificial fragrance free cleaning solutions. Founded in 2010, Andrii and Rainbow Cleaning Service has served over 35,000 customers.
There are 11 references cited in this article, which can be found at the bottom of the page.
This article has been viewed 11,249 times.
You had fun camping, but now your tent is dirty. What do you do? In this article, we’ll explain how to clean the interior and exterior of your tent, get rid of tough stains (like mold and sap), and eliminate odors. We’ll also cover basic maintenance, like how to apply new coat of water repellent and mend small tears, so your tent is ready for your next adventure. Read on for our complete guide!
Steps
Washing the Exterior
-
1Set up your tent so it’s easier to wash. Pitching your tent is a hassle, but it’ll pay off big time when you’re finished washing it. Put the tent in a clear, dry spot that’s totally flat so cleaning it will be a breeze.[1]
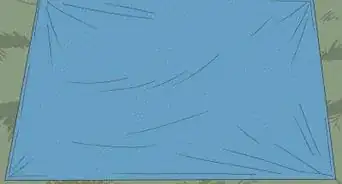
- If you’re worried about the bottom of your tent getting dirty, you can place your tent on a tarp or drop cloth so it’s not touching the ground.
- Read this article for help setting up your tent.
-
2Sweep or vacuum out the tent. Use a clean broom, a vacuum attachment, or a handheld vacuum to get rid of any dirt, leaves, sticks, or other debris that’s on the floor of your tent. Pay special attention to the nooks and crannies where dirt can hide.[2]
- If you’re using a broom, you can either brush the debris outside the tent or collect it in a dustpan for disposal in your trash.
Advertisement -
3Shake off all of the dirt and debris that’s stuck to the outside. Grip the corner of your tent and gently lift it part way off the ground. Then, give the tent a vigorous shake to dislodge any grime on the outer walls. You may need to do this several times to get rid of all of the dirt.[3]
- If there’s debris that won’t come off, brush it off with a clean, dry cloth.
- Dirt will turn to mud when you add water, so it’s best to get the dirt before you start the washing process.
-
4Mix mild soap into a tub of lukewarm water. Use dish soap, castile soap, or tent cleaner because they’re safe for the tent fabric. Fill a large plastic tub or your bathtub with lukewarm water, then add soap. Swish the water around with your hand to mix in the soap.[4]
- If you’re using tent cleaner, follow the directions on the bottle.
-
5
-
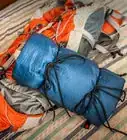
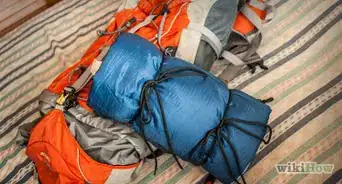
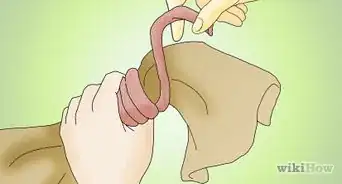
6Scrub the tent fly with a soft toothbrush. To wash the tent fly, dip a soft toothbrush in soapy water. Use the bristles to brush away any dirt or debris that’s on the zipper. Pay extra attention to areas with built up gunk. Finally, test the zipper to make sure it opens and closes easily.[6]
- Rinse your toothbrush when it looks dirty.
- If your water starts to look dirty, replace it with fresh soapy water so you can clean your tent fly more easily.


Cleaning the Interior
-
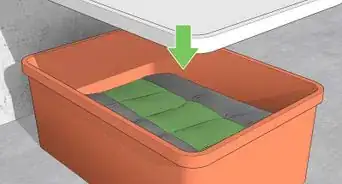
1Take your tent down and turn it inside out for soaking. Open all of the tent flies and gently reverse the tent fabric.[7] The outside of your tent has been treated with waterproof coating, so the soapy water will be more effective if you expose the underside of the fabric.
-
2Use your hands to agitate the tent for about 5 minutes. Swishing the tent around in the water will help break up any grime that’s embedded in your tent. Simply shift the tent back and forth in the water to give it a good wash. Do this for up to 5 minutes.[8]
-
3Soak the tent in soapy water for about 20 minutes. You don’t need to soak your tent for very long. In fact, leaving it submerged in water for too long could damage your tent’s waterproof coating. Set a timer so it’s easy to remember when to remove the tent.[9]
- If you’re using a tent cleaner, soak the tent for the amount of time specified on the label.
- Don’t use fabric detergent because it’ll actually leave residue on your tent, which can break down the coatings.
-
4Rinse out the soap using fresh water. Pour out the soapy water or drain the bathtub. Then, run clean water over your tent to remove any remaining soap. Continue rinsing your tent until the water is no longer sudsy.[10]
- It’s okay to use a water hose for this if you soaked your tent outside in a plastic tub.
-
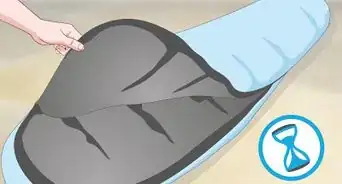
5Hang your tent in the shade to dry. Position it so that the sun isn’t shining directly on your tent, since it could fade your tent. Make sure your tent is completely dry before you store it. Otherwise, mold and mildew will grow on the moist parts.[11]
- You can hang it on a clothesline or drape it over something, like a clean sawhorse.
-
6Clean the poles with a soapy rag, then wipe them dry. You only need to wash your poles if they’re dirty. Just dip a clean cloth in soapy water and wipe the tent poles to remove any dirt or debris. Follow up with a clean, dry cloth.[12]
-
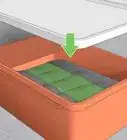
7Pack your dry tent away in a cool, dry area. Once your tent air dries, loosely fold it so air can get between the folds. Then, place it somewhere it won’t get wet or moist. Any wetness on your tent can lead to mold.[13]


Removing Mold, Sap, and Odors
-
1Scrub out mold stains with a soft cloth and enzyme cleaner. Spray the cleaner onto the mold, then let it sit for up to an hour or according to the instructions on the bottle.[14] Dampen a clean rag or sponge, then scrub the mold stain until it comes up. Rewet your cloth as needed to help you remove the stain.
- Make your own mold cleaner, mix 1⁄4 c (59 mL) of white vinegar into 1 c (240 mL) of warm water. In a spray bottle, mix 1 c (240 mL) of lemon juice and 1 cup (273 grams) of salt into 1 US gal (3.8 L) of warm water. Then, add the diluted vinegar to the lemon juice-salt-water mixture.[15]
- Don’t use bleach to kill mold on your tent. Not only can it discolor your fabric, it could also dissolve your waterproof coating.
-
2Remove tree sap with mineral oil, rubbing alcohol, or adhesive remover. Dampen a soft rag or sponge and scrub off the sap. Once the sap is gone, wipe the area down with a clean, damp rag.[16]
- Rewet your rag or sponge as needed.
- Remove large amounts of sap by freezing them overnight, then pulling them off.
-
3Remove odors with a 50/50 mixture of white vinegar and water. For an easy solution, fill a spray bottle with a vinegar-water solution and saturate your tent. Let the vinegar sit for about an hour, then wipe down your tent with water.[17]
- Vinegar is pretty smelly, but the scent will dissipate quickly. Your tent will smell fresh and clean the next time you use it.
-
4Soak your tent in an enzyme cleaner to get rid of persistent odors. Simply fill your bathtub with lukewarm water, then add the enzyme cleaner according to the instructions on the bottle. Soak your tent for the amount of time listed on the bottle.


Waterproofing and Maintenance
-
1Spray a fresh coat of water repellant on your tent while it’s pitched. Wash the tent before waterproofing so the water repellant sticks better. Set up your tent so you can apply the coating evenly. Hold the can about 5 to 10 in (13 to 25 cm) away from the tent fabric. Then, slowly move your arm as you spray the repellent onto the fabric.[18]
- Read the instructions on your water repellent before you use it.
- If you prefer, set up your tent on a tarp or drop cloth to protect the ground.
- Apply water repellant spray every 1 to 3 years.
-
2Wipe off the excess water repellant with a damp rag after 5 minutes. Your repellent should adhere to the tent in just a few minutes. After that, wet a clean cloth and gently swipe it over the tent fabric so you don’t have a gunky residue. Rinse off the cloth as needed so it stays clean.[19]
- If your product says something different, follow those instructions instead so your product sets correctly.
-
3Use a sealant and patch kit to repair holes or seam rips on your tent. Apply a sealant around the edges of the hole to prevent it from expanding. Next, cut a circle- or oval-shaped patch that’s at least 1 in (2.5 cm) larger than the hole. Then, follow the directions on your patch kit to apply the patch over the hole.[20]
- For small rips and holes, you can also use seam grip.
- Use round patches because they stick better. Pointy corners have a tendency to peel up.
-
4Replace a broken zipper using pliers and a new pull. Start by gently removing the zipper stopper at the bottom of the zipper by loosening it with your pliers. Then, pull the broken zipper pull off and slide the new zipper pull on. Use your pliers to press the zipper stopper back into place.[21]
- If the teeth on the zipper get bent, you may not be able to repair the zipper. In that case, you might have to get a new tent.


Things You’ll Need
Washing the Exterior
- Large plastic tub or bathtub
- Dish soap, castile soap, or tent cleaner
- Soft rag or sponge
- Tarp or drop cloth
- Toothbrush
- Dish soap, castile soap, or tent cleaner
Cleaning the Interior
- Large plastic tub or bathtub
- Dish soap, castile soap, or tent cleaner
- Soft rag or sponge
Removing Mold, Sap, and Odors
- Spray bottle (for removing smells or making your own solution)
- Vinegar (for removing smells or making natural cleaner)
- Lemon juice (for making natural cleaner)
- Salt (for making natural cleaner)
- Enzyme cleaner
- Soft rag or sponge
- Mineral oil, rubbing alcohol, or adhesive remover
- Dish soap, castile soap, or tent cleaner
Waterproofing and Maintenance
- Water repellent spray
- Drop cloth or tarp
- Sealant
- Patch kit
- Seam grip
- Pliers
- Zipper pull
- Zipper repair kit
Warnings
- Don’t soak your tent for longer than your tent cleaner or enzyme remover recommends. Immersing your tent in water for too long can break down the waterproof coating.⧼thumbs_response⧽

References
- ↑ https://tentsntrees.com/how-to-clean-a-tent-after-camping/
- ↑ https://tentsntrees.com/how-to-clean-a-tent-after-camping/
- ↑ https://www.fieldandstream.com/outdoor-gear/how-to-clean-a-tent/
- ↑ https://www.themanual.com/outdoors/how-to-clean-tent/
- ↑ https://www.beyondthetent.com/how-to-clean-a-tent/
- ↑ https://www.fieldandstream.com/outdoor-gear/how-to-clean-a-tent/
- ↑ https://www.themanual.com/outdoors/how-to-clean-tent/
- ↑ https://www.themanual.com/outdoors/how-to-clean-tent/
- ↑ https://www.fieldandstream.com/outdoor-gear/how-to-clean-a-tent/
- ↑ https://www.beyondthetent.com/how-to-clean-a-tent/
- ↑ https://www.fieldandstream.com/outdoor-gear/how-to-clean-a-tent/
- ↑ https://www.themanual.com/outdoors/how-to-clean-tent/
- ↑ https://www.beyondthetent.com/how-to-clean-a-tent/
- ↑ https://www.themanual.com/outdoors/how-to-clean-tent/
- ↑ https://outdoorish.com/learn/how-to-clean-a-tent-that-smells/
- ↑ https://www.wildernessroamer.com/how-to-clean-sap-off-your-tent/
- ↑ https://campinghabits.com/how-to-clean-a-tent-that-smells/
- ↑ https://www.fieldandstream.com/outdoor-gear/how-to-re-waterproof-outdoor-gear/
- ↑ https://thehikingauthority.com/how-to-waterproof-a-tent/
- ↑ https://backpackers.com/outdoor-guides/how-to-repair-camping-gear/
- ↑ https://blog.nols.edu/2017/09/05/how-to-fix-your-outdoor-gear
- ↑ https://www.themanual.com/outdoors/how-to-clean-tent/