This article was co-authored by wikiHow staff writer, Savannah Vold. Savannah Vold graduated from the University of California at Santa Barbara in 2020, earning her B.A. in English with a specialization in Literature and Culture of Information. Passionate about accessibility and fostering a love for the arts, she started her literary, arts, and culture-based website, The Executant. At wikiHow, Savannah feels fortunate to learn about new and exciting topics daily and is driven to empower anyone, anywhere, by providing accurate and engaging knowledge.
There are 7 references cited in this article, which can be found at the bottom of the page.
Learn more...
Keeping your film clean is essential to preserving those treasured reels for years to come. But how is it done? While taking your film to a professional is the safest way to ensure your film is properly cleaned and maintained, you can easily clean your 8mm film with little effort at home. In this article, we’ll teach you how to dust your 8mm (or 16mm) film with a microfiber cloth to remove dust and dirt. Then, we'll also explain how you can use a microfiber cloth and liquid film cleaner to remove more serious issues like mold. Read on for fabulous film-cleaning tips!
Things You Should Know
- Taking your film to a professional for cleaning is the safest way to ensure that your precious reel isn’t damaged during preservation.
- Clean your 8mm or 16mm film reels at home by winding them on a hand rewind and running them through a dry microfiber cloth with or without a film-safe cleanser.
- Store your film reels in a cool, dry, dark place to avoid environmental damage like sun fading and moisture.
Steps
Dusting Your Film with a Microfiber Cloth
-
1Place your set of manual hand rewinds on a board or table. A manual hand rewind is a hand-crank device designed explicitly for winding your film forward and back. We’ll be using our manual hand rewinds to clean the entire film reel. Specifically, we'll dust your original 8mm roll with a microfiber cloth and reload it into a take-up roll, which is an empty film roll that your original reel is wound into.
- Get a board or table sturdy enough to set your manual hand rewinds on to ensure it’s secure and ready for the next step.[1]
- The following steps will work for 16mm film as well.
-
2Start by putting on cotton or nitrile gloves for proper film handling. Much like photos, avoid touching the film reel with your bare hands, as the oils from your skin can damage the reel. Clean, lint-free, or nitrile gloves ensure that no particles or oils get transferred during the cleaning process.[2]Advertisement
-
3Secure your reels into the manual hand rewinds. Click in your original film reel on the right manual rewind, face up so that the film feeds out of the top. Click your take-up roll into the left manual rewind and feed in the film from the original reel by threading it through the opening slot of the take-up roll.[3]
- Wind the left manual rewind to ensure that the film rolls between the rewinds easily.
-
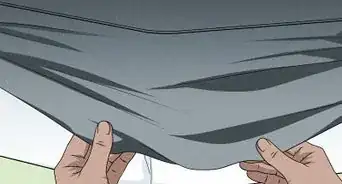
4Use a microfiber cloth to clean your 8mm film reel. Fold the cloth in half, lightly wrapping and holding it around your film reel. Then, slowly begin winding the right manual hand rewind so the entire film gently slides through the microfiber cloth. Make sure to check the cloth often for dirt and rearrange it so that only clean segments of the cloth touch the film reel.[4]
- Make sure that your microfiber cloth is free from any contaminates and is ready for use before applying it to the surface of your film reel.
- Some people prefer silicone cloths, which are also a great option and can be used the same way as a microfiber cloth.
-
5Remove your cleaned and rewound reel from the manual rewinds. Once you have cleaned the entirety of the film reel with your microfiber cloth and inspected it for any visible particulates such as dust, dirt, or mold, rewind your film into your original reel holder and disconnect it from the opening slot of the take-up roll. Unlatch the roll from the manual hand rewind, and you’re all finished![5]
- Remember to store your freshly cleaned film rolls in a cool, dark place, like a cabinet drawer, free of other objects that could poke, rip or spill onto your reel.


Cleaning with Film Solutions
-
1Set up your hand rewinds in a well-ventilated area. A manual hand rewind is a hand-crank device designed to help you wind your film forward and back, which makes cleaning each segment of your film reel super convenient. Since you’ll be working with a chemical film cleaner, protect yourself from breathing in harmful vapors by setting up your manual hand-rewind station near an open window or outside. Like the previous method, place your manual hand rewinds on a sturdy surface like a table or board.[6]
- This cleaning method will also work for 16mm film.
-
2Put on cotton or nitrile gloves. Gloves are a necessary precaution against damaging oils in your hands that could be transferred onto your film reel during cleaning. To protect your film, never handle it without gloves on.[7]
- If you’re working to clean mold off your reel, wear a KN95 mask to protect yourself from inhaling mold spores.
-
3Wind your reel through the manual hand rewinds and take-up roll. Click in your original film reel, film-side up, into the right-hand rewind, and the take-up roll (empty film roll) into the left. Thread the original film reel into the take-up roll by gently pulling it across the right-hand rewind to the left take-up roll, inserting it into the opening slot.[8]
- Wind the left-hand rewind to ensure that the film is rolling properly between the right and left sides.
-
4Moisten your microfiber cloth with your liquid film cleaner of choice. There are countless liquid film cleaners made specifically for cleaning your film reels safely and effectively. Make sure to read the directions on the back of your cleaner to ensure that you apply the proper amount onto a microfiber cloth, though most suggest applying just enough to moisten the cloth without it being sopping wet.[9]
- Filmrenew is a very popular film reel cleaner amongst the film community, though it does take a few days to dry, whereas other cleaning agents take much less.
- Some people use film cleaning machines, though hand-cleaning your film reels is considered the safest, most effective method.
-
5Run your 8mm film reel through a moistened microfiber cloth. Holding your moistened microfiber cloth in the cup of your hand, lightly cover the front and back of your reel. Wind one side of the manual hand rewinds to glide the reel gently through the microfiber cloth.[10]
- Work your way through the entirety of the reel by slowly gliding your microfiber cloth across the front and back, winding the reel forward with the manual hand rewind every second or so.
- Slowly running the reel through the moistened microfiber cloth minimizes the risk of the cleaner drying too rapidly, which could cause the film to stick together and become damaged.
-
6Use a clean microfiber cloth to dry your 8mm film reel. Fold the cloth in half, lightly wrapping and holding it around your film reel. Then, slowly begin winding the right manual hand rewind so the entire film gently slides through the microfiber cloth. Make sure to check the cloth often for dirt and rearrange it so that only clean segments of the cloth touch the film reel.[11]
- Make sure that your microfiber cloth is free from any contaminates and is ready for use before applying it to the surface of your film reel.
- Some people prefer silicone cloths, which are also a great option and can be used the same way as a microfiber cloth.
-
7Remove your original film reel from the manual rewind station. Once cleaned and dried, slowly and gently rewind your film reel into its original holder on the right side and disconnect it from the take-up roll. Remove the original film roll from the hand rewind, and you’ve successfully cleaned your reel![12]


Maintaing Your Film
-
1Store your film in a cool, dark, dry place. Like a photograph, environmental factors like the sun and excess moisture can fade and damage your precious reels irrevocably. Store your reels in a cool, dark, dry place, such as a special trunk in your closet that isn’t subject to extreme temperature changes.[13]
- Stack and store your film reels horizontally for even pressure distribution.
-
2Remove any extra materials from around your reels. Film reels are often held together with materials such as rubber bands or strings to keep them from unwinding. Over time, materials like rubber bands decompose onto the film, causing damage to your reel.[14]
- Rubber bands also deposit sulfur compounds onto the film as it breaks down, which can deteriorate the silver in the reel.
-
3Digitize your film reels as a backup. After you’ve cleaned your film reels, why not take them to be digitized? Digitizing your film reels on a DVD or downloadable file ensures that the contents of your reel are protected through copy-making and can even be done at home using a film digitizing device.[15]
- Film reels can easily become brittle and damaged over time, so having them digitized with multiple copies ensures that you won’t lose your priceless family memories or beloved collection pieces.


Warnings
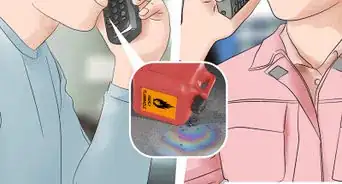
To ensure your reels are correctly cleaned and rid of more severe issues, such as a vinegar smell that can indicate brittleness and degradation, we recommend professionally caring for your reels.


References
- ↑ https://urbanskifilm.com/filmclean.html
- ↑ https://ask.loc.gov/preservation/faq/337286
- ↑ https://urbanskifilm.com/filmclean.html
- ↑ https://wp.nyu.edu/tischschoolofthearts-regionalmedialegacies/2021/04/21/moldy-films-and-how-to-react-accordingly/
- ↑ https://urbanskifilm.com/filmclean.html
- ↑ https://urbanskifilm.com/filmclean.html
- ↑ https://ask.loc.gov/preservation/faq/337286
- ↑ https://urbanskifilm.com/filmclean.html
- ↑ https://www.nfsa.gov.au/preservation/guide/handbook/conservation
- ↑ https://www.nfsa.gov.au/preservation/guide/handbook/conservation
- ↑ https://wp.nyu.edu/tischschoolofthearts-regionalmedialegacies/2021/04/21/moldy-films-and-how-to-react-accordingly/
- ↑ https://urbanskifilm.com/filmclean.html
- ↑ https://www.archives.gov/preservation/formats/motion-picture-film-storage.html
- ↑ https://www.nfsa.gov.au/preservation/guide/handbook/storage
- ↑ https://arapahoelibraries.org/blogs/post/digitizing-8mm-super-8-films-with-moviemaker-pro/
About This Article