This article was co-authored by wikiHow staff writer, Amy Bobinger. Amy Bobinger has been a writer and editor at wikiHow since 2017. She especially enjoys writing articles that help people overcome interpersonal hurdles but frequently covers a variety of subjects, including health and wellness, spirituality, gardening, and more. Amy graduated with a B.A. in English Lit from Mississippi College in 2011 and now lives in her hometown with her husband and two young sons.
There are 8 references cited in this article, which can be found at the bottom of the page.
This article has been viewed 147,861 times.
Learn more...
You might already know that you can dye feathers, but did you know that you can actually dye a live chicken? Some hatcheries inject dye into eggs to tell chicks apart when they hatch, while some people sell dyed chicks around Easter. This is a controversial practice that’s illegal in some places, but those who do it claim that if it’s done properly, there’s no harm to the chicks. However, you can also use food coloring to dye an adult chicken in a much less invasive practice.
Steps
Injecting an Egg with Dye
-
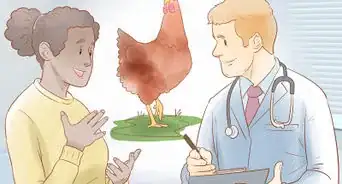
1Check the laws in your area to see if dyeing chicks is illegal. In some places, it may be illegal to dye chicks under a certain age, and some states ban the sale of dyed animals altogether. If you’re not sure, research animal cruelty laws in your state before you attempt this.[1]
- In Florida, for instance, you can’t dye any type of fowl, no matter its age.[2]
-
2Choose a 2-3% solution of vegetable-based food dye. The safest dye to inject into eggs is vegetable-based food dye. Luckily, this includes most of the commercially-available food dyes sold in your supermarket. These nontoxic dyes are gentle enough for people to eat, and there’s no evidence that they do any harm to developing chicks.[3]
- If you have a food dye that’s stronger than a 2-3% solution, dilute it with a little water.
- You can use any color you want, but red, green, and blue typically show up the best.
Advertisement -
3Inject the eggs between the 11th and 14th days of incubation. Chicken eggs need to incubate for about 21 days. You can inject the eggs anywhere between 10 and 19 days into their incubation. However, for best results, try to inject the dye between days 11-14. This will allow the color to saturate the growing bird’s feathers, and you’re more likely to end up with an even coloration.[4]
- After about 14 days, the chicks are taking up most of the room inside of the egg, so the color might not spread out over the whole bird.
-
4Remove each egg from the incubator and candle it. Candling an egg involves holding it in front of a bright light so you can see whether the egg is fertile. Using a lit candle or a small flashlight, look for the dark outline of the embryo and blood vessels spreading out from the center of the egg. If you don’t see that, the egg might not have been fertilized, and you should remove the egg from the incubator and dispose of it.[5]
- If you see a blood ring, or a red circle inside the shell, the embryo might have died, and you should also dispose of the egg.
Warning: Do not keep eggs out of the incubator for more than 30 minutes.
-
5Use alcohol to sterilize the needle and the small end of each egg. Pour a little 95% isopropyl alcohol on a gauze pad and wipe all around the small end of each egg. Wipe down the hypodermic needle you’re planning to use as well. This will help prevent bacteria from getting inside of the egg and harming the embryo.[6]
- Use a 20-gauge hypodermic needle to inject the dye into the egg. In most states, you can purchase these needles at your local pharmacy without a prescription.
- Allow the egg and needle to dry.
- If you'll be dyeing multiple eggs, sterilize the needle after each injection.
-
6Make a tiny hole 1⁄2 in (1.3 cm) from the small end of the egg. Holding the egg gently in one hand, use your other hand to press the tip of a 20-gauge hypodermic needle to the shell just above the smallest end. Gently press the needle into the shell, rotating it slightly until you make a small hole.[7]
- Do not insert the needle into the shell more than you need to in order to make the hole.
- This will be the same needle used to inject the dye.
-
7Inject 0.5 cc (0.5 mL) of dye into the egg. Place the tip of the needle into the dye and pull back on the plunger until you have about 0.5 cc (0.5 mL) in the chamber. Then, slip the needle just inside the hole you made, so the tip of the needle is just inside the inner membrane. Slowly and gently push down on the plunger to inject the dye into the egg.[8]
- If you go too fast, the dye might overflow and come back out of the hole, or it could even cause the shell to crack.
-
8Seal the hole with a drop of melted paraffin. It’s important to cover the hole so the dye and fluids from inside the egg can’t leak out. Spread the melted paraffin over the hole and allow it to dry for a minute or so before you return the egg to the incubator.[9]
- If you don’t have paraffin on hand, cover the hole with fast-drying cement or even a small piece of fabric from an adhesive bandage.
-
9Wait for the chicks to hatch. It takes about 21 days of incubation for chickens to hatch. Once you’ve injected the dye, allow the eggs to continue to incubate, turning them each day as you normally would. When the chicks hatch, they should come out as whatever color you dyed them![10]
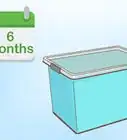
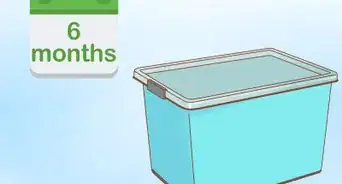
- The dye lasts for 2-4 weeks, which is how long it takes for the chicks to start growing their adult feathers.[11]


Dyeing a Chicken's Feathers
-
1Choose 2-3% vegetable-based food coloring. The best way to dye a chicken once it’s already hatched is to use food coloring. The kind that you can purchase at the grocery store, which is typically a 2-3% concentration, is perfect. It will typically produce a vibrant result on a white chicken, although the effect may be more subdued if your chicken is another color.[12]
- Even non-toxic hair dyes may be harmful if your chicken ingests them while it’s grooming itself, so it’s safer to stick to food coloring.
-
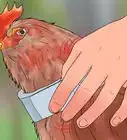
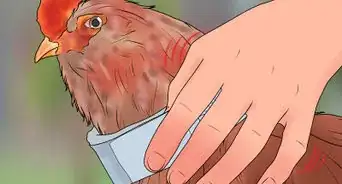
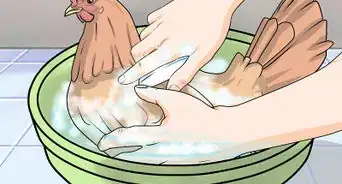
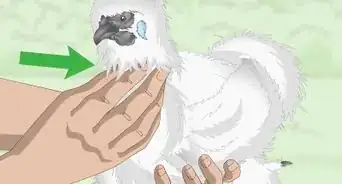
2Brush the dye onto the chicken with your fingers or an old toothbrush. Squirt a little of the food coloring into a cup or bowl and dip your fingers or an old toothbrush into the dye. Then, gently brush it onto the chicken’s feathers, always working in the same direction that the feathers grow. If you’re planning on dyeing the whole chicken, start on the underside and work your way up.[13]
- Avoid getting dye on the chicken’s face, since it might panic or choke if you pour water over its head when it’s time to rinse.
- Don’t massage the feathers too roughly, and don’t brush the feathers backward. Either of these techniques could damage the chicken’s feathers.
- You may need to have someone else hold the chicken for you as you apply the color.
-
3Leave the dye on for about 15-30 minutes. The longer you leave the dye on the chicken, the more vibrant the results will be. However, it’s best to stick to about 30 minutes at the most to avoid stressing the chicken out too much.[14]
Tip: Try to keep the chicken indoors or do this on a warm day so the chicken doesn’t get too cold.
-
4Rinse the dye until the water runs clear. Once the time is up, rinse your chicken in a shower or with a gentle sprayer. Avoid getting water in the chicken’s eyes or over its beak, as this could cause the bird to become very stressed out. Continue rinsing until you’ve removed all of the dye.[15]
-
5Blow-dry the chicken if it’s tame enough. Many chickens enjoy the feeling of being blow-dried, especially if they’re already hand-tamed and used to being pampered. Set your blowdryer to low heat and make sure the chicken is totally dry before you put it back outside.[16]
- This will help keep the chicken from getting a chill.
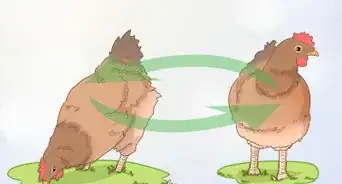
- The color should last for several weeks.


Community Q&A
-
QuestionWhat if you hit it in the head with the needle?
 Community AnswerThe chick will die.
 -
QuestionWhat is paraffin wax?
 KarinTop AnswererParaffin wax is a petroleum, coal or oil-shale derivative that is white or colorless and a soft solid. It's used in candles, crayons, as lubrication, and electrical insulation.
 -
QuestionWhy would someone do this?
 Community AnswerSome people like to color chickens for the novelty of it. It might also help them sell their chickens, especially closer to Easter.
Things You'll Need
Injecting an Egg with Dye
- 2-3% vegetable-based food coloring
- Chicken eggs
- Incubator
- 20-gauge hypodermic needle and syringe
- 95% isopropyl alcohol
- Gauze pad
- Light for candling
- Melted paraffin
Dyeing a Chicken's Feathers
- 2-3% vegetable-based food coloring
- Toothbrush (optional)
- Cup or bowl
- Timer


References
- ↑ https://www.audubon.org/news/colored-chicks-raise-concerns-after-easter-many-face-fates-worse-dye
- ↑ http://www.leg.state.fl.us/Statutes/index.cfm?App_mode=Display_Statute&Search_String=&URL=0800-0899/0828/Sections/0828.1615.html
- ↑ http://chickscope.beckman.uiuc.edu/resources/egg_to_chick/coloring.html
- ↑ http://chickscope.beckman.uiuc.edu/resources/egg_to_chick/coloring.html
- ↑ http://chickscope.beckman.uiuc.edu/resources/egg_to_chick/coloring.html
- ↑ http://chickscope.beckman.uiuc.edu/resources/egg_to_chick/coloring.html
- ↑ http://www.poultryhelp.com/coloringchicks.html
- ↑ http://www.poultryhelp.com/coloringchicks.html
- ↑ http://www.poultryhelp.com/coloringchicks.html
- ↑ https://modernfarmer.com/2015/04/how-to-incubate-chicken-eggs/
- ↑ http://chickscope.beckman.uiuc.edu/resources/egg_to_chick/coloring.html
- ↑ https://youtu.be/xS64wsM6Hcw?t=30
- ↑ https://youtu.be/xS64wsM6Hcw?t=114
- ↑ http://adayinapril.com/2014/08/the-pink-chicken-diy-project.html
- ↑ http://adayinapril.com/2014/08/the-pink-chicken-diy-project.html
- ↑ http://adayinapril.com/2014/08/the-pink-chicken-diy-project.html
About This Article