wikiHow is a “wiki,” similar to Wikipedia, which means that many of our articles are co-written by multiple authors. To create this article, volunteer authors worked to edit and improve it over time.
There are 8 references cited in this article, which can be found at the bottom of the page.
The wikiHow Tech Team also followed the article's instructions and verified that they work.
This article has been viewed 94,403 times.
Learn more...
Outlook is one of the most popular email clients in the world, and has a host of powerful features. In order to get the most out of Outlook, you'll want to add your email accounts so that you can find all of your messages in one place, import your calendar so that you can see upcoming events, and add your contacts from your various online contacts lists.
Steps
Adding an Email Account
-
1Understand the difference between POP and IMAP email services. There are two ways that email can be delivered to your email client: POP (Post Office Protocol) and IMAP (Internet Message Access Protocol). POP is the older method of transferring email messages, and works by downloading new messages to your client and then deleting them from the server. IMAP was designed to allow you to check email from multiple devices, as messages and organization are synced between all of the clients you use. [1]
- There is really no practical reason to use POP if IMAP is available. IMAP is more stable, more secure, and allows you to check your email from your computer, phone, and laptop without losing any messages.
- Most email services allow you to use IMAP, though some may charge for it. Gmail, Yahoo!, Outlook.com (Hotmail), AOL, and most service providers allow for IMAP.
-
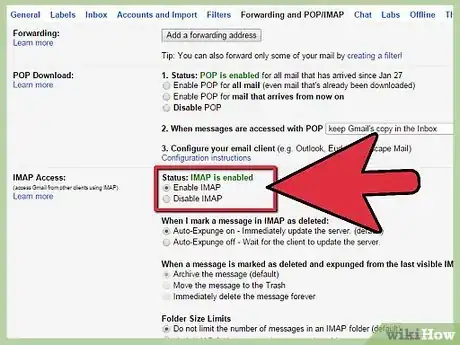
2Configure your service for IMAP (Gmail). Most email services allow you to access the IMAP functions without making any changes. The major exception to this is Gmail, where you will need to manually enable IMAP.[2]
- Log into the Gmail website and click the Gear button. Select "Settings' and then click the "Forwarding and POP/IMAP" tab. Select "Enable IMAP" and click "Save Changes".
Advertisement -
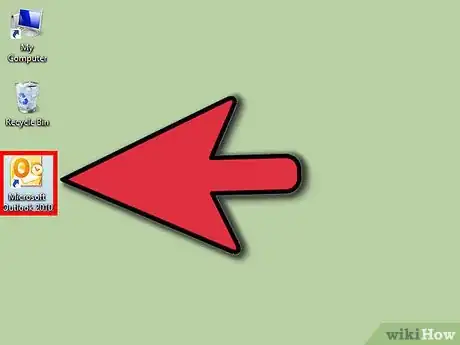
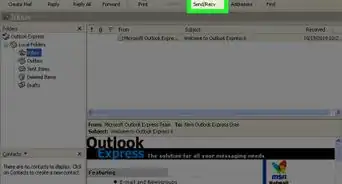
3Open Outlook. When you add an IMAP email service, you'll be able to check, organize, and manage your email in Outlook and on all of your other devices. Any changes you make in Outlook will be reflected in your other email clients.
-
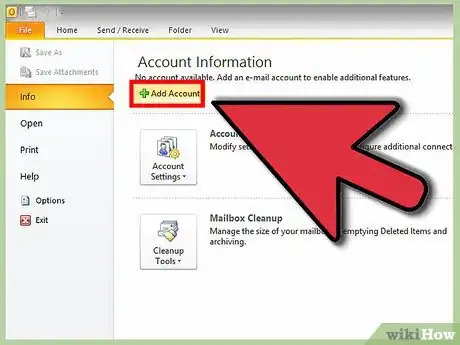
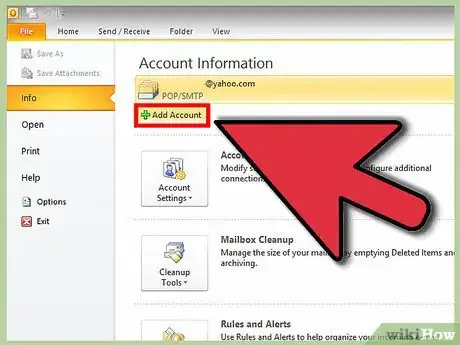
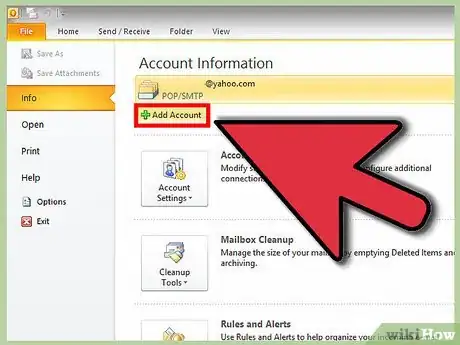
4Click the "File" tab. In the "Info" section, click the "+ Add Account" button.
-
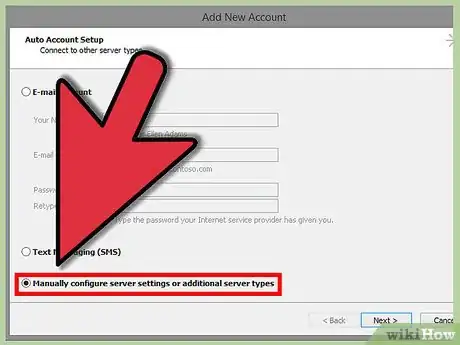
5Select "Manual setup or additional server types". This will allow you to enter any email account.
- Note: If you're using Gmail or Hotmail (Outlook.com), you can enter your email address and password in the "E-Mail Account" section of the Add New Account window and skip the rest of this section. Outlook will take care of the rest of the configuration for you. You can also manually set them up if you prefer by reading on.[3]
-
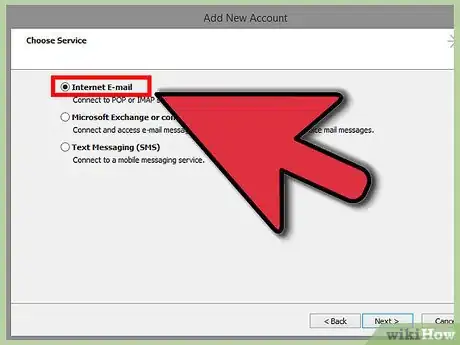
6Select "POP or IMAP". This will enable you to enter a web-based email account.
-
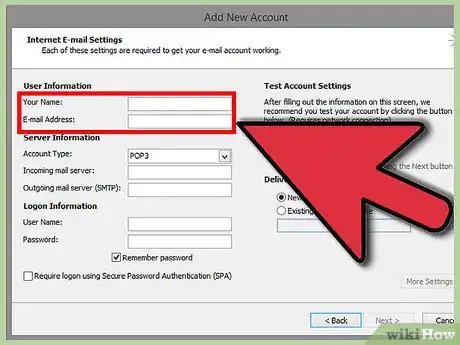
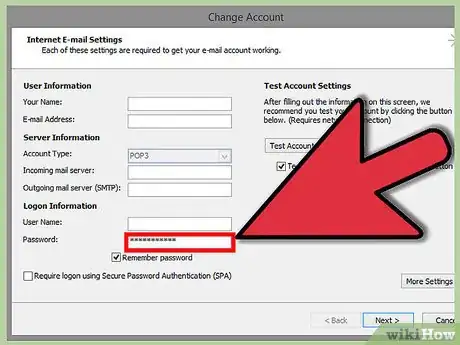
7Enter your email account information. Enter your name as well as your email address in the top section. Leave the Server Information blank for now (see next step). In the Logon Information section, enter your account User Name (usually the same as your email address) as well as the password you use to access the account.
-
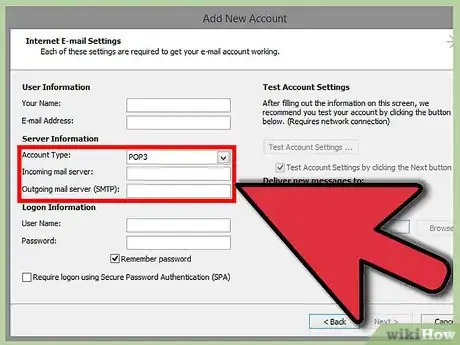
8Enter your mail server information. In the Server Information section, enter in the information for your mail service. Select "IMAP" from the Account Type drop-down menu. Below is information for some of the more popular mail services:
Service Incoming Mail Server Outgoing Mail Server Gmail imap.gmail.com
smtp.gmail.com
Yahoo![4] imap.mail.yahoo.com
smtp.mail.yahoo.com
Hotmail imap-mail.outlook.com
smtp-mail.outlook.com
AOL[5] imap.aol.com
smtp.aol.com
Comcast imap.comcast.net
smtp.comcast.net
Time Warner [6] mail.twc.com
mail.twc.com
AT&T[7] imap.mail.att.net
smtp.mail.att.net
-
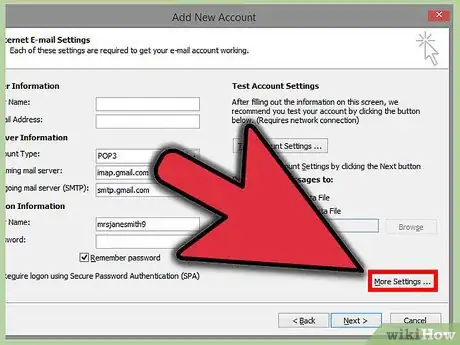
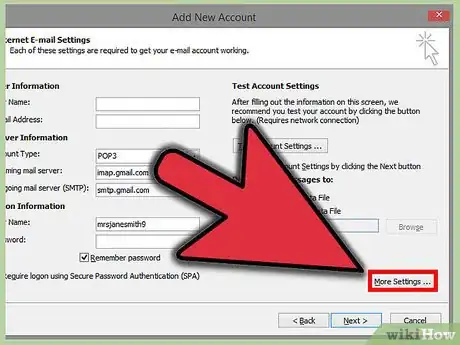
9Click the .More Settings... button. Click the Outgoing Server tab.
-
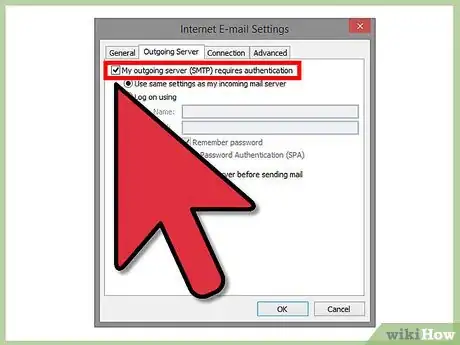
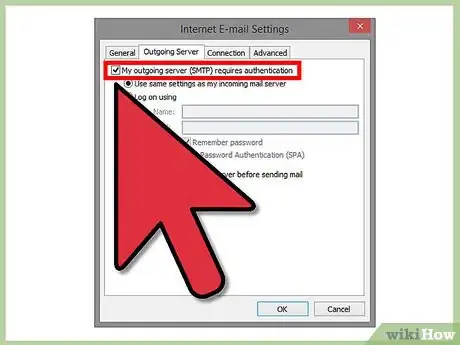
10Check the "My outgoing server (SMTP) requires authentication". Select "Use same settings as my incoming mail server". This setting is the same for nearly all email services.
-
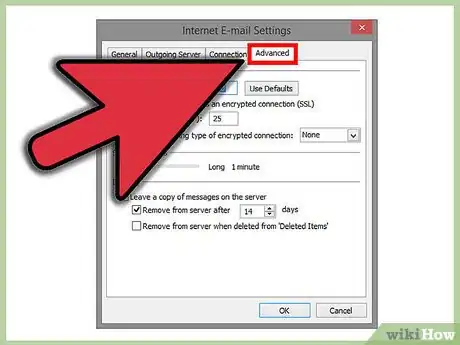
11Click the .Advanced tab. These settings are usually correct, but you'll want to verify them using the table below:
Service Incoming Server/
EncryptionOutgoing Server/
EncryptionGmail 993/SSL
587/TLS
Yahoo! 993/SSL
465/SSL
Hotmail 993/SSL
587/TLS
AOL 993/SSL
587/SSL
Comcast 993/SSL
587/TLS
Time Warner 143/SSL
587/SSL
AT&T 993/SSL
465/SSL
-
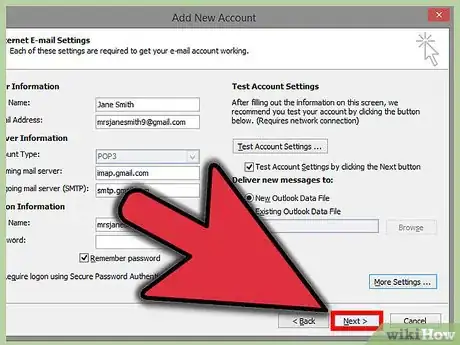
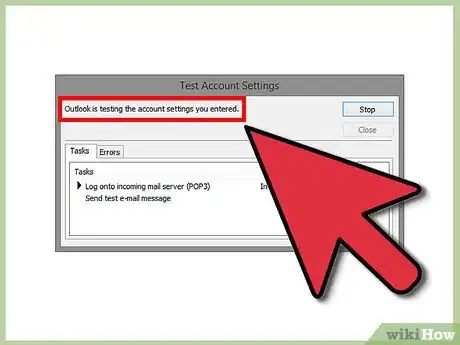
12Click .Next > after entering all of your account settings. Outlook will begin testing your settings to ensure that it can connect to the server to send and receive messages.
-
13Wait for your messages to sync. once you've connected your email account, your messages and folders will begin syncing with Outlook. Depending on how many messages you have, this may take a few moments. You can monitor the process from the status bar at the bottom of the window.
- Outlook will only have to do a major sync the first time you connect your account. After this, it will just sync any changes made from any of your email clients.
-
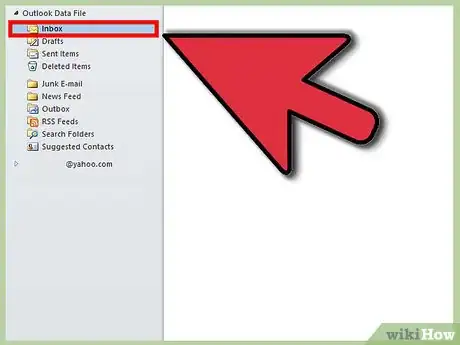
14Browse through your messages. On the left side of the window, you'll see your email account with its associated folders listed underneath. You can browse through these folders to see all of your messages. Any organizational changes you make in Outlook will be reflected in the web version of your email account, and vice versa.
Troubleshooting
-
1I can't send email messages, but I can receive them. If you can receive messages just fine, but Outlook gives you an error when sending, you'll want to double-check your Outgoing Server settings.
- Click the File tab and select "Info". Click "Account Settings" → "Account Settings", and then double-click the account you want to make adjustments to.
- Double-check that your Outgoing Mail Server is set correctly. In the "More Settings" window, look up alternate ports to try for the Outgoing Server. Also ensure that "My outgoing server requires authentication" is checked in the Outgoing Server tab.
-
2I can't receive email messages, but I can send them. If you can send email messages, but you're having difficulty retrieving new ones, you'll want to double-check your Incoming Server settings.
- Click the File tab and select "Info". Click "Account Settings" → "Account Settings", and then double-click the account you want to make adjustments to.
- Ensure that you have the correct IMAP address for your Incoming Mail Server. In the "More Settings" window, make sure your Incoming Server port is set to 993/SSL, unless otherwise specified by the email service.
-
3I can't send or receive email messages. If you are receiving authentication errors and can't send or receive messages, you're likely dealing with a bad password.
- Click the File tab and select "Info". Click "Account Settings" → "Account Settings", and then double-click the account you want to make adjustments to.
- Retype your password into the Password field. Check to see if your mail service requires logon using Secure Password Authentication (most web mail services don't require this).
- If you're using two-factor authentication, you'll need to crate and use an app-specific password for Outlook. Click here for instructions for Google's two-factor authentication.
Syncing Calendars
-
1Understand what will happen when you import a calendar. Outlook cannot sync both ways with calendar services, except Outlook.com (Hotmail). Instead, you can set Outlook to subscribe to your calendar, and it will automatically update when you make changes to your web calendar. Changes made to your Outlook calendar, however, will not be synced back to your web calendar.
- To sync an Outlook.com account, including the calendar, click the File tab and then click the "Add Account" button. Enter your Outlook.com account information and follow the prompts to sync your accounts.
-
2Find the ICAL address for your calendar. The ICAL address is a link to your web calendar that allows Outlook to stay updated. The process for finding the ICAL address depends on the calendar service:
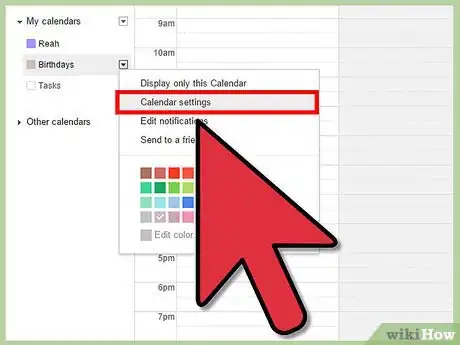
- Google Calendar - Log in to your Google Calendar. Hover over the calendar you want to share with Outlook and click the Menu button that appears. Select "Calendar Settings" and then click the ICAL button next to "Private Address". Copy the address that is displayed.
- Yahoo! Calendar - Log into your Yahoo! Calendar. Hover over the calendar you want to share with Outlook and click the Menu button that appears. Select "Share..." and then check the "Generate links" box. Copy the address in the "To import into a Calendar app (ICS)" box.
- Facebook - Log into your Facebook account. Click the "Events" option in the left menu. Right-click the "Upcoming Events" link and select "Copy". This link is in the small box underneath the "Events Happening This Week" box, found on the right side of the page.
- iCloud - In order to add your iCloud Calendar to Outlook, you'll need to install the iCloud Control Panel.
-
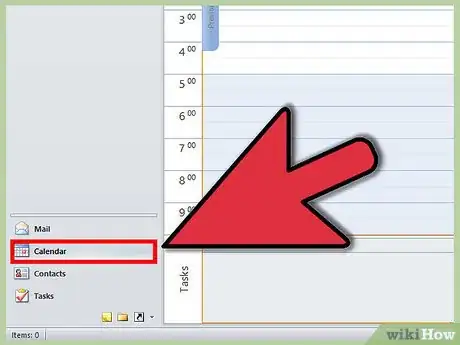
3Open Outlook and select the Calendar section.
- Outlook 2013 - You can select Calendar from the row of buttons along the bottom of the window.
- Outlook 2010, 2007, and 2003 - You can select Calendar from the list of buttons in the lower-left corner of the window.
-
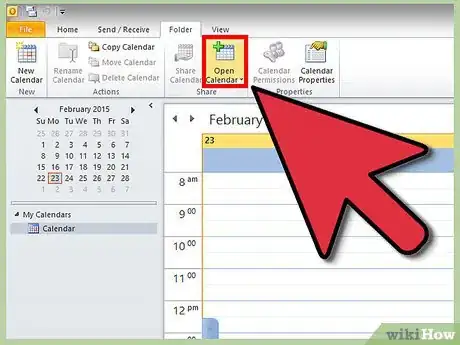
4Click the "Folder" tab, and then click "Open Calendar".
-
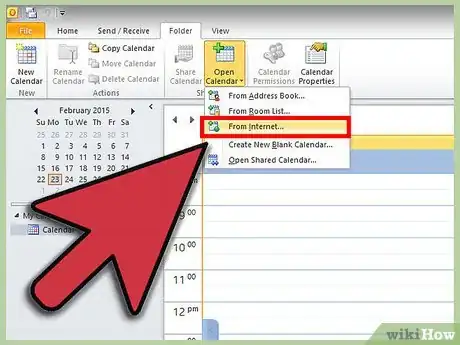
5Select "From Internet..." and paste in the ICS address. Click Yes when prompted to add the internet calendar.
- You can click Advanced... to add a description or rename the calendar.
-
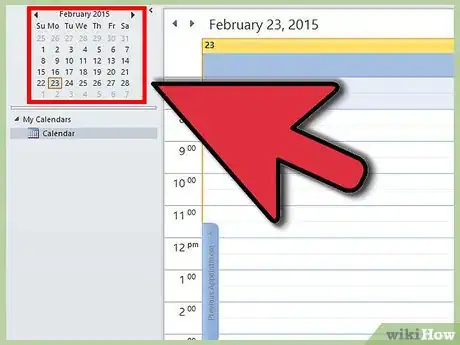
6Browse your calendar. Your new calendar will open, allowing you to see you internet calendar's events. Any changes made in Outlook will not be synced back to your internet calendar.
Troubleshooting
-
1My calendar is not staying synced with my iPhone. This is a fairly common problem when connected to an Exchange server, and requires a special tool to fix on your computer. It happens when files get corrupted during the sync process.
- Download the CalCheck program from Microsoft here.
- Unzip the program and drag CalCheck.exe to a convenient location on your computer.
- Hold the ⇧ Shift key and right-click in the folder that contains CalCheck.exe. Select "Open command window here".
- Type calcheck.exe -f and press ↵ Enter to run the program and attempt to fix any corrupted files.
Importing Contacts
-
1Understand what will happen when you import contacts from another service. Outlook cannot sync back and forth between your online contacts list and the Outlook contacts list. When you import a contacts file, any changes made in Outlook stay in Outlook. If you want to push the changes you've made in Outlook back to your online calendar list, you'll need to export your Outlook contacts.
- The exception to this is an Outlook.com account, which can sync with Outlook completely. To sync an Outlook.com account, including the contacts, click the File tab and then click the "Add Account" button. Enter your Outlook.com account information and follow the prompts to sync your accounts.
-
2Export the contacts from your other service. You'll need to download or save your contacts list as a file that Outlook can read and import. The process varies depending on your contacts service.
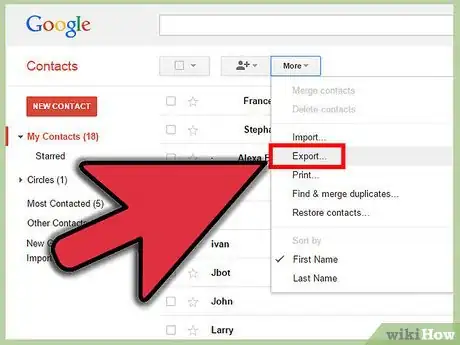
- Google Contacts - Log into the Gmail website. Click the "Gmail" menu and switch to "Contacts". Click the "More" button and select "Export...". Select which groups you want to export. By default, all contacts will be exported. Select "Outlook CSV" as the format. Save the file to your computer.
- Yahoo! Contacts - Log into the Yahoo! Mail website. Click the Contacts button above your mail folders list. Click the "... Actions" button above your list of contacts. Click "Export" and ensure that Microsoft Outlook is selected. Click "Export Now" to download the file to your computer.
- iCloud Contacts - Log into the iCloud website and select "Contacts". Select all of the contacts you want to export. You can hold down ⇧ Shift to select multiple contacts once. Click the Gear icon and select "Export vCard.." to download the contacts file to your computer.[8]
-
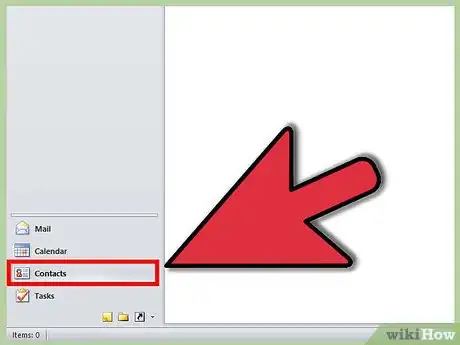
3Open Outlook and select the People section.
- Outlook 2013 - You can select People from the row of buttons along the bottom of the window.
- Outlook 2010, 2007, and 2003 - You can select People from the list of buttons in the lower-left corner of the window.
-
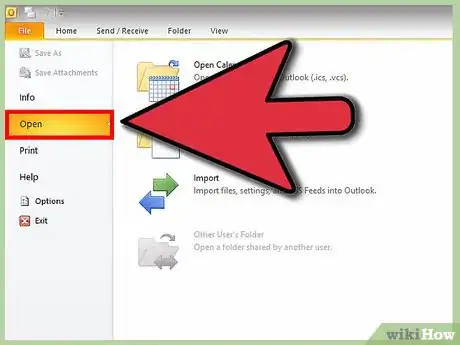
4Click the "File" tab and select "Open & Export".
-
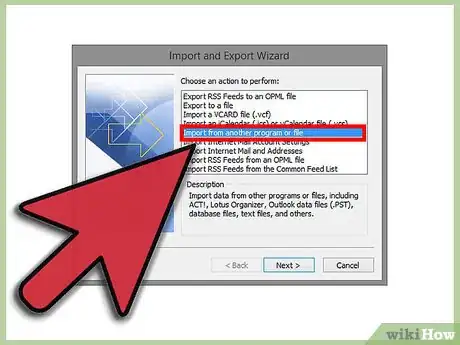
5Select "Import/Export" and then select "Import from another program or file".
- If you are importing iCloud contacts, select "Import a VCARD file".
-
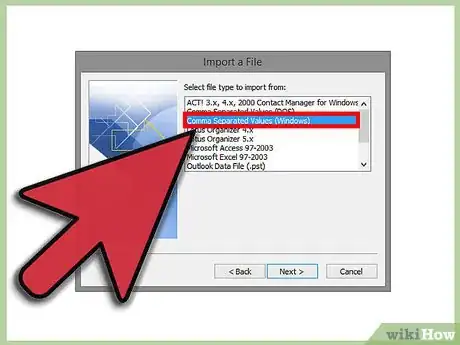
6Select "Comma Separated Values (Windows)". Browse for the file that you downloaded from your online contacts list.
-
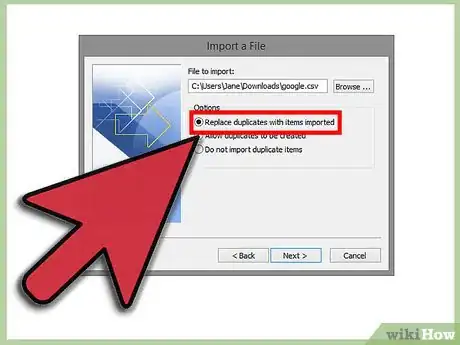
7Determine how you want to handle duplicates. If you already have contacts in Outlook, you may have duplicates when you import your contacts list. You can choose to replace duplicates with the internet contact information (best it is the more up-to-date source), create duplicates which you can then combine or delete later, or to not import duplicate items at all (best when Outlook is the more up-to-date source).
-
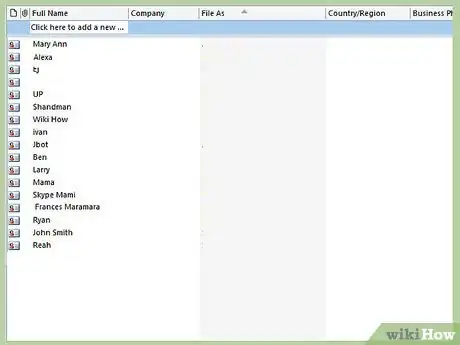
8Browse your contacts. Your contacts will now be listed in the People section of Outlook. You can quickly email your contacts or add them to groups. Any changes made in Outlook will not be reflected in your online contacts list.
Troubleshooting
-
1My Google contacts are not importing properly. Outlook may have difficulties with large CSV files containing hundreds of Google Contacts. You can quickly sync your contacts using Outlook.com (provided you have Outlook linked with your Outlook.com account).
- Visit people.live.com and log in with your Outlook.com account.
- Click the "Google contacts" button.
- Click "Connect" and then log in with your Google account.
- Select "Allow Access" and your contacts will be imported into your Outlook.com account, which if linked with Outlook will add them to your Outlook contacts.
References
- ↑ http://pop2imap.com/index.php
- ↑ https://support.google.com/mail/troubleshooter/1668960?hl=en#ts=1665018
- ↑ http://www.slipstick.com/outlook/email/setting-outlookcom-imap-account/
- ↑ https://help.yahoo.com/kb/imap%C2%A0server-settings-sln4075.html
- ↑ https://discussions.apple.com/thread/6600000
- ↑ http://www.timewarnercable.com/en/support/internet/step-by-step/twc-mail.html
- ↑ http://www.att.com/esupport/article.jsp?sid=33462&cv=820
- ↑ http://www.akruto.com/backup-phone-contacts-calendar/icloud-contacts-to-outlook/
About This Article
1. Click File.
2. Click Add Account.
3. Select Manual setup.
4. Select POP or IMAP.
5. Enter your account and server info.
6. Click Next.
