This article was co-authored by wikiHow staff writer, Kyle Hall. Kyle Hall works on the content team at wikiHow. He helps manage our team of editors and creates content for a variety of wikiHow projects. Kyle continually looks for new ways to improve the content at wikiHow and make it more helpful and enjoyable for readers. He graduated from Eckerd College in 2015, where he majored in Political Science.
This article has been viewed 77,928 times.
Learn more...
Constructing your moving boxes properly will help your belongings get to their destination safe and sound. The key is to open up the box and tape down the bottom flaps first so they're secure. Then, all you need to do is fill the box with your belongings and tape the top of it shut.
Steps
Opening a Flat-Packed Box
-
1Locate the flaps at the top of the box. To find the top of the box, look for the flaps that are connected by small cardboard tabs. Only the flaps at the top of the box will have these tabs. You can also look for letters or arrows on the box that indicate which side is the top.
-
2Fold the top flaps down on both sides. Keep the box flat when you fold down the flaps. The box should still lay flat after you fold the flaps down.Advertisement
-
3Open up the box so it’s no longer flat. To open up the box, pull the corners on opposite sides of the flattened box away from each other. When you’re finished, the box should be square.
- The top flaps should still be folded down after you open the box. The cardboard tabs connecting the flaps will lock them in place.
- If your box doesn't have lock tabs, just fold the top flaps down so they're not in your way.


Taping the Bottom
-
1Turn the box upside down. Now the folded-down flaps at the top of the box should be near the floor. The 4 bottom flaps should be pointing up at you.
-
2Fold the bottom flaps down over each other. Fold the shorter flaps down first, and then the longer flaps. When all of the bottom flaps are folded down, you shouldn’t be able to see into the box anymore.[1]
-
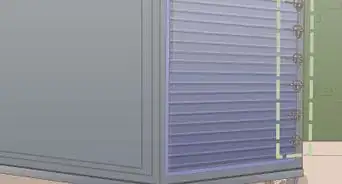
3Run a piece of packaging tape down the seam between the bottom flaps. Avoid using other kinds of tape, like masking or cellophane tape, that are less secure than packaging tape. Have the ends of the tape go 2–3 inches (5.1–7.6 cm) up the sides of the box.[2]
-
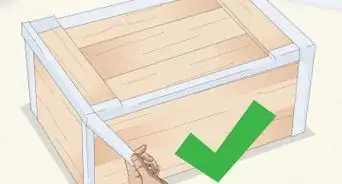
4Run another piece of tape along each side of the first piece. Overlap the second and third pieces of tape over the first piece of tape. The extra tape doesn't need to cover the seam between the bottom flaps — it's just there to make the bottom of the box extra secure.[3]
-
5Turn the box back over. The open end of the box should be at the top, and the taped end should be at the bottom. Now that the box is open and taped together, it’s ready for packing.


Closing the Top
-
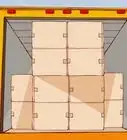
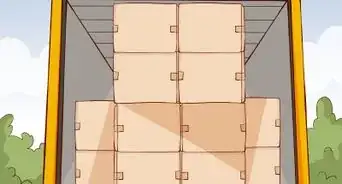
1Pack your things in the box. Check the bottom or side of the box for a weight limit and make sure your belongings don’t exceed it. When you’re finished, there shouldn’t be anything sticking out over the top rim of the box, or you won’t be able to close it.
-
2Cut the tabs on the top flaps with a utility knife. Cutting the tabs will free the flaps so you can fold them and close the box. Carefully cut down the center of the tabs until the flaps are no longer attached to each other.
- If the flaps don't have tabs, you can skip this step.
-
3Fold the top flaps down over each other. Fold the flaps just like you did with the flaps on the bottom of the box — short flaps first, then the long flaps. When you're done, the box should be closed with nothing sticking out of it.
-
4Tape the top of the box closed like you did on the bottom. First, run a piece of packaging tape down the seam between the top flaps so the ends go down the sides of the box. Then, run another piece of tape along each side of the first piece to make the box more secure.
-
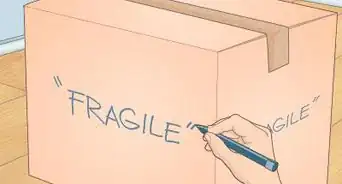
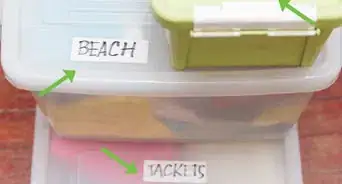
5Label the moving box. If this isn't the only box you'll be packing, number it so you can keep track of how many boxes you have. Then, write the name of the room you'll be unpacking it in after the move, like "kitchen" or "master bedroom." If there's anything fragile in the box, like glass or ceramics, write "fragile" on the outside.[4]


Things You’ll Need
- Moving box
- Packaging tape
- Utility knife
- Permanent marker

References
- ↑ https://www.youtube.com/watch?v=Fxl4yWEnZ7o&feature=youtu.be&t=11
- ↑ https://www.youtube.com/watch?v=Fxl4yWEnZ7o&feature=youtu.be&t=17
- ↑ https://www.youtube.com/watch?v=Fxl4yWEnZ7o&feature=youtu.be&t=17
- ↑ https://www.apartmenttherapy.com/3-smart-secrets-for-labeling-moving-boxes-that-will-make-your-next-move-a-breeze-222780
About This Article

If you’ve received some flat-packed moving boxes, you can easily construct them with a little box tape. The flaps connected with a small cardboard tab will be the top of the box. Turn your box upside down so the 4 open flaps are pointing up at you. Fold the 2 shorter flaps down first, then the 2 longer ones. Next, tape along the seam and up the sides of the box, and tape another piece intersecting that one to secure the bottom. Once you’ve packed your box, cut the tabs on the top flaps with a box cutter and secure the top like you did for the bottom. For more tips, including how to label your moving boxes, read on!