This article was co-authored by wikiHow Staff. Our trained team of editors and researchers validate articles for accuracy and comprehensiveness. wikiHow's Content Management Team carefully monitors the work from our editorial staff to ensure that each article is backed by trusted research and meets our high quality standards.
This article has been viewed 15,962 times.
Learn more...
Drones are small mechanical helicopter-like devices that can be piloted remotely. One of the most popular styles is a “quadcopter”: a 1 ft (0.30 m) “X”-shaped drone with 1 small propeller at the end of each arm. Drones are often equipped with cameras and can be flown over remote areas. Controlling a drone while it's in the air can be tricky and, since they're expensive, you'd be well advised not to crash a drone. Start out by keeping the drone well within eyesight, and practice simple maneuvers before trying anything too complex.
Steps
Taking off and Landing a Drone
-
1Practice piloting the drone in a large open area. This is especially important for any drone novices. You're bound to make a couple of mistakes the first time or 2 that you fly a drone, so avoid flying the machine in forested areas with trees and branches around you. Ideally, try to find an open meadow or field that's at least 200 yards (180 m) across, so you'll have plenty of obstacle-free space to fly in.[1]
- If you're new to flying a drone, stick to flying it outdoors in a large, open area. Since many drones can cost as much as $1,500 USD, any slight mishap could be very expensive.
- However, a number of small toy drones are made to be flow inside. Once you're an experienced drone pilot, you may be able to fly a drone indoors in a spacious and relatively empty room.
-
2Urge bystanders to stand at least 20 ft (6.1 m) away as you practice. The controls for a drone are sensitive, and a tiny tap in the wrong direction could send the drone flying in a direction you didn't intend. If friends (or family members, onlookers, etc.) are nearby, they could be in the drone's way. So, have them keep a safe distance for their own good.[2]
- If a friend gets too close to the drone as it's taking off or landing, they could be injured and the drone could be damaged or destroyed.
Advertisement -
3Press the left stick of the drone's remote control forward to take off. As you push the stick away from yourself, the propellers will engage and the drone will lift off. The speed with which the drone elevates itself will depend on how forward you push the left stick: use a gentle touch so that the drone will slowly lift off.[3]
- The left stick of the drone's remote control (often also called a “transmitter”) is called the “rudder.”
-
4Keep slight pressure forward on the left stick to let the drone hover. Once the drone has lifted off of the ground, continue pushing the left stick gently forward to keep the drone at a consistent altitude. Your drone is now hovering! For now, keep the drone less than 6 inches (15 cm) off of the ground. Try lightly pushing and pulling on the left stick to see how the drone responds.[4]
- Don't touch the right stick of the remote control for now.
-
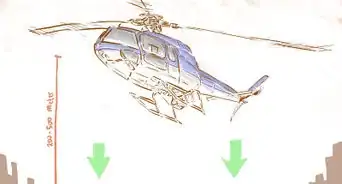
5Pull the left stick slowly back down to land the drone. Lower the drone slowly back to the ground when you're ready to set it down. When the drone is within 2 inches (5.1 cm) of the ground, pull the rudder all the way down (towards your body). This will drop the drone to the ground without damaging it.[5]
- It's worth practicing taking off and landing the drone 3–5 times before you move on to actually flying it. If you take off or land too aggressively, you could damage the drone.


Steering a Drone in the Air
-
1Fly the drone forwards and backwards by maneuvering the right stick. When your drone is in the air and hovering about 5–9 feet (1.5–2.7 m) off the ground, direct it forward or backwards by lightly pushing or pulling the right stick forward (away from your body) or backward (towards your body). Pressing the stick forward will send the drone forward, and pulling it backward will fly the drone backwards.[6]
- Fiddle around with the right stick to see how the drone responds. Remember that relatively small adjustments can have a large effect on the drone's direction.
-
2Move the right stick to the right or left to tilt the drone in that direction. Slight pressure on the right stick to the right or to the left will send the drone flying in that direction. Start by making small adjustments. Once you gain confidence and experience with the drone, you can move the right stick all of the way to the right or left so the drone tilts severely to 1 side or the other and makes more dramatic turns.[7]
- Don't quickly shuttle the stick back and forth multiple times in a row, or you'll risk damaging the remote control.
-
3Manipulate the left stick to rotate the drone left or right. This is another way to turn the drone, and one which will keep the drone at more or less a consistent altitude. Unlike steering the drone with the right stick (which causes it to tilt and dip to 1 side or the other,) turning the drone with the left stick keeps the device in more or less the same spot. This is also a useful way to find-tune the direction that the drone points in when you're using the camera.[8]
- Try combining left/right movements on the left stick with forward/backward movements to adjust the drone's elevation as you steer it left or right.
- Turning the drone left or right in this way is called adjusting its “yaw.”
-
4Combine movements with the left and right sticks to fly the drone. At this point, you'll have mastered the basics of drone control. As before, use the right stick to guide the drone left and right, and the left stick to move the drone up and down, or to control its rotation.[9] Keep in mind that, if your drone is equipped with a camera, the lens will always point forward.
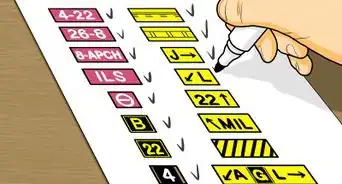
- Before you send your drone over the horizon, make sure to read the instructions and find out how far the remote-control signal transmits and how long the battery lasts.
- Depending on the type of drone you're flying, the maximum flight distance can range from 1.5–8 kilometres (0.93–4.97 mi). Most drones have a battery life of roughly 30 minutes.


Practicing Common Flight Patterns
-
1Rotate the right stick to pilot the drone in a circle. For this flight pattern, you won't need to touch the rudder. To send your drone in a clockwise circle, begin by pressing the right stick forward and to the right. Slowly rotate the right stick so it's pointing only to the right, and then circle it back so it's pointing towards your body. Finish the circle by rounding the right stick clockwise to the left and then forward again.[10]
- Once you've perfected the clockwise circle, try flying the drone in a counterclockwise circle. You'll use the same steps as presented above, but steer the rudder counterclockwise.
-
2Pilot the drone in a square by moving the right stick at right angles. Start out with the drone hovering. Slide the right stick forward so the drone flies about 5 feet (1.5 m) in this direction, then return the right stick to the center. Then, slide the right stick to the right so the drone moves 5 feet (1.5 m) in that direction.[11]
- Finish off the square pattern by flying the drone 5 feet (1.5 m) backwards (by moving the right stick back towards you) and to the left (by moving the right stick to the left).
-
3Practice hovering over specific targets to improve your control. To improve your hovering skills, line up 3 or 4 objects (e.g., traffic cones) each 3–4 feet (0.91–1.22 m) apart from one another. Use the controls to fly the drone over the first object, then hold the left stick (yaw and elevation) steady. Tweak the right stick until the drone hovers in place. Then use the right stick to guide the drone over to the next object and again stabilize the drone so it hovers.[12]
- This can be a useful flight technique to use if you're planning to take advantage of the drone's camera. If you're filming something on the ground, hover the drone directly over it for as long as you like.
-
4Fly the drone at different orientations to prepare for longer flights. As you fly your drone at greater heights and farther distances, it won't always remain pointing in the same direction. So, while the drone is sitting on the ground, turn it 90°, 180°, or 270°. Practice lifting off and landing the drone, and pilot it in the air until you're comfortable flying the drone as it faces any angle. As you steer the drone, you'll need to perform some mental adjustments so it goes in the direction you'd like.[13]
- For example, with the drone rotate 90°, moving the right stick left or right will move the drone forward (away from you) or backward (back towards you).
- It might be easiest to start with the drone rotated 180°. In this position, moving the right stick to the right will cause the drone to turn left, and vice-versa.


Community Q&A
-
QuestionWhat if it gets lost in the air?
 HaoCommunity AnswerMost drones have a return home feature. Press that button and it will come back to where it took off from.
Warnings
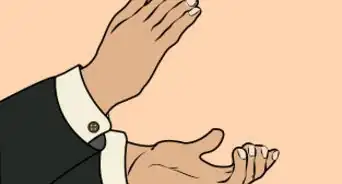
- The spinning propellers of a drone can be quite dangerous. When the propellers are moving—or anytime that the drone is on—keep your fingers away from the blades. Always handle a drone by picking it up from the center, not the propeller.[15]⧼thumbs_response⧽
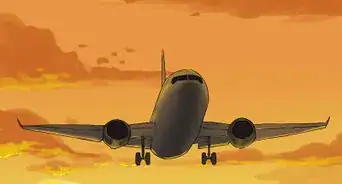
- Before attempting to fly a drone over land that you do not own, make sure that you're legally able to do so. For example, the National Park Service does not allow any drone flight over parks.⧼thumbs_response⧽


-Step-15.webp)
References
- ↑ https://uavcoach.com/how-to-fly-a-quadcopter-guide/#Place
- ↑ https://uavcoach.com/how-to-fly-a-quadcopter-guide
- ↑ https://uavcoach.com/how-to-fly-a-quadcopter-guide
- ↑ https://youtu.be/P3E2pQnEDRI?t=90
- ↑ https://uavcoach.com/how-to-fly-a-quadcopter-guide
- ↑ https://uavcoach.com/how-to-fly-a-quadcopter-guide
- ↑ https://uavcoach.com/how-to-fly-a-quadcopter-guide
- ↑ http://dronenodes.com/how-to-fly-a-quadcopter-beginner-guide/
- ↑ http://dronenodes.com/how-to-fly-a-quadcopter-beginner-guide/
- ↑ https://uavcoach.com/how-to-fly-a-quadcopter-guide
- ↑ https://uavcoach.com/how-to-fly-a-quadcopter-guide
- ↑ https://youtu.be/aSeKzdO_uxo?t=101
- ↑ https://uavcoach.com/how-to-fly-a-quadcopter-guide
- ↑ http://dronenodes.com/how-to-fly-a-quadcopter-beginner-guide/
- ↑ https://uavcoach.com/how-to-fly-a-quadcopter-guide/#Place
About This Article