This article was co-authored by wikiHow staff writer, Amy Bobinger. Amy Bobinger has been a writer and editor at wikiHow since 2017. She especially enjoys writing articles that help people overcome interpersonal hurdles but frequently covers a variety of subjects, including health and wellness, spirituality, gardening, and more. Amy graduated with a B.A. in English Lit from Mississippi College in 2011 and now lives in her hometown with her husband and two young sons.
There are 12 references cited in this article, which can be found at the bottom of the page.
The wikiHow Video Team also followed the article's instructions and verified that they work.
This article has been viewed 178,861 times.
Learn more...
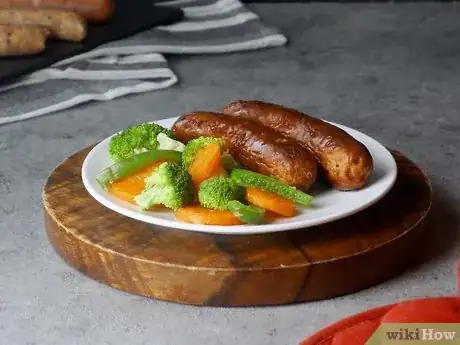
While there's no wrong way to cook bratwurst, cooking them in the oven is about as easy as it gets. It’s a great option if the weather isn’t nice enough for grilling, and the result is a plump, juicy sausage with almost no effort. Whether you're using your brats in a recipe or you're enjoying them on a bun, you won't be sorry you gave this a try!
Ingredients
- 1 medium white onion
- 2 cloves garlic
- 1–2 tablespoons (15–30 mL) olive oil
- 2–3 tablespoons (30–44 mL) Worcestershire sauce
- Salt and pepper to taste
- 1 tbsp (12.5 g) brown sugar (optional)
- 1 tsp (1.5 g) red pepper flakes (optional)
- 5 bratwursts
- 2 12 fl oz (350 mL) beers of your choice (lager, stout, IPA, amber, etc)
- 5 buns or rolls
Makes 5 servings
Steps
Baking the Bratwurst
-
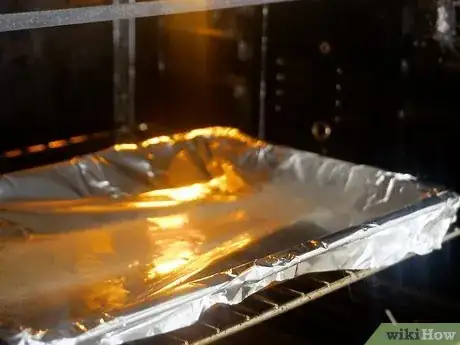
1Line a rimmed baking pan with foil and place it in the oven. Spread a sheet of aluminum foil across the baking pan and crimp the edges around the sides of the pan to hold it in place. This will make cleanup easy, and it will help keep the brats from sticking to the pan. Once the pan is lined, place it in your oven so it can get hot as the oven preheats.[1]
- You can use a cookie sheet, a casserole dish, or any other pan you have on hand. It just needs to be big enough to hold all of the bratwurst so that they don’t touch each other.
- If you use a rimmed baking sheet, the brats won’t be able to accidentally roll off the side.
-
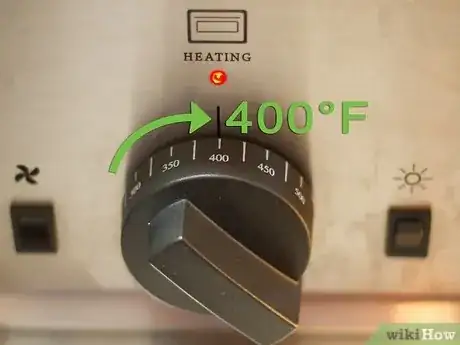
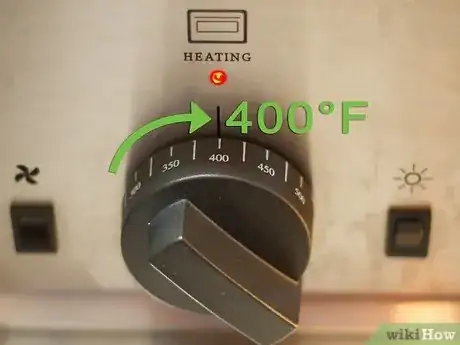
2Preheat the oven to 400 °F (204 °C). Once you’ve placed the pan inside of the oven, turn the oven to 400 °F (204 °C). Give the oven about 10-15 minutes to reach the correct heat. If you have a thermometer on your oven, you can use that to monitor the temp so you’ll know when the oven is ready.[2]
- Preheating the oven will give you more consistent results while you’re cooking, since the temperature will already be stabilized when you add the food.
- By preheating the baking pan along with the oven, you’ll get a nice sear on the outside of the sausages.
Advertisement -
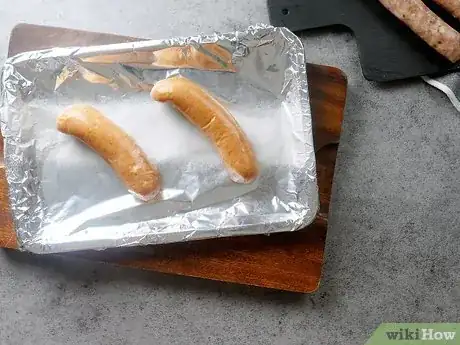
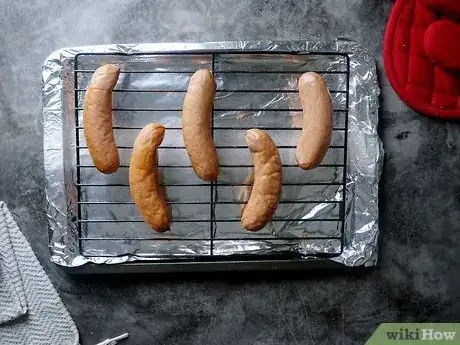
3Take out the baking pan and spread out the brats in a single layer. Use oven mitts to carefully slide the baking pan out of the oven. Set the pan on top of the stove or on a heat-safe mat on the counter, then add the bratwursts on top of the foil.
- To ensure even cooking, make sure the brats aren’t touching each other on the sheet. However, they don’t need much space between them, so as long as you have about 1⁄2 in (1.3 cm) around each one, you should be fine.
-
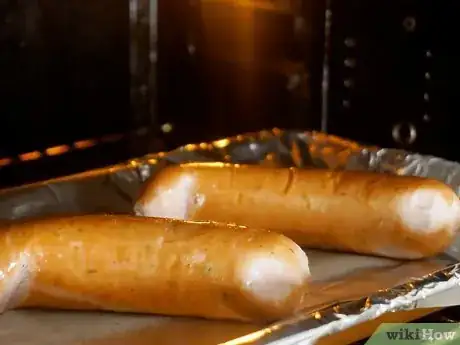
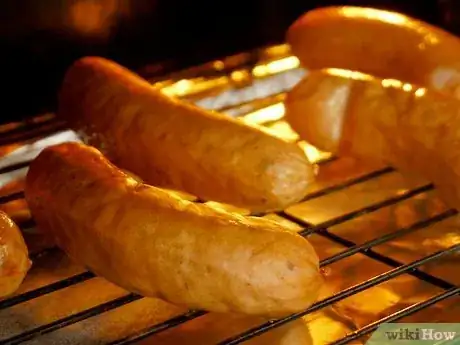
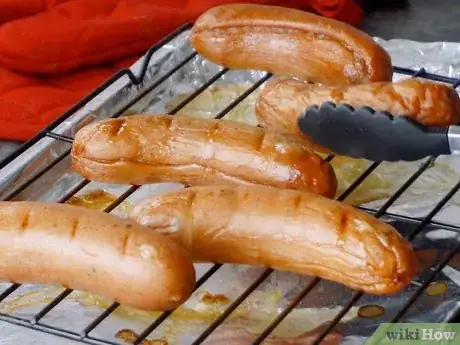
4Place the brats in the oven for 45 minutes, turning once with tongs. After the brats have been cooking for about 20 minutes, carefully turn them over with a pair of cooking tongs. This will ensure they brown evenly on both sides. Return them to the oven and cook them for another 20-25 minutes, or until the sausages are browned on the outside.[3]
- Remember to use oven mitts when you handle the pan, as it will be very hot.
-
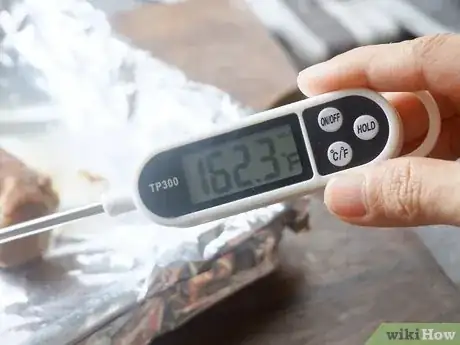
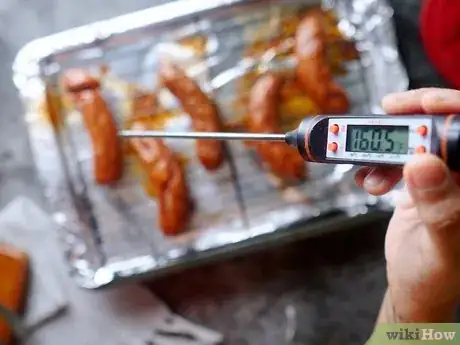
5Make sure the internal temp of the brats reaches 160 °F (71 °C). To make sure the bratwursts are fully cooked, they need to be at least 160 °F (71 °C). Slide an instant-read meat thermometer into the thickest part of the sausage to check the temperature.[4]
- When you’re cooking meat, always judge the doneness by the internal temperature, rather than the time it’s been cooking. Smaller brats may only need to cook for about 30 minutes, while larger brats may take about an hour.[5]
-
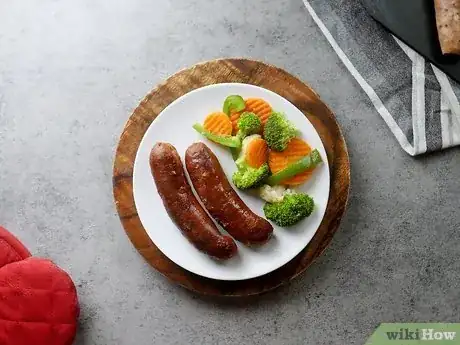
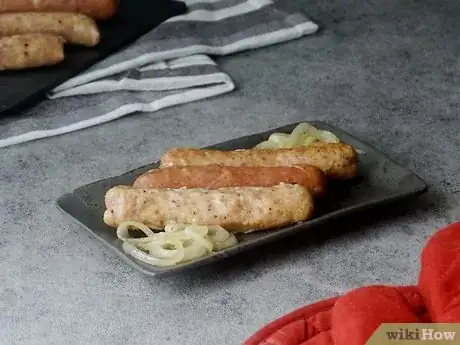
6Let the brats cool for about 5 minutes, then serve. When meat cooks, the juices tend to draw toward the center of the food. By letting the bratwurst rest for about 5 minutes, you’ll give those juices time to redistribute through the food, resulting in a delicious, tender brat![6]
- Store your leftover bratwurst in an air-tight container in the fridge for 3-4 days, or in the freezer for 1-2 months.[7]
Serve with: Try serving your brats with sauteed onions and peppers, roasted vegetables, or potatoes!
Broiling Your Brats
-
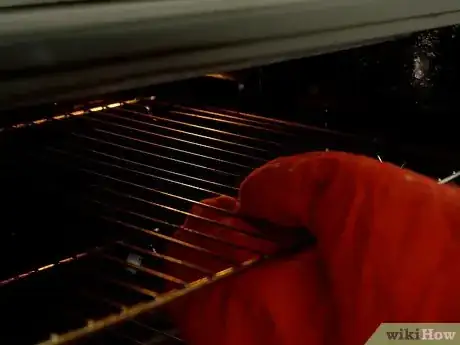
1Move the top rack in your oven as high as it will go. On most oven models, the broiler is located at the very top of the oven. The broiler delivers intense, direct heat to cook food quickly, and the best way to take advantage of this is to get the food as close to the broiler as you can.[8]
- If you have an older oven, the broiler may be located in the drawer beneath the main oven compartment. If this is the case, you don’t need to move the rack at all.
-
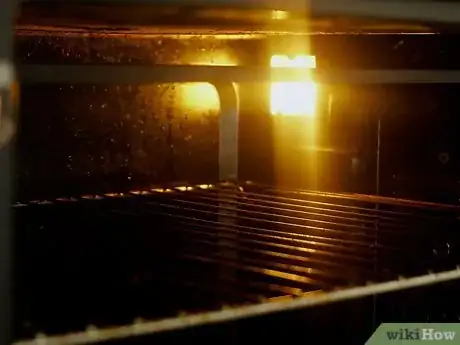
2Turn on the broiler to let it preheat for about 10 minutes. Most broilers don’t have adjustable temperatures. Some only have on and off, in which case you should turn it on. If your broiler has a “high” and a “low” setting, set the broiler to high. It will take about 10 minutes for the broiler to preheat.[9]
- Since the broiler will get hot very quickly, it’s important to adjust the racks in your oven before you turn on the broiler. Otherwise, you could burn yourself.
-
3Arrange the brats on a broiler pan so they're not touching. A broiler pan has slots in the bottom, and it usually fits inside of another tray or pan. The slots allow the hot air in the oven to circulate around the sausages, resulting in a more even cook.[10]
- It’s important to have a tray under your broiling pan because the brats will likely drip some juices while they’re cooking. If those juices fall into the bottom of your oven, it could become a fire hazard.
-
4Broil the brats for 15-20 minutes, turning them every 5 minutes. Use tongs to carefully flip the bratwursts every 5 minutes or so to prevent them from burning. You may need to pull the pan part of the way out of the oven in order to flip them. If so, be sure to use oven mitts so you don’t get burned.[11]
- Be very careful not to touch the top of your oven when you’re flipping the brats. The broiler element will be extremely hot and could give you a serious burn.
-
5Take out the brats when they're slightly browned, with grate marks. Although oven-cooking brats typically won’t result in grill marks, you will start to see some darker lines on the bratwurst from the grates in the broiling pan. This is a great way to get some of the delicious char you’ve been missing if it’s too cold or rainy to grill![12]
- Since bratwurst is made from ground pork, it’s important to take the temperature to judge the doneness, rather than relying on the brats’ appearance.
-
6Use a meat thermometer to ensure the internal temp is 160 °F (71 °C). Slide an instant-read meat thermometer into the center of the bratwurst, making sure to pass through the thickest part. If the temperature reads 160 °F (71 °C), the brats are done![13]
- If the brats aren’t ready, put them in for another 5 minutes until they reach the right temperature.
-
7Let the bratwurst rest for 5 minutes, then serve. Giving the bratwurst time to cool will keep you from burning your mouth, but it will also give the juices time to redistribute through the meat. The end result will be a delicious, tender brat that tastes almost like it came right off of the grill![14]
- If you have any leftovers, place them into an airtight container or a resealable plastic bag. They'll keep for 3-4 days in the refrigerator or 1-2 months in the freezer.[15]
Making Oven-Braised Beer Brats
-
1Preheat your oven to 400 °F (204 °C). Since you’ll be simmering the bratwurst in liquid along with lots of onions, you’ll want a really hot oven to ensure everything gets cooked through. Give the oven about 10-15 minutes to reach the desired temperature before you put any food in the oven.[16]
- By preheating the oven, you’ll be able to be more accurate with your cooking times. If you put food into a cold oven, you have to account for the heating time when you calculate how long the food has been cooking.
-
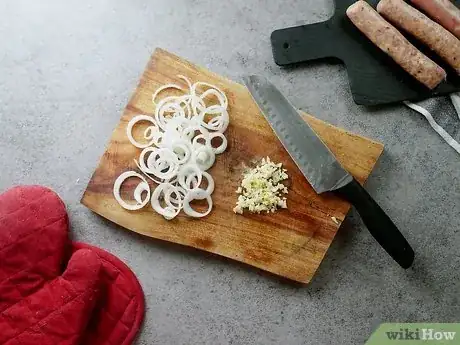
2Slice an onion into rings and mince 2 cloves of garlic. Use a sharp knife to carefully slice a medium white onion horizontally to make rings that are about 1⁄4 in (0.64 cm) wide, then break up those rings with your hands. For the garlic, mince 2 cloves as finely as possible.[17]
- If you don’t like a lot of onions, or if you picked a large onion at the grocery store, it’s fine to only use half.
- If your eyes water when you’re cutting onions, try putting the onion into the freezer for 10-15 minutes first. Don’t leave it in longer than that, though, or it could make the onion mushy.[18]
- Some people opt to leave the garlic out of the recipe. While the garlic adds a nice flavor that complements the onions and beer, it’s fine to omit it if you prefer.
-
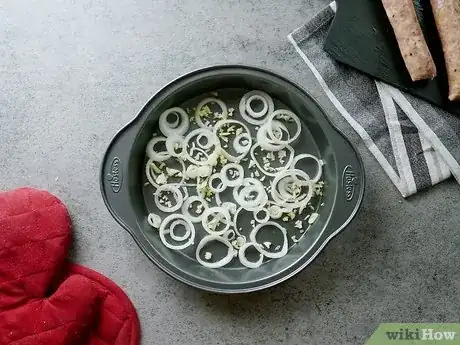
3Spread the onions and garlic in a deep baking dish. As long as the baking dish is at least 2–3 in (5.1–7.6 cm) deep, the size doesn’t matter as much. However a standard 9 in × 13 in (23 cm × 33 cm) pan is a good option here.[19]
- While this 1-dish meal is already great for easy clean-up, opt for a disposable aluminum baking dish to make it even simpler!
-
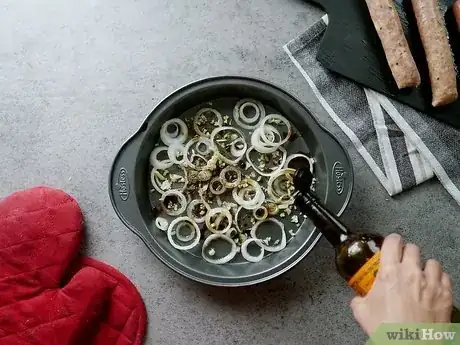
4Drizzle olive oil, salt and pepper, and Worcestershire sauce over the onions. Once you’ve added the onions and garlic to the baking dish, add about 1–2 US tbsp (15–30 mL) of olive oil, 2–3 US tbsp (30–44 mL) of Worcestershire, and salt and pepper to taste. Stir everything together to combine it.[20]
- For sweeter brats, add 1 tbsp (12.5 g) of brown sugar.
- If you prefer spicier brats, add in 1 tsp (1.5 g) of red pepper flakes.
-
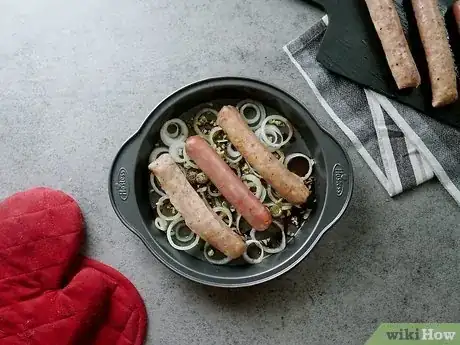
5Lay 5 brats on top of the onion mixture. Push the brats down slightly into the onions when you place them in the pan. As the onions cook and soften in the beer, they’ll surround the brats, making both the bratwurst and the onions more flavorful. [21]
-
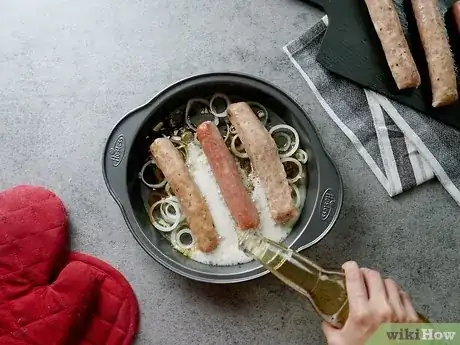
6Pour 2 12 fl oz (350 ml) beers into the dish. The type of beer you use is totally up to you. You can use anything from the cheapest option at your neighborhood market to a microbrew that’s made at a local brewery. Whichever type of beer your choose, pour it into the pan until the brats are about halfway submerged.[22]
- Different beers will produce different flavors. For instance, a lager will have a mild taste, an IPA will leave a bitter flavor, and a stout will be richer and deeper.
- For an option that’s a little richer than a lager but not as dark as a stout, opt for an amber or a red beer.
- Depending on the size of the pan you’re using, you may not need to use all of the beer.
-
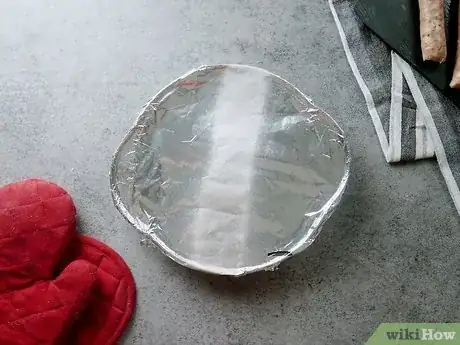
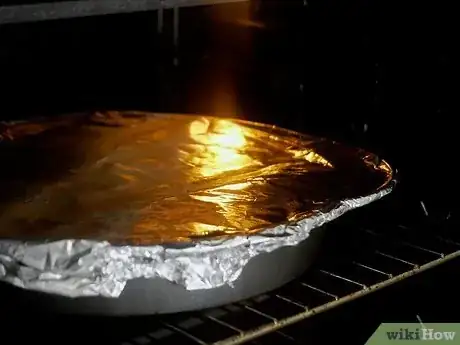
7Cover the pan tightly with aluminum foil. Place a long sheet of aluminum foil over the pan and crimp it tightly around the edges. This will help the bratwurst to steam as it cooks, and the result will be a more flavorful and juicy sausage.[23]
- If one sheet of foil doesn’t cover the pan, use 2 sheet and overlap them.
-
8Place the pan in your oven for about an hour, turning once. Once you’ve covered the pan and your oven is preheated, place the brats on the center rack of the oven. After about 30 minutes, they’ll be ready to flip. Carefully remove the pan with oven mitts and flip the sausages, then cook them for another 30 minutes.[24]
- Use caution when you open the foil on top of the pan, as steam will escape. Be sure your hands and face aren’t in the path of the steam, or you could be burned.
- Do not pierce the brats with a fork, or the juices will run out.
- After the hour, test the internal temperature of the thickest with an instant-read thermometer. If the temperature reads 160 °F (71 °C), then the bratwursts are done! If not, put them back in the oven for another 5-10 minutes until they reach the right temperature.[25]
-
9Serve the brats on a bun topped with the onions. The beer-cooked onions make the perfect topping for bratwursts served on a soft bun. If you like, you can toast the bun and top the brats with mustard, or you can just enjoy them plain on a soft bun if you prefer.
- Keep leftover brats in an airtight container in the fridge for 3-4 days or freeze them for up to 2 months.[26]
Other toppings: Try topping your beer-braised brats with sauerkraut, mustard, or pickled jalapenos!
Things You'll Need
Baking the Bratwursts
- Rimmed baking sheet
- Aluminum foil
- Oven mitts
- Heat-safe mat (optional)
- Instant-read meat thermometer
- Tongs
- Oven
Broiling Your Brats
- Broiler
- Broiler pan
- Tongs
- Oven mitts
- Instant-read meat thermometer
Making Oven-Braised Beer Brats
- Oven
- Cutting board
- Sharp knife
- 9 in × 13 in (23 cm × 33 cm) baking dish
- Aluminum foil
- Oven mitts
References
- ↑ https://thekitchenprofessor.com/blog/best-way-make-brats-without-grill
- ↑ https://www.budgetbytes.com/roasted-bratwurst-peppers-onions/
- ↑ https://www.budgetbytes.com/roasted-bratwurst-peppers-onions/
- ↑ https://www.fsis.usda.gov/wps/wcm/connect/625d9435-4f14-46fe-b207-5d6688cb4db5/Safe_Miminum_Internal_Temperature_Chart.pdf?MOD=AJPERES
- ↑ https://thekitchenprofessor.com/blog/best-way-make-brats-without-grill
- ↑ https://www.seriouseats.com/2009/12/how-to-have-juicy-meats-steaks-the-food-lab-the-importance-of-resting-grilling.html
- ↑ https://www.stilltasty.com/fooditems/index/18274
- ↑ https://www.cookinglight.com/cooking-101/techniques/how-to-use-broiler#how-to-brown-in-broiler
- ↑ http://www.thenibble.com/reviews/main/meats/sausages/sheboygan-bratwurst.asp
- ↑ https://www.epicurious.com/recipes/food/views/bratwurst-with-creamy-apple-compote-240278
- ↑ https://www.epicurious.com/recipes/food/views/bratwurst-with-creamy-apple-compote-240278
- ↑ http://www.md-health.com/Cooking-Brats-In-The-Oven.html
- ↑ https://www.fsis.usda.gov/wps/wcm/connect/625d9435-4f14-46fe-b207-5d6688cb4db5/Safe_Miminum_Internal_Temperature_Chart.pdf?MOD=AJPERES
- ↑ https://www.seriouseats.com/2009/12/how-to-have-juicy-meats-steaks-the-food-lab-the-importance-of-resting-grilling.html
- ↑ https://www.stilltasty.com/fooditems/index/18274
- ↑ http://www.simplyscratch.com/2016/05/oven-braised-beer-brats.html
- ↑ http://www.simplyscratch.com/2016/05/oven-braised-beer-brats.html
- ↑ https://www.thekitchn.com/five-tips-on-how-to-cut-onions-1-44517
- ↑ http://www.simplyscratch.com/2016/05/oven-braised-beer-brats.html
- ↑ http://whoonew.com/2013/03/grilling-green-bay-beer-brats/
- ↑ http://www.simplyscratch.com/2016/05/oven-braised-beer-brats.html
- ↑ http://www.simplyscratch.com/2016/05/oven-braised-beer-brats.html
- ↑ http://www.simplyscratch.com/2016/05/oven-braised-beer-brats.html
- ↑ http://www.simplyscratch.com/2016/05/oven-braised-beer-brats.html
- ↑ https://www.fsis.usda.gov/wps/wcm/connect/625d9435-4f14-46fe-b207-5d6688cb4db5/Safe_Miminum_Internal_Temperature_Chart.pdf?MOD=AJPERES
- ↑ https://www.stilltasty.com/fooditems/index/18274
About This Article
To braise bratwurst in the oven, line a baking pan with aluminum foil and put it in the oven. Preheat the oven to 400 °F (204 °C). After 10-15 minutes, take the warm pan out of the oven and spread the bratwurst out on the bottom in an even layer. Put the brats in the oven for 45 minutes total, and turn them over once with tongs about 20 minutes in. The bratwurst is done once the skins are browned and a meat thermometer inserted into the thickest part of the sausage reads 160 °F (71 °C). Let the bratwurst rest for about 5 minutes, then serve it with your favorite condiments and sides. To learn how to make beer-braised bratwursts, keep reading!
