wikiHow is a “wiki,” similar to Wikipedia, which means that many of our articles are co-written by multiple authors. To create this article, 25 people, some anonymous, worked to edit and improve it over time.
This article has been viewed 531,870 times.
Learn more...
Are you trying to copy your favorite album to your computer, but the copy protection keeps screwing things up? There are a variety of copy protection methods, all designed to prevent you from making unauthorized copies of CDs. Unfortunately, they also prevent the many legitimate reasons you may want to make a copy as well. Luckily, there is software available that can help you bypass these restrictions. See Step 1 below to learn how to copy any CD, from albums to game installation discs.
Steps
Ripping a Protected Audio CD
-
1Disable Autorun. Many early forms of copy protection actually installed invasive software on your computer without you knowing it. for this reason, you'll want to disable Autorun before you insert the CD you want to copy to ensure that the invasive software does not get installed.
- You will need to open the Windows registry in order to disable Autorun.
-
2Download a CD ripping program. There are a variety of programs available that can rip the audio from protected CDs. If you need to copy the entire image of a data CD, see the next method. Some of the more popular programs include dBpoweramp, EAC, and ISOBuster.
- dBpoweramp is preferred because it has various options for circumventing copywriting protections. You will need the purchased version in order to access all of the functionality.
- ISOBuster can be obtained for free but comes bundled with a significant amount of adware.
Advertisement -
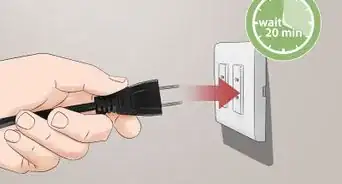
3Insert your CD. Insert your CD into your computer. Autoplay should be disabled, but if it isn't, hold the ⇧ Shift key for about five seconds as you close the disc tray. This will prevent Autoplay from running.
-
4Rip the songs. The method varies depending on the program you are using. You may have to try multiple methods until you find a way that works for you.
- If you are using dBpoweramp, click the "Options" button at the top of the window and select "Secure" for the Ripping Method. Click the "Secure Settings" link and enable "Ultra Secure Ripping". This can take a lot longer but can fix errors caused by copy protection.
- If this first method doesn't work, try selecting "Defective by Design" from the Options menu. This is for CDs that have been intentionally damaged as a form of copy protection.[1]
- Once you've chose your settings, select the tracks you want to copy and click the Rip button.
- If you are using ISOBuster, highlight all of the tracks you want to copy, right-click on them, and select "Extract Objects". Choose a location to save them and then wait for the ripping process to complete.
-
5Burn the ripped songs to a blank CD. Once the songs have been copied to your computer, they are no longer copy-protected. You can freely burn them to a CD using your favorite burning software, or add them to your digital music library.
- See this guide for details on burning an audio CD.


Copying a Protected Data CD
-
1Download a disc copying program. While you can use the above method to rip the contents of an audio CD to your computer to be burned to a new CD, the process is a little different if you want to copy a data CD or make a 1:1 copy of your audio CD. To do this, you will need a disc copying program.
- The most popular and powerful disc copying program is CloneCD. CloneCD is available for free for 21 days, which should allow you to copy any CD you need to without having to pay. You can always uninstall it and reinstall it if you want to restart the trial period.
-
2Create an image from the disc. When you first start CloneCD, you will see four options. Select the first one to start the image creation process. This will copy the entire contents of the CD as a single file, which will then be able to be burned to a new disc.
- In the next window, select the drive that contains the disc that you want to copy.
- Choose the disc type. Once the disc has been analyzed, you will be given several options to choose from. Choose the type of content that is on the disc: CD Audio, Data, Multimedia Audio, Game or Protected Game.
- Set a location for the image. Choose a location on your hard drive to store the image file. The image file will be as big as the CD is, which means it could be up to 800 MB large.
- Wait for the image to be created. Once you set the location of the image file and continue, the image creation process will begin. This could take a significant amount of time. Avoid doing anything else on the computer during this process, as opening other programs could end up causing errors.
-
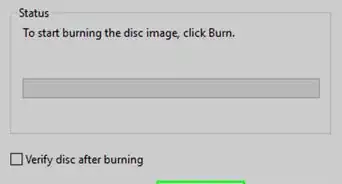
3Burn the image. Once the image has been created, you can burn it to a new blank CD. CloneCD has a burning function built-in, but you can use any image burning program, such as ImgBurn or Nero. See this guide for more details on burning image files to a disc.