This article was co-authored by wikiHow Staff. Our trained team of editors and researchers validate articles for accuracy and comprehensiveness. wikiHow's Content Management Team carefully monitors the work from our editorial staff to ensure that each article is backed by trusted research and meets our high quality standards.
There are 14 references cited in this article, which can be found at the bottom of the page.
This article has been viewed 66,628 times.
Learn more...
Beaded barrettes are elegant and beautiful on any type of hair. While they might seem difficult to make, you can easily learn how to create your own stunning beaded barrettes with the right tools and materials. Anchoring the first bead can be a bit tricky, but once you do that it’s just a matter of stringing beads in the order you want. Once your barrette is finished, try it on or give it as a gift to someone special. If you enjoy making barrettes, you might even make more of them to sell at craft shows or online.
Steps
Anchoring the First Bead
-
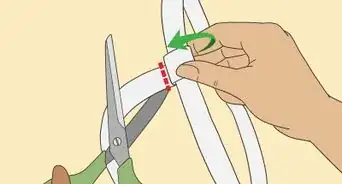
1Cut 4 ft (1.2 m) of wire. You will need to use 0.012 stainless steel wire to string the beads onto your barrette base. This type of wire is the strongest option and it will give you the best results. Cut the wire with a pair of wire cutters or very strong, sharp scissors.[1]
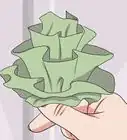
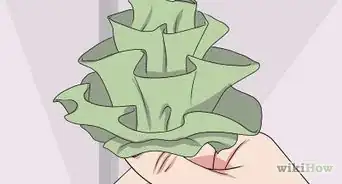
Warning: Don’t use nylon thread or another type of jewelry-making thread to string beads for barrettes. Since the barrette base has a somewhat sharp edge to it, other types of filament might break from rubbing against the barrette’s edges.
-
2String 1 round bead onto the center of your wire. Choose a bead that is larger than the hole at the end of the barrette base so that it won’t slip through the hole. This will be your anchor bead. Then, string the bead onto the wire by inserting 1 of the wire’s ends through it. Slide the bead down until it is in the center of the wire.[2]
- You can use a plain or fancy bead to anchor the other beads onto the barrette base. It’s up to you and your design!
Advertisement -
3Insert the ends of the wire through the hole at the end of the barrette. The barrette should have 2 holes in it with 1 hole on each end. Insert the ends of the wire through one of the holes. Then, tug the ends until the bead is positioned over the hole.[3]
- It doesn’t matter which end of the barrette you start stringing the beads on. However, you might find it easier to secure the crimp beads at the end if you start stringing beads at the hinge of the barrette rather than at the clasp or opening of the barrette.
-
4Insert the left wire through the right side of the bead and vice versa. Cross the wires under the hole so that they are going in the opposite direction of the side of the bead they are on. Then, insert the end of each wire into the opposite side of the bead on the top of the barrette. Pull the ends through the bead and pull them taut to secure the bead over the hole.[4]
- Your first bead is now anchored to the barrette base and you can continue to string beads onto it.


Stringing Additional Beads
-
1Pick up 1 bead with each end of the wire. You might want to make a small pile or fill a dish with the first type of beads you want to string onto the barrette. Insert 1 end of the wire through each of the beads and let the beads slide all the way down to the barrette base.[5]
- An added bonus of using wire filament is that it is stiff, so you don’t need to use a needle to string your beads like you would use when making a beaded necklace or bracelet.
-
2Insert both ends through 1 bead from opposite directions. Next, insert both ends of the wire through the same bead, but going from opposite directions. For example, insert the right end from the right side of the bead and the left end from the left side of the bead. Tug the ends to slide the bead against the others.[6]
- The ends should cross each other inside of the bead and form a diamond shape with the first 4 beads attached to the barrette base.
-
3Press the beads down against the barrette and wrap the wires under it. Once the beads are in a diamond-shape against the barrette, press it down to help make it lay even flatter. Otherwise, the wire may stick up from the barrette base slightly. Then, slide the ends of the wire under the barrette base going from opposite directions.[7]
-
4Pass the end of each wire through opposite sides of the last bead. Once the wires are crossed under the barrette, bring them back up along the side of the barrette base. Then, insert each end of the wire through the side of the bead that the wires come up on. Tug he ends of the wires until they are all the way through the bead.[8]
Tip: You can create interesting designs by varying your bead sizes, colors, shapes, and patterns. Try stringing 3 small beads onto each wire before crossing and anchoring them, alternating between different colors, sizes, and shapes, or adding a focal point bead near the center of the barrette.[9]
-
5Repeat the process to add more beads. After you have finished securing the fourth bead, repeat the process to add more beads in the same manner. Insert the ends of each wire through 1 bead each, and then insert them through the same bead to anchor those beads.
- Continue to do this until you reach the end of the barrette.


Finishing the Barrette
-
1Insert the ends of the wire through the end hole. Once you reach the end of the barrette base, you can anchor the beads to the barrette base. Push the ends of the wire down through the hole on the end of the barrette base just as you did to anchor it at the beginning. Tug until the last bead is pressed against the hole.[10]
- You can use the same type of bead you started with or a different bead depending on your preferences and design.
-
2Reinsert the ends through the bead over the hole. After you bring the ends of the wire down through the hole, wrap them under the barrette base going in opposite directions and then bring them up along opposite sides of the barrette base. Insert each end through the bead on opposing sides and pull the ends through the bead until the wire is taut.[11]
- If you’re finished adding beads, then you can secure the ends with crimp beads. If not, then repeat the process going back over the last row with a smaller size bead.[12]
-
3Weave the ends under the barrette and secure them with crimp beads. Insert the ends of the wires through 2 crimp beads from opposite directions. Tug the wires tight to get the beads as close to the barrette as possible. Then, use you chain-nose pliers to squeeze the beads tightly around the wire.[13]
- You may want to open the hair clip before you do this to make it easier to access the bottom of the barrette.
-
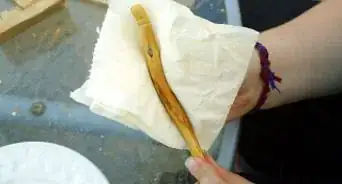
4Cut the ends of the wires off right next to the crimp beads. Use the wire cutters to do this. Cut the wire as close to the crimp bead as you can to minimize the amount of wire that is sticking out. Cut straight across the wire to prevent any sharp or jagged edges.[14]
- You can also use a sharp pair of scissors to cut the wire, but with scissors it might be more difficult to cut as close to the barrette base as is needed for a clean finish.
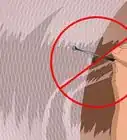
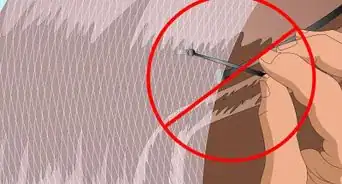
Safety Precaution: Cutting wire can be dangerous since it can shoot up towards you face and potentially cause an eye injury. Put on a pair of protective glasses or goggles before cutting the wire.


Community Q&A
-
QuestionWhat kind of thread was used?
 Community AnswerTo attach beads to a barrette you can use medium weight fishing line. The fishing line is strong enough that it will not break easily and will last a long time.
Things You’ll Need
- Size .012 nylon coated stainless steel bead stringing wire
- 1 hair barrette
- Beads in the size and colors you like
- Crimp beads
- Chain nose pliers
- Tweezers
- Wire cutters


References
- ↑ https://www.youtube.com/watch?v=bGooNZ0o5PU&feature=youtu.be&t=386
- ↑ https://www.youtube.com/watch?v=bGooNZ0o5PU&feature=youtu.be&t=395
- ↑ https://www.youtube.com/watch?v=bGooNZ0o5PU&feature=youtu.be&t=415
- ↑ https://www.youtube.com/watch?v=bGooNZ0o5PU&feature=youtu.be&t=472
- ↑ https://www.youtube.com/watch?v=bGooNZ0o5PU&feature=youtu.be&t=557
- ↑ https://www.youtube.com/watch?v=bGooNZ0o5PU&feature=youtu.be&t=566
- ↑ https://www.youtube.com/watch?v=bGooNZ0o5PU&feature=youtu.be&t=590
- ↑ https://www.youtube.com/watch?v=bGooNZ0o5PU&feature=youtu.be&t=600
- ↑ https://ourpastimes.com/how-to-make-a-beaded-hair-barrette-12182464.html
- ↑ https://www.youtube.com/watch?v=bGooNZ0o5PU&feature=youtu.be&t=1230
- ↑ https://www.youtube.com/watch?v=bGooNZ0o5PU&feature=youtu.be&t=1304
- ↑ https://www.youtube.com/watch?v=bGooNZ0o5PU&feature=youtu.be&t=1390
- ↑ https://www.youtube.com/watch?v=bGooNZ0o5PU&feature=youtu.be&t=2350
- ↑ https://www.youtube.com/watch?v=bGooNZ0o5PU&feature=youtu.be&t=2625
About This Article