This article was co-authored by Nine Morrison. Nine Morrison is the owner of WedLocks Bridal Hair & Makeup, the largest bridal beauty company in Colorado. Her work has been featured in Brides Magazine, The Knot, and by Moroccanoil, and her company replicates this standard across 400+ weddings per year. She has been in the beauty industry for over 10 years, and also travels as a beauty educator and business consultant.
This article has been viewed 67,939 times.
Flower hair clips are the perfect accessory to dress up your hairstyle. While you can buy them in stores, they are also simple, cheap, and fun to make! This article will show you a few ways of making a flower hair clip, using both fresh and fake flowers. It will also show you two ways of making your very own fabric flowers, in case you cannot find any that you like.
Steps
Making a Simple Flower Hair Clip
-
1Gather your flowers. You can use both real or fake flowers for this method.[1] Try to find some flowers that have a flat base or back, such as daisies. They will be easier to glue onto the clip.
- Chose either real or fake flowers. Do not combine real and fake flowers on the same hair clip.
- if you are using real flowers, choose something sturdy, such as chrysanthemum, mums, or daisies. You might want to pass on the delicate flowers, such as pansies and blue bells.
-
2Prepare your flowers. Make sure that your flowers and clean and free of dust (and in the case of real flowers, free of insects). You will also need to make sure that the back of the blossom is as flat as possible. Here's how you should prepare real and fake flowers:
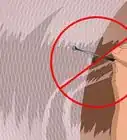
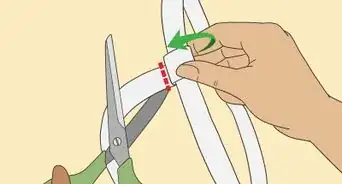
- Cut fresh flowers off the stems.[2] Trim single flowers, such as daisies, as close to the base as possible. This will make it easier to glue it onto the clip.[3] Discard the stems.
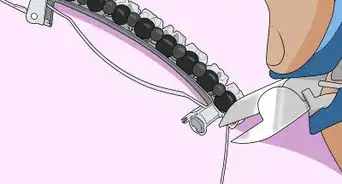
- Pull fake flowers off the stem. Then, use a pair of sharp scissors to trim down the plastic nub at the base of the flower. Discard the stems.
- If you are using tiny flowers, such as baby's breath, keep them in small bunches. Don't trim them down all the way to the base of the flower.[4]
- Consider saving the leaves from your flowers. They can make great fillers.
Advertisement -
3Consider hot gluing some ribbon or leaves onto the clip. This will help hide the metal part. It may also make your hair clip look fuller. Here are some ideas to get you started:
- Glue two to three leaves onto the clip with the points facing outward, like rays on a sun.
- Glue several leaves down the center of the clip, with the points overlapping each other like scales.
- Glue a strip of ribbon onto the top of the clip to hide the metal.
- Glue several long strands of ribbon to one of the ends of the clip.
-
4Consider hot gluing a circle of felt to the back of your flower. This is not necessary, but it will help give it some stability. The felt circle should be large enough to cover the back of the flower, but small enough so that you can't see it when you look down at the flower. Try to use a felt color that matches your flower color.
-
5Start hot gluing the flowers onto the clip. Place the glue onto the clip first, then press the flower into the glue. You can arrange them in any pattern your want, but here are some ideas to get you started:
- Work in odd numbers. This will make your piece look more natural and organic.
- Work from large to small. Place the largest flower at one end of the clip, and work your way towards the other side, using smaller flowers as you go.
- Use all the same size flowers on a barrette clip. If you have small flowers, such as chamomile or mini roses, you can glue them down the center of the clip.
- Use the largest flower in the center of the clip, and place the smaller flowers to the left and right of it.
- Place a large flower in the center and use filler, such as baby's breath or leaves, around it.
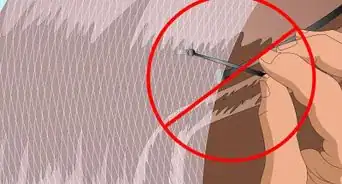
- If you are using a real flower, consider using a safety pin to attach the fresh flower to the clip. Slide the needle through both of the felt parts.[5]
-
6Consider gluing some tiny rhinestones or beads to the center of your flower. This is not necessary, but it can give your flower some extra sparkle. Choose tiny rhinestones instead of large, clunky ones for a more professional finish.

Making a Custom Flower Hair Clip
-
1Choose some fake flowers with multiple layers. You will be pulling the flowers apart and rearranging them to make your own flowers. Get a few different types of flowers in different shapes, sizes, and colors so that you will have more shapes and colors to work with..
- Great fake flowers to use include roses, chrysanthemums, and mums.
-
2Pull the fake flowers off the stem. They should pop off easily. Discard the stems, as you won't be needing them. If you want, you can save the leaves for filler.
-
3Take the flowers apart completely. Pull the plastic nub off of the back of the flower. Then, pull the different layers apart. Discard the plastic stamen, center, and nub.
- If you want, you can separate the petals into different groups based on shape, size, and color. This will keep your work area more organized and make it easier for you to find what you need.
-
4Rearrange the petals in new and interesting combinations. Make sure that you keep the layers stacked. You can combine more of the same flower to create a fuller flower. You can also take out petals from a flower you don't like.[6]
-
5Pull a threaded needle through the center of the petal stack. Thread your needle and tie a knot at the bottom of the thread. Push the needle through the center of all of the petals, starting from the bottom flower. There should already be a hole in the center of each petal; use this hole as your guide.
-
6String a pretty bead onto the needle. Some beads have a very small opening, so you may need to switch out your sewing needle for a beading needle. Once you have the bead on the thread, switch back to a regular sewing needle. Beading needles are too delicate to go through all of those petals.[7]
- Try using a pearl bead, or a faceted crystal bead.
-
7Push the needle back through the petals and tie the thread in a knot. Once you have your bead on the thread, hold it against the petal. Then, push the needle back through the petals again and tie a knot at the bottom.
-
8Hot glue a small circle of felt to the back of your flower. This will make the flower more sturdier. The felt circle should be big enough to give the flower support, but small enough so that you won't see it when you look down at the flower.
- Try to choose a color of felt that closely matches the color of your flower.
-
9Hot glue the flower onto the hair clip. If you saved any of the leaves, glue those down onto the clip first. Then, glue the flower down.

Making Silk Flowers for a Clip
-
1Choose a 100% polyester fabric. Most bolts of fabric in a fabric store will have a label at one end. The label will tell you what the fabric is made out of. Look for something that says 100% polyester. This is very important. You will be using a candle flame to burn away the edges, so you want something that melts under heat. Natural fabric, such as cotton, will burn.
- Consider using any of the following types of fabric: organza, chiffon, or satin.
- Consider mixing and matching different types of fabric to create an interesting texture.
-
2Cut the fabric into circles. Make the circles a little bit larger than you want them to be, as they will shrink when you hold them above the flame. The size of the circle will be the size of your flower; you can add petals later.
- Consider making the circles slightly different sizes. This will add some texture and variety to your flower.
-
3Light the candle. The best candle to use for this is a tea candle, but any candle will do so long as it is stable enough.
-
4Burn the edges of the circles. Hold the fabric about 1 to 2 inches (2.54 to 5.08 centimeters) away from the flame.[8] Slowly rotate the circle until the entire edge is lightly singed. The edges will melt and crinkle.
- If the flame is too hot for you, consider holding the fabric with a pair of tweezers.
- If the fabric melts quickly, pull the fabric further away. If the fabric doesn't melt, hold it closer to the flame. If the fabric doesn't melt at all, check to make sure that it is 100% polyester.
-
5Consider adding some petals. This is not necessary, but it can make your flower look more organic and realistic. After you melt edges, cut four slits, about a third of the way, into the flower.[9] Keep the slits evenly spaced. Pull a slit open and hold the flower above the flame. Keep it as far as you can so that the raw edges can still melt, but not burn.
-
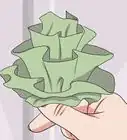
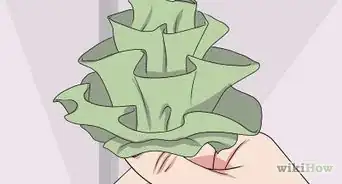
6Stack the fabric circles. Place the circles on top of each other in a stack. Play around with different sizes and textures until you get the layering you want.
- Consider using an odd number of petals instead of an even one. This will make your flower appear more organic and realistic.
-
7Stitch the flowers together. Thread your needle and tie a knot at the bottom of the thread. Push the needle through the center of all of the petals, starting from the bottom flower. Once the needle comes out of the top petal, push it back through the petals again and tie a knot at the bottom.
-
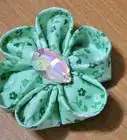
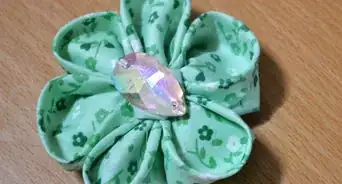
8Attach a bead, button, rhinestone, or sequin to the center of the flower. You can either sew it on or glue it on. Fabric glue or hot glue would be the best.
-
9Glue a small circle of felt to the back of your flower. This will make the flower more stable. The felt circle should be large enough to give the flower support, but small enough so that you can't see it when you look down on top of the flower.[10]
- Try to choose a color of felt that closely matches the color of your flower.
-
10Glue the flower onto the clip. Once you are happy with the flower, place some hot glue onto the metal hair clip. Press the flower down into the glue.

Making Fabric Flowers for a Clip
-
1Cut out five to six squares out of some colorful fabric. Each square needs to be about 3 inches (7.62 centimeters) on each side.
-
2Fold each square in half diagonally and press it flat with an iron. You will end up with five or six triangles. These will be your petals. Ironing them will help keep them flat while you work.
-
3Make a running stitch along the cut edges of your triangles. Thread your needle and tie a knot at the end. Pick up a petal, and make a running stitch along the cut edges; do not sew along the folded edge. Start at one corner, right next to the fold, and work your way around to the other side.
-
4Gather the cut edges. Once you have reached the other end of the triangle, slide the triangle down the thread, all the way to the knot. Keep pushing down until the fabric gathers.
- If you want, you can tie a knot to keep the petal together.
-
5Repeat the process for the rest of the petals. Keep stringing your petals onto the thread using a running stitch. Push the petals down to the bottom of your thread to gather them.
-
6Tie the strung petals into a circle. Bring the first and last petals together and stitch them together. Tie the thread off into a tight knot. You should end up with what looks like a ring with gathered petals.
-
7Cover the hole with a large button. Make sure that the button is large enough to cover the hole. Draw a line of hot glue around the gathered edges of the petals. Press a button into the glue.
- You can also use a large beak or clunky, plastic rhinestone.
-
8Glue the flower onto the hair clip once you are happy with it. Draw a line of hot glue down the center of the hair clip and press the flower into the glue.
Expert Q&A
Did you know you can get expert answers for this article?
Unlock expert answers by supporting wikiHow
-
QuestionWhat kind of flower should I use to style in my hair?
 Nine MorrisonNine Morrison is the owner of WedLocks Bridal Hair & Makeup, the largest bridal beauty company in Colorado. Her work has been featured in Brides Magazine, The Knot, and by Moroccanoil, and her company replicates this standard across 400+ weddings per year. She has been in the beauty industry for over 10 years, and also travels as a beauty educator and business consultant.
Beauty ConsultantBaby’s breath is so easy because you can just pop it in. It's too small to secure, but it is a very affordable, easy option.
Support wikiHow by unlocking this expert answer.
-
QuestionWhere can I buy a flower hair clip?Nine MorrisonNine Morrison is the owner of WedLocks Bridal Hair & Makeup, the largest bridal beauty company in Colorado. Her work has been featured in Brides Magazine, The Knot, and by Moroccanoil, and her company replicates this standard across 400+ weddings per year. She has been in the beauty industry for over 10 years, and also travels as a beauty educator and business consultant.
Beauty ConsultantIf you talk to a florist, they can craft you a hair comb with flowers. it’s really good to ask a florist to do it, as they can craft a vibrant floral comb with both fresh and dried flowers.Support wikiHow by unlocking this expert answer.
-
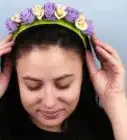
QuestionWhat are the most popular flower hair pieces?Nine MorrisonNine Morrison is the owner of WedLocks Bridal Hair & Makeup, the largest bridal beauty company in Colorado. Her work has been featured in Brides Magazine, The Knot, and by Moroccanoil, and her company replicates this standard across 400+ weddings per year. She has been in the beauty industry for over 10 years, and also travels as a beauty educator and business consultant.
Beauty ConsultantFlower crowns are really big right now. They can be time consuming to make, so it’s really good to ask a florist to do it.Support wikiHow by unlocking this expert answer.
Warnings
- When working with candles and fabric, consider having a bowl of water nearby. This is just in case the fabric catches fire.⧼thumbs_response⧽
- Hot glue guns can cause blisters. If you are concerned about this, consider using a low-temp glue gun instead of a high-temp one. Low-temp glue guns are less likely to cause blisters and burns.⧼thumbs_response⧽
Things You'll Need
Making a Simple Flower Hair Clip
- Real or fake flowers
- Real or fake leaves (optional)
- Ribbon (optional)
- Hot glue gun
- Hot glue sticks
- Hair clip
- Felt (optional)
Making a Custom Flower Hair Clip
- Fake flowers
- Hot glue gun
- Hot glue sticks
- Needle
- Thread
- Pearl or crystal bead
- Hair clip
- Felt
Making Silk Flowers for a Clip
- 100% polyester fabric
- Scissors
- Tweezers (optional)
- Candle and matches
- Needle
- Thread
- Sequin, small bead, rhinestone, etc.
- Hot glue gun
- Hot glue sticks
- Hair clip
Making Fabric Flowers for a Clip
- Fabric
- Needle
- Thread
- Scissors
- Sequin, small bead, rhinestone, etc.
- Hot glue gun
- Hot glue sticks
- Hair clip


References
- ↑ Nine Morrison. Expert Hair Stylist. Expert Interview. 3 September 2018.
- ↑ Nine Morrison. Expert Hair Stylist. Expert Interview. 3 September 2018.
- ↑ Project Wedding, DIY Fresh Flower Accessory
- ↑ Nine Morrison. Expert Hair Stylist. Expert Interview. 3 September 2018.
- ↑ Studio DIY, DIY Fresh Flower Hair Bows
- ↑ Something Turquoise, DIY Flower Hair Piece
- ↑ Something Turquoise, DIY Flower Hair Piece
- ↑ Simply Vintage Girl, Tutorial: How to Make Lovely Fabric Flowers
- ↑ Simply Vintage Girl, Tutorial: How to Make Lovely Fabric Flowers
- ↑ Simply Vintage Girl, Tutorial: How to Make Lovely Fabric Flowers
- ↑ Nine Morrison. Expert Hair Stylist. Expert Interview. 3 September 2018.
About This Article