This article was co-authored by wikiHow Staff. Our trained team of editors and researchers validate articles for accuracy and comprehensiveness. wikiHow's Content Management Team carefully monitors the work from our editorial staff to ensure that each article is backed by trusted research and meets our high quality standards.
There are 9 references cited in this article, which can be found at the bottom of the page.
The wikiHow Video Team also followed the article's instructions and verified that they work.
This article has been viewed 47,749 times.
Learn more...
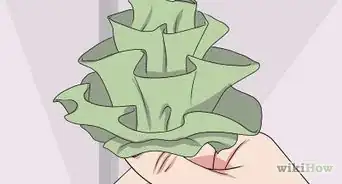
Baby hair bows are a cute way to dress up your little one’s hair, and they are so easy to make! All you need is some ribbon, hot glue, and a barrette to attach the bow to. Choose any type of ribbon you like and form it into a bow. Then, simply attach the bow to a barrette for a cute and easy baby hair accessory.
Steps
Making a Simple Baby Hair Bow Barrette
-
1Cut out 2 pieces of ribbon for the bow. Cut one 4 to 6 in (10 to 15 cm) long piece of 1.5 in (3.8 cm) wide ribbon, depending on how big you want your finished bow to be. Then, cut one 4 in (10 cm) long piece of 3⁄8 in (0.95 cm) wide ribbon, which you will wrap around the center of your baby bow. Measure the 2 pieces of ribbon with a ruler and cut them with a sharp pair of fabric scissors.[1]
- Choose 2 kinds of ribbon that complement each other. Also, make sure to select ribbon in prints, colors, and textures that you like.
- Since you will be folding the ribbon in half, a 4 in (10 cm) long piece of ribbon will create a 2 in (5.1 cm) bow, while a 6 in (15 cm) piece will create a 3 in (7.6 cm) bow.[2]
-
2Fold the 1.5 in (3.8 cm) wide piece of ribbon in half. Match up the 2 short ends of the ribbon to fold it in half. Then, crease the ribbon along the fold. This crease line will serve as your guide for gluing the ribbon’s ends to form the bow.[3]
- Keep in mind that this fold is only temporary to create a crease. You will need to unfold the ribbon to form the loops for the bow.
Advertisement -
3Apply hot glue along the crease and press the ribbon into it. Unfold the ribbon and lay it with the back side of the ribbon facing up. Then, apply a line of glue along the edge of the crease and press 1 end of the ribbon into it. Hold the end of the ribbon against the line of glue for 15 seconds to set it. This will form 1 loop with the ribbon.[4]
- Repeat for the other side of the ribbon so that you have 2 loops on either side of the crease you made.
- Be careful not to get hot glue on your skin or it may burn you. To avoid touching the glue at all, press down the ends of the ribbon with the end of a pen or a pencil eraser.[5]
-
4Pinch the bow at the center to fold the ribbon in half lengthwise. Next, grasp the center of the bow with the raw edges of the bow against your fingertips. Pinch until the center of the bow is folded in half and the 2 edges of the center meet up. Hold the bow in this position for about 5 seconds to crease this fold.[6]
- Make sure that the hot glue has already set and cooled before you release the center of the bow. Otherwise, you may undo the ends or even burn your fingers.
-
5Apply a dot of glue into the fold. Release the center of the bow and then apply a dot of hot glue to the crease you made. Pinch the bow again to press the 2 sides of bow’s center together around the glue. Hold the bow in this position for about 15 seconds to set the glue.[7]
- Only use a small dot of glue. Too much and it will squeeze out around the center of the bow and glue too much of the center together and possibly even burn your skin.
-
6Fold the ribbon back at the center and glue it in place. Once the glue has set, take 1 edge of the center of the bow and fold it back. Press the ribbon in the opposite direction of the first fold to create an accordion-like fold at the center of the bow. Then, release the ribbon and apply a dot of glue to the fold and press it again. Hold it in this position for 15 seconds to set the glue, and then repeat the same fold on the other edge.[8]
- The second fold should be the mirror image of the first fold, but on the other side of the bow’s center.
-
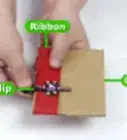
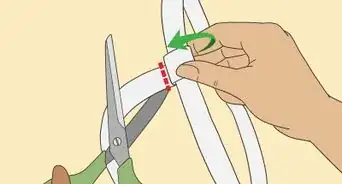
7Wrap the 3⁄8 in (0.95 cm) wide ribbon around the center of the bow. Apply a small dot of glue to the back of the bow and press 1 end of the narrow ribbon into it. Then, wrap the ribbon around the center going towards the front side of the bow and back around to the back. Do this 2 times, and then glue the other end of the ribbon behind the bow.[9]
- If there is any excess ribbon, cut it off with your scissors.
- If you want to make a double bow, then do not wrap the center of your bows. Leave them bare so that you can wrap the ribbon around both bows at once.
-
8Glue the bow onto a baby barrette. Apply a line of glue to the barrette and then press the back of the bow onto it. Hold the barrette firmly against the back of the bow for about 15 seconds to ensure that the glue is set.[10]
- Be careful not to move the bow while you are pressing on it or it won’t set properly.
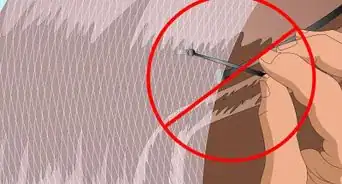
Tip: Baby hair is finer than adult hair, so you may want to purchase a special baby barrette or a non-slip barrette to use as the base for your bow. Check in the hair supply section of a drug or grocery store to find one.

Creating a Double Baby Bow
-
1Make a second bow identical to the first one. If you want to create a double bow, then make a second simple bow in the same way that you made the first one. You can use the same color ribbon or a complementary color.[11]
- For example, you could make 1 bow in yellow with white polka dots and the second bow in plain yellow or in a yellow ribbon with white flowers on it.
-
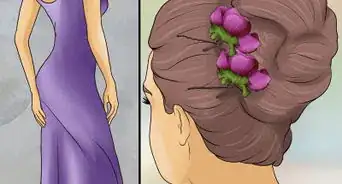
2Stack and glue the 2 bows together at the center. Take the 2 bows and apply a dot of hot glue to the side of 1 bow at its center. Then, place the other bow against the center of this bow and pinch the 2 bows to press them together around the glue. Hold the bows in this position for about 15 seconds to set the glue and secure them together.[12]
- Only apply a small dot of glue between the 2 ribbons to attach them. You will be wrapping the bows with a piece of ribbon as well, so it is okay to only use a little glue.
-
3Wrap a piece of ribbon around the center of the bows. Next, cut a 4 in (10 cm) piece of 3⁄8 in (0.95 cm) wide ribbon. Apply a dot of glue to the back of one of the bows and press the end of the ribbon into it. Then, wrap the ribbon around the front of the 2 bows and around to the back again. Bring the ribbon around the center of the bows 1 more time and then glue the other end in the back.[13]
- Make sure to press the ends of the ribbon for about 15 seconds to set the glue.
- If there is any excess ribbon after you wrap it around the bow, cut it off.
-
4Glue a piece of 3⁄8 in (0.95 cm) wide ribbon to the top of the barrette. Next, cut a piece of 3⁄8 in (0.95 cm) wide ribbon to the same length as your barrette. Then apply a line of glue to the barrette and press the ribbon into it. Hold the ribbon in place for 15 seconds to set the glue.[14]
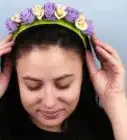
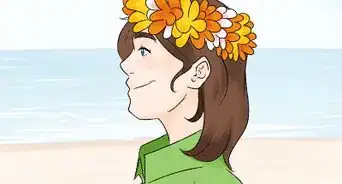
Tip: You can glue the bow onto a headband if you prefer. Just identify where you want to attach the bow and glue it directly onto the headband. Then, glue the end of a 4 in (10 cm) long piece of 3⁄8 in (0.95 cm) wide ribbon to the underside of the headband, wrap it tightly around the around the center of the bow 2 to 3 times, and glue the other end on the underside of the headband.[15]
-
5Glue the bow onto the ribbon on the barrette. After the glue has set, apply a line of glue across the ribbon on the barrette. Then, press the back of the bow into the ribbon and hold it for 15 seconds to set the glue.[16]
- Make sure that the bow is centered over the ribbon and oriented the way you want it to be.
-
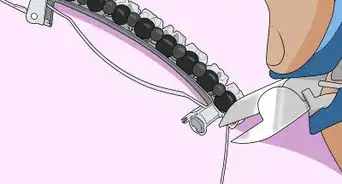
6Wrap a piece of 3⁄8 in (0.95 cm) wide ribbon around the bow and barrette. As a final touch to secure the bow and make the barrette easier to keep in your baby’s hair, cut out 1 more 4 in (10 cm) long piece of the 3⁄8 in (0.95 cm) wide ribbon. Open up the barrette and apply a dot of glue to the underside of the barrette. Press the end of the ribbon into it and wrap it around the center of the bow. Wrap it around 1 more time and then glue the end of the ribbon on the underside of the barrette again.[17]
- This completes your double baby hair bow! After the glue is set and cooled it is ready to use!

Things You'll Need
- 1.5 in (3.8 cm) wide ribbon
- 3⁄8 in (0.95 cm) wide ribbon
- Ruler
- Scissors
- Hot glue gun and glue
- Barrette


References
- ↑ https://www.youtube.com/watch?v=uHRgrc-C6g8&feature=youtu.be&t=18
- ↑ https://www.makelifelovely.com/no-sew-hair-bow-headbands/
- ↑ https://www.youtube.com/watch?v=uHRgrc-C6g8&feature=youtu.be&t=70
- ↑ https://www.youtube.com/watch?v=uHRgrc-C6g8&feature=youtu.be&t=86
- ↑ https://www.makelifelovely.com/no-sew-hair-bow-headbands/
- ↑ https://www.youtube.com/watch?v=uHRgrc-C6g8&feature=youtu.be&t=142
- ↑ https://www.youtube.com/watch?v=uHRgrc-C6g8&feature=youtu.be&t=160
- ↑ https://www.youtube.com/watch?v=uHRgrc-C6g8&feature=youtu.be&t=182
- ↑ https://www.youtube.com/watch?v=uHRgrc-C6g8&feature=youtu.be&t=238
- ↑ https://www.youtube.com/watch?v=uHRgrc-C6g8&feature=youtu.be&t=238
- ↑ https://www.youtube.com/watch?v=uHRgrc-C6g8&feature=youtu.be&t=238
- ↑ https://www.youtube.com/watch?v=uHRgrc-C6g8&feature=youtu.be&t=238
- ↑ https://www.youtube.com/watch?v=uHRgrc-C6g8&feature=youtu.be&t=238
- ↑ https://www.youtube.com/watch?v=uHRgrc-C6g8&feature=youtu.be&t=238
- ↑ https://www.makelifelovely.com/no-sew-hair-bow-headbands/
- ↑ https://www.youtube.com/watch?v=uHRgrc-C6g8&feature=youtu.be&t=238
- ↑ https://www.youtube.com/watch?v=uHRgrc-C6g8&feature=youtu.be&t=238
About This Article