X
wikiHow is a “wiki,” similar to Wikipedia, which means that many of our articles are co-written by multiple authors. To create this article, 13 people, some anonymous, worked to edit and improve it over time.
This article has been viewed 69,578 times.
Learn more...
Salesforce is a great tool for managing your company's customers, including your leads. We'll show you how to add the contact info for your leads so you can hopefully convert them into new clients!
Steps
-
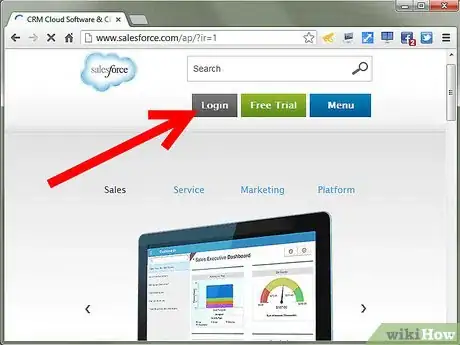
1Sign into your Salesforce account. You will be asked for an email and a password. Although companies usually sign up for Salesforce, there is a unique login for each user. Salesforce's software is based on "cloud computing" where the database is stored on more than 1 server and made available through an Internet connection. This frees up space on a company's computer network.[1]
-
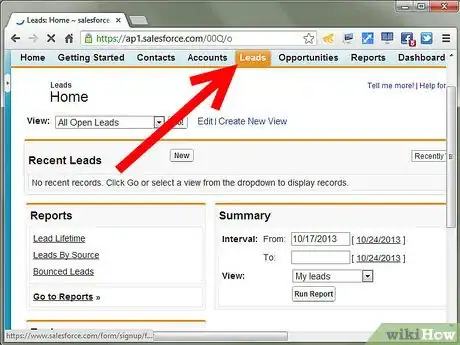
2Go to the "Leads" tab, which will be toward the left hand side of your horizontal options for your Salesforce account. Check if you have an option to "Add New" at the top. Most user accounts will not have this option. In general, mainly administrators add new Salesforce leads. Most leads are generated from a company's connected website or through various lead sources or mass imports.
- If you do not have an "Add New" button, you will need to add your lead in as a "Contact," a name for a lead that has been qualified as useful.
Advertisement -
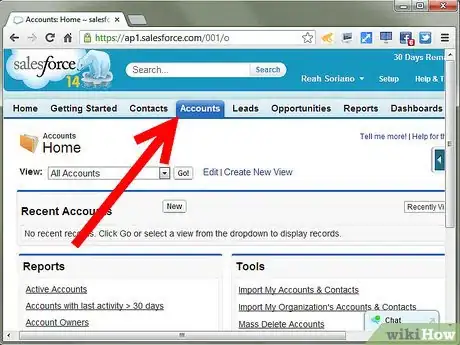
3Go to the business account with which the lead is associated. You can do this by clicking on the "Account" tab, most likely the third tab on the horizontal list of Salesforce options.
- Although this is not strictly necessary, if the lead is an individual, Salesforce is most often used for Business to Business sales where there may be many different people in a company's hierarchy that are associated with their business account. It is also a way to ensure that you are not trying to put a lead in that is already in the system.
- Scroll down the page that lists all the info you have for the account. Approximately halfway down the page there will be a list of "Contacts" for the business.
-
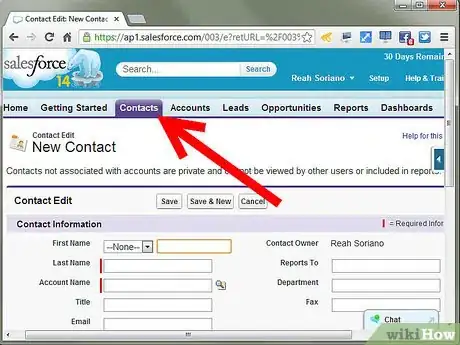
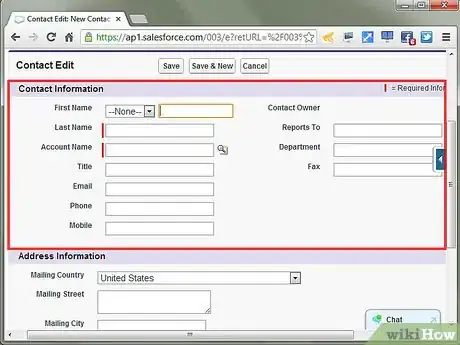
4Click the "New Contact" button above the list of current contacts. A screen should appear that has blanks where you can enter the lead or contact's information.
-
5Fill in all the information you know. Any blank that has a vertical red line to the left of the box is a required field.
- You will not need to add the account information, since it will automatically be linked to that Salesforce contact.
-
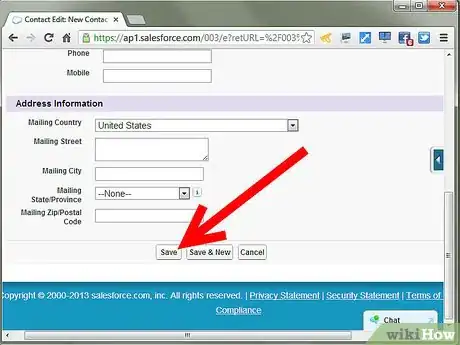
6Press the "Save" button at the top of the page in order to add the contact into the database.
- Alternatively, you can press "Save and New" to save the contact you have just created and add another new Salesforce contact to the account.
Advertisement
References
About This Article
Advertisement
