This article was co-authored by wikiHow Staff. Our trained team of editors and researchers validate articles for accuracy and comprehensiveness. wikiHow's Content Management Team carefully monitors the work from our editorial staff to ensure that each article is backed by trusted research and meets our high quality standards.
There are 11 references cited in this article, which can be found at the bottom of the page.
The wikiHow Video Team also followed the article's instructions and verified that they work.
This article has been viewed 44,909 times.
Learn more...
Fabric that is cut on the bias is cut from one corner to the other of the fabric.[1] Making diagonal folds allows you to create bias binding strips without having to measure and draw lines all the way across your fabric.[2] The strips have angled ends that make it easier to connect them along the edges of your project. Bias binding strips can be used to cover the raw edges of a project while also adding a decorative touch.
Steps
Pressing and Cutting the Fabric
-
1Iron your fabric. Your fabric needs to be completely wrinkle-free. This will help to ensure that the bias binding strips look neat when you sew them onto the edges of your project. Iron your fabric to get rid of any wrinkles before you begin working with it.[3]
- Depending on the type of fabric, you may need to pre-wash and dry it before ironing it. For example, if your fabric is one that will likely shrink the first time you wash it, such as cotton, then pre-washing is recommended.
-
2Lay out your fabric with the print side facing down. A cutting mat and rotary cutter make it much easier to get precisely sized binding strips. You can purchase a cutting mat and rotary cutter in a craft supplies store. Place your fabric onto the cutting mat after you have pressed it. Make sure that the print side of the fabric is facing down towards the mat.[4]
- If you do not have a cutting mat and rotary cutter and do not want to purchase these items, then you may also use scissors and a ruler to make your cuts. However, you will have to be much more careful when cutting the fabric since you will not have the benefit of a lined surface to cut on.
Advertisement -
3Cut your fabric if needed. Use your rotary cutter or a pair of fabric shear to cut your fabric piece to the desired dimensions for making your binding strips. The dimensions that you cut your fabric to will impact how much bias binding you can make. It is best to use a piece of fabric that is a square or nearly a square. You can also use what is known in quilting terms as a “fat quarter” to make your bias binding strips. This is a piece of fabric that measures 1.25 yards (1.14 m) by 1.25 yards (1.14 m).[5]

Folding the Fabric
-
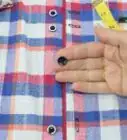
1Fold the fabric so that the opposite corners meet. Fold over one corner of your fabric towards the opposite lower opposite corner. Make sure to match up one edge of the fabric with its adjacent edge. The corners may not line up perfectly if your piece is slightly rectangular. It is most important for the edges of the fabric to be even on one side. Also, if your piece is slightly rectangular and not square, then you may have some excess fabric that does not match up with anything and that is okay.[6]
- Your piece will be in the shape of a triangle after you make this first fold. The print sides of the fabric will also be visible after you make this fold.
-
2Fold diagonally again to form a smaller triangle. Next, fold one corner of the triangle to its opposite corner. This will form the fabric into the shape of a smaller triangle. You may still have a strip of excess fabric at the bottom of the triangle, and that is fine.[7]
-
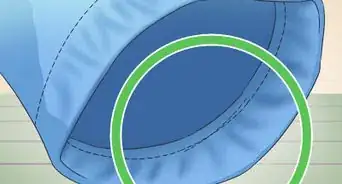
3Create one more fold to form a rectangle. Fold the tip of the triangle towards the bottom of the triangle so that the fabric forms a rectangle. You will have a small triangular piece of fabric sticking out from the bottom of the rectangle after you make this fold.[8]
- Keep in mind that this extra fold is only necessary if you are working with a larger piece of fabric. If you just have a small piece, then you can skip it.
Cutting the Bias Binding Strips
-
1Cut off the end of the rectangle. Place your clear ruler across the shorter area of the rectangle so that it is about 0.5 inches (1.3 cm) from the edge. Then, run the rotary cutter along the edge of the ruler to cut this 0.5 in (1.3 cm) strip off of the rectangle.[9]
-
2Measure and cut 2.5 inches (6.4 cm) sections across the rectangle. After you remove the end piece, turn the piece of fabric around and begin cutting 2.5 inches (6.4 cm) sections all the way across the rectangle. You can make your strips smaller or larger if desired by increasing or decreasing the width of the strips.[10]
- Make sure to cut across the shortest portion of the rectangle. In other words, cut width-wise, not lengthwise.
-
3Stack the strips until you are ready to use them. After you cut the strips, stack them up and tie them with the first 0.5 in (1.3 cm) piece of fabric that you cut. This will keep the bias binding strips together until you are ready to use them.[11]

Things You'll Need
- Fabric
- Cutting mat
- Rotary cutter or sharp fabric shears
- Clear ruler
- Iron


References
- ↑ https://www.quiltingdaily.com/binding-a-quilt-bias-binding-vs-straight-of-grain-binding-quilting-daily/
- ↑ http://www.jenniferlaurenvintage.com/2013/05/tutorial-how-to-make-bias-binding.html
- ↑ https://www.youtube.com/watch?v=_dgB4Hc_Xe4&feature=youtu.be&t=55s
- ↑ https://www.youtube.com/watch?v=_dgB4Hc_Xe4&feature=youtu.be&t=50s
- ↑ https://www.youtube.com/watch?v=_dgB4Hc_Xe4&feature=youtu.be&t=35s
- ↑ https://www.youtube.com/watch?v=_dgB4Hc_Xe4&feature=youtu.be&t=1m5s
- ↑ https://www.youtube.com/watch?v=_dgB4Hc_Xe4&feature=youtu.be&t=1m19s
- ↑ https://www.youtube.com/watch?v=_dgB4Hc_Xe4&feature=youtu.be&t=1m32s
- ↑ https://www.youtube.com/watch?v=_dgB4Hc_Xe4&feature=youtu.be&t=1m39s
About This Article