This article was co-authored by Alberto DeJesus. Alberto DeJesus is a Construction Specialist and the CEO of DeJesus Industries. With more than four years of experience, he specializes in high-end real estate development and construction. Alberto and DeJesus Industries have been featured on NBC News and have worked with numerous well-known companies, including Mazda, Amazon, and CVS. Alberto holds a Bachelor’s degree from Boston University.
There are 12 references cited in this article, which can be found at the bottom of the page.
This article has been viewed 76,685 times.
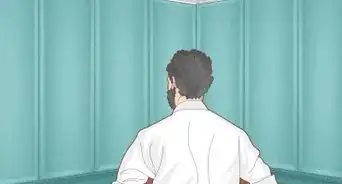
Cutting your own skirting boards is a fairly quick and easy project. There are two types of cuts that you will likely need to make: external and internal. External corners are where the skirting boards join to form a point that faces towards you. Internal corners are where the skirting boards join together and point inwards. Choose the appropriate cut for each skirting board to achieve seamless joints.
Things You Should Know
- Measure the boards and mark the cut lines on the surface.
- Use a mitre or coping saw to cut along the lines you created.
- Sand the exposed wood and make sure the boards fit together properly.
Steps
Cutting External Corners
-
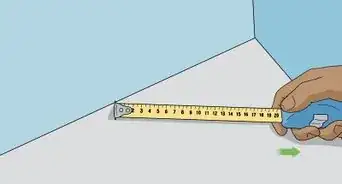
1Measure how long the board needs to be. Line a piece of skirting board up with the wall and mark where the corner of the wall is on the board. Use a pencil and ruler to mark the board.[1]
- Use a pencil rather than a pen as this can easily be erased.
-
2Mark which side of the corner the skirting board is on. This is an important step if you want your corners to fit together. If your skirting board sits to the left of the corner, draw an arrow on the wood pointing towards the left. Similarly, if the board is on the right side of the corner, draw an arrow pointing right on the timber.[2]
- Draw the arrow on the same side as the first line you drew so that you can easily identify which is the front side of the board.
Advertisement -
3Attach a mitre box to a firm surface. A mitre box is a tool that will help you to make the cuts at the correct angles. In order for the box to be stable, it needs to be attached to something. If you are a regular woodworker, consider attaching it to your workbench. Place screws into the holes in the mitre box and use a drill to screw them into the wood.[3]
- If you don’t foresee yourself using the mitre box often, attach it to a piece of sheet timber instead. Use the sheet of timber to kneel on when you come to cut the skirting board.
- Purchase a mitre box from a hardware store.
- Choose screws that are long enough to go through the mitre box with at least 1 centimetre (0.39 in) to spare.
-
4Place the board in the mitre box with the front of the skirting facing you. Place the skirting board into the open slit in the mitre box. Position the skirting board so that the end you need to cut is in the middle of the mitre box.[4]
- Check the lines that you drew on the wood are facing toward you so that you can see where to make the cut. Make sure that the skirting is the right way up. If you cut the board upside down, there is a possibility it could get damaged while it’s being cut.
-
5Place the saw into the gap that corresponds to the angle you are cutting. If the arrow you drew on the skirting board points left, place the saw into the gap in the mitre box that point towards the left. Similarly, if the arrow on the skirting board points right, place the saw into the gap that points toward the right.[5]
- Push the saw right down so that it is touching the wood.
-
6Push the saw back and forth to cut the board. Keep a steady pressure on the saw as you move it back and forward. Try to do long and even strokes rather than fast motions. Keep sawing until the saw has cut right through the wood. Remove the pieces of board from the mitre box once you have cut it.[6]
- Use one hand to hold the skirting board in place while you saw.
-
7Sand the exposed wood on the boards with 100-grit sandpaper. Rub a piece of 100-grit sandpaper back and forth over the freshly cut wood. Sand the wood for about 10 seconds.[7]
- The cuts don’t need to be perfectly smooth, just focus on removing any major bumps or splinters from the wood.
-
8Plane off any excess wood if the corners don’t join up correctly. Place the skirting board against the wall. If one skirting board is hanging over the other board, you will need to plane the longer board down to size. Push the planer over the wood, following the angle of the original cut, to remove small shavings of wood. Recheck the boards to ensure that they fit together.[8]
- Continue to plane the wood until the boards form a perfect corner.
- Only remove a small amount of wood each time you plane. It is easy to shave a little more wood off but it is impossible to stick the shavings back onto the wood!


Making Internal Corners
-
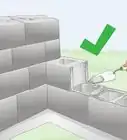
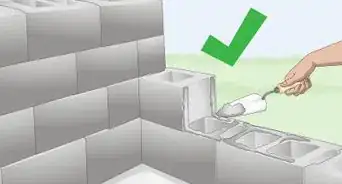
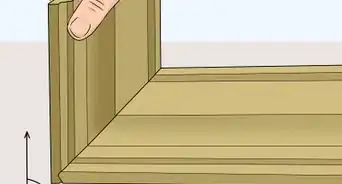
1Push the skirting boards into the corner. Push one board right into the corner and then push the second board to the corner so that the end is flat against the first skirting board. The first piece of board is called the bottom board, and the second board is known as the top board.[9]
-
2Trace the profile of the top board onto the bottom board if the skirting is curved. Many skirting boards have ornate curves and grooves to add decoration to the room. Place the top board on top of the bottom board so that it forms a right angle. Use a pencil to trace the silhouette of the top board onto the face of the bottom board.[10]
-
3Cut the bottom board along the line you drew using a coping saw. Push the coping saw back and forth to cut through the wood. Turn the coping saw to face the direction that you want to saw as this will allow you to change directions and form curves.[11]
- Saw slowly to avoid breaking the blade.
-
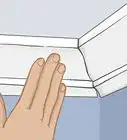
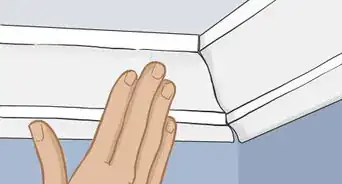
4Check that the skirting boards fit together. Push the top board into the corner of the wall. Push the bottom board flat against the perpendicular wall and push it towards the top board. The two pieces of board should slide together to form a seamless joint.[12]
- If the boards don’t fit together well, check that you cut all the lines that you drew on the wood and make any necessary adjustments.
-
5Sand the cut wood with 60-grit sandpaper. Use rough 60-grit sandpaper to quickly smooth down the freshly exposed wood. This will remove any splinters that are poking out. Rub the sandpaper back and forth over the wood for about 10 seconds.[13]


Things You’ll Need
Cutting External Corners
- Mitre box
- Panel saw
- Pencil
- Ruler
- Planer
- 100-grit sandpaper
Making Internal Corners
- Coping saw
- Pencil
- 60-grit sandpaper


References
- ↑ https://youtu.be/nb5mmbul1vc?t=134
- ↑ https://youtu.be/nb5mmbul1vc?t=137
- ↑ https://youtu.be/nb5mmbul1vc?t=122
- ↑ https://youtu.be/nb5mmbul1vc?t=123
- ↑ https://youtu.be/nb5mmbul1vc?t=157
- ↑ https://youtu.be/nb5mmbul1vc?t=160
- ↑ https://youtu.be/nb5mmbul1vc?t=181
- ↑ https://youtu.be/nb5mmbul1vc?t=196
- ↑ https://youtu.be/Lu10dxPyA40?t=242
About This Article