This article was co-authored by Marvin Woo. Marvin Woo is a licensed electrician and the Owner of Woo's Electrical & Appliance based in East O’ahu. With over two decades of experience, he specializes in troubleshooting issues and maintaining residential electrical systems. Marvin is both licensed and insured to complete electrical work in the state of Hawaii.
There are 9 references cited in this article, which can be found at the bottom of the page.
This article has been viewed 311,090 times.
A daisy chain connects multiple light fixtures to the same circuit. It's useful for recessed lighting, illuminating rooms, and connecting lights to the same switch. To start, always turn off all the electricity and confirm that no current is flowing to the room. Then pigtail new hot and neutral wires to the original light fixtures. Run these new wires to the new light fixture and connect them. Continue this pattern until all the lights are installed.
Steps
Taking Safety Precautions
-
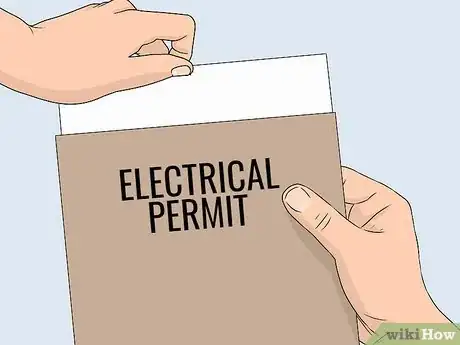
1Get any necessary permits for doing electrical work. If you’re doing a wiring job in your home, your local community may require an electrical permit. Contact your local zoning board and explain the work you’re doing. If they require a permit, go through the process of obtaining it before starting the work. [1]
- Don’t try to work on your home without a permit. You could face a hefty fine if you’re caught. Also, if you make a mistake and do any damage, insurance may refuse to cover it if you didn’t have a permit.
- If you’re not working on your home wiring and are just daisy-chaining lights as a hobby or activity, then you probably don’t need a permit.
- If you aren’t sure whether this job requires permits, contact a local electrician and ask.
-
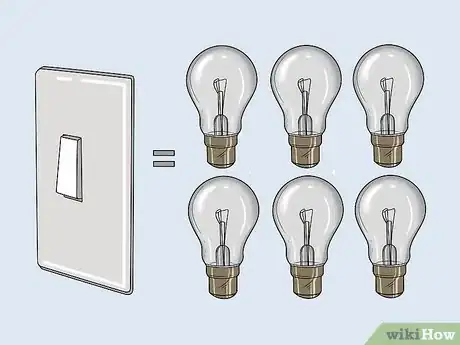
2Find out the load on your light switch to see how many bulbs it supports. Wattage is the measure of electric power coming out of a switch. Unscrew the plate cover on the wall and look at the switch. The wattage is marked on the switch. Then divide that number by the wattage of the bulbs you’re using to determine how many bulbs you can connect to this chain.[2]
- Common switch wattages are 300, 600, and 1,000. This means if you use 100 watt bulbs, these switches could respectively support 3, 6, and 10 bulbs.[3]
- Make sure you’re looking at the wattage measurement on the switch. Switches also mark amps and volts. These are different measurements.
- Never overload light switches. This is extremely dangerous and will cause a fire. If you need more bulbs than the switch can support, install a new switch first.
Advertisement -
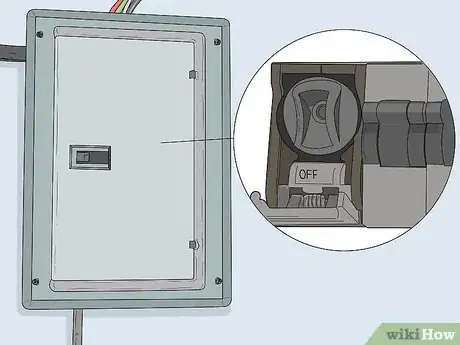
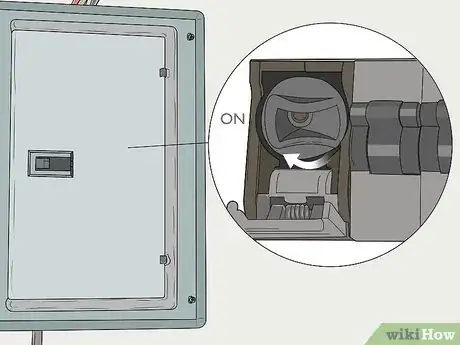
3Shut off the power to the room you’re working in. Never work on wiring without turning off the electricity. Find the fuse box in your home. Locate the fuse that connects to the room you’re working in and switch it to the Off position.[4]
- Your breaker box may have a wiring plan on the inside cover showing which areas each fuse connects to. Use this as a guide to locate the right fuse.
- If you can’t locate the right fuse, then switch the master switch in the middle to the Off position. Remember that this will cut off power for your whole home while it’s off.
-
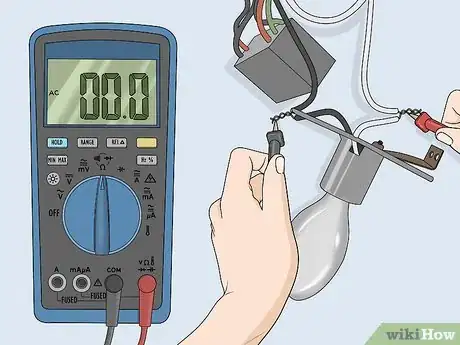
4Test the wires with a voltmeter to confirm there is no current. Since you’ll be handling wires with this job, take all precautions to confirm that no electricity is flowing to your work area. Go to either the light switch or the light fixture, if you’ve already taken it out. Touch the black node of the voltmeter to the black wire and the red node to the white wire. If the voltmeter reads 0, then the wires aren’t live.[5]
- If you do get a volt reading, do not work on the wires. Double-check and make sure you turned off the right circuit breaker.
- If you can’t stop electricity from flowing to the room, call a professional electrician to inspect your wiring.
Connecting the Wires
-
1Install new light fixtures if you’re wiring a room. A common reason to daisy chain lights is to power more light fixtures in a room. If this is the case, then install the new fixtures before working on the wiring. Cut through the drywall on the ceiling or wall. Then screw the fixture housing into place. When this is complete, go on with the wiring.[6]
- Always make sure there are no obstructions above the ceiling before cutting through it. Drill a hole where each fixture will be and insert a piece of wire or hangar. Feel around for obstructions. Then, when you’ve confirmed the path is clear, cut the hole.
-
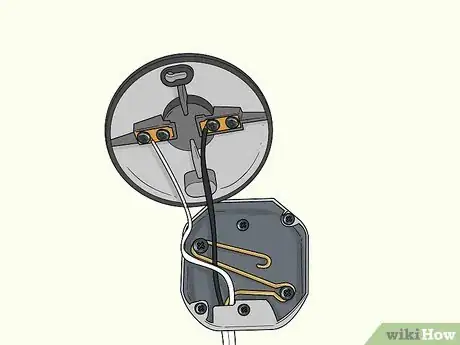
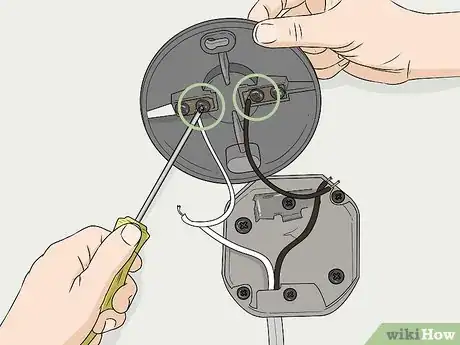
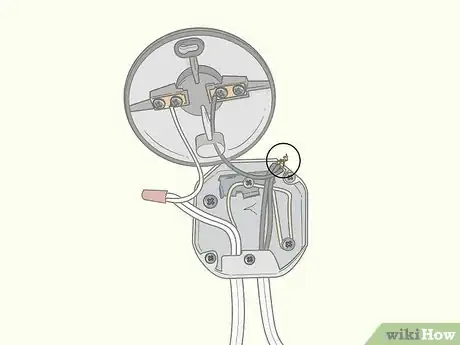
2Disconnect the hot and neutral wires from the first light fixture. Each light fixture has a hot and neutral wire going into it. Usually, the hot wire is black and the neutral is white. Remove the screws connecting the wires to the fixture to free them.[7]
- Hold onto the light fixture when you remove the wires if nothing else is securing it.
- The wires may already be pigtailed, meaning that they’re twisted together before attaching to the light fixture. This makes daisy-chaining easier. To disconnect the wires, remove the wire nuts holding them together. Then unravel the wire ends from each other.
-
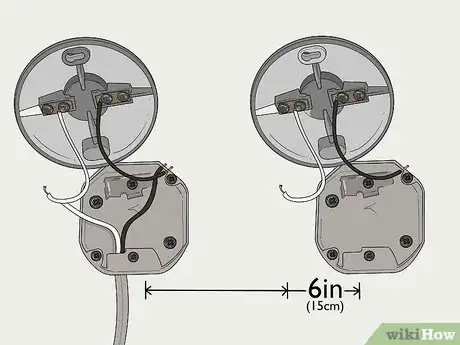
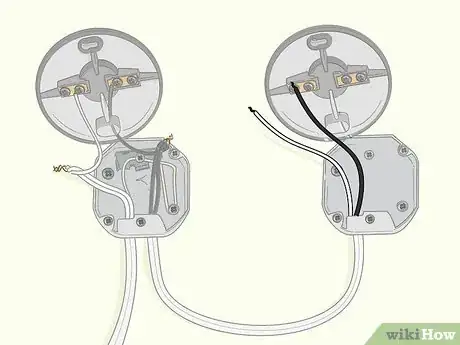
3Cut new wires 6 in (15 cm) longer than needed to reach the next fixture. Whatever the distance between the two light fixtures you’re connecting, always leave extra length. Measure the wires to the length you need, then add 6 inches (15 cm). Cut the wires at this point.[8]
- If there is excess wiring when you’re done, just coil it up in the light fixture.
- Do not mix up the colors you use. Always use white wires for the neutral and black wires for the hot.
-
4
-
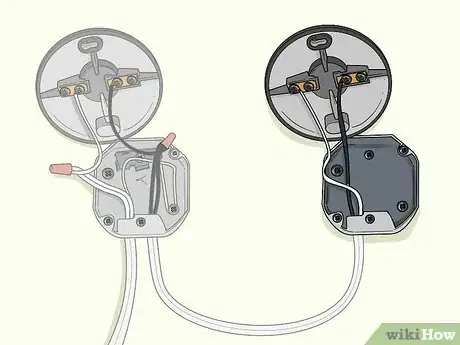
5Pigtail the wires together. Take the original hot wire from the power source, the hot wire connected to the fixture, and the new hot wire. Twist the ends of all 3 together. Leave the new wire free on one end so you can run it to the next light fixture. Then cover the 3 wire tips with a wire nut. Do the same with the 3 neutral wires.[10]
- If the fixture wasn’t already pigtailed, then you’ll need to make a pigtail. Disconnect the hot and neutral wires from the fixture. Cut another white and black wire 3 inches (7.6 cm) long and attach them to the fixture. Then pigtail those wires with the original hot and neutral ones and the ones that you're running to the next fixture.
- The advantage of pigtailing is that if one light burns out, the other lights in the chain will still work. Connecting all the wires directly to the fixture will stop the electric current if that light burns out.
-
6Run the hot and neutral wires to the new light fixture. If you’re installing new lighting in a room, you’ll probably have to run the wires through the ceiling. Feed the wiring up and push it towards the new fixture. Then go to the other fixture and pull the wiring out of the ceiling.[11]
- You can also staple the wiring to the wall if you don’t want to work through the walls and ceiling.
- If you’re daisy-chaining fixtures that aren’t in the ceiling or wall, then just run the wiring to the new fixture.
-
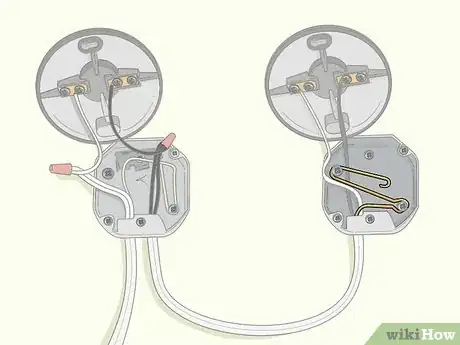
7Connect the hot and neutral wires to the new fixture. If this is the last fixture in the chain, then attach the wires directly to it. Run the hot wire to the hot side and the neutral wire to the neutral side. These are marked on most fixtures. Then wrap the wires around the fixture screws and tighten them, completing the connection.[12]
- If you’re connecting more fixtures after this one, then continue using pigtails until the last fixture.
-
8Run the ground wire to the new fixtures. In the original light fixture, look for a bare copper wire. This is the ground wire. Twist another bare wire around the ground and run it to the next fixture. Hook the ground to the fixture by wrapping it around the labeled grounding screw. Continue chaining the ground wires to all the new fixtures you're installing.[13]
- Ground wires are occasionally wrapped in green rubber. This depends on the local codes.
- Some local codes also require ground wires to be joined with a nut instead of twisted together. Check the local regulations for the correct procedure.
-
9Turn the power back on and test the chain. Go back to your breaker box and turn the fuses back on for this room. Then turn the light switch on and see if the lights work. If they do, then your daisy chain was successful.[14]
- If the lights don’t work, turn the power back off and double-check the connections. Make sure all the wires are in the right spots and have a tight connection.
- Never troubleshoot electricity without turning the power off again.
- Remember, lights should be wired in parallel rather than in series.[15]
- When wired in series, if one bulb fails then the entire group of lights fails.[16]
- Safety is a matter of wiring technique, proper wire sizing and load calculating.[17]
Community Q&A
-
QuestionLights in basement turn on/off with the same switch. I would like the lights in the storage area on a different switch so they don't come on with the rest of the basement. Any suggestions?
 Community AnswerSounds like you want storage light off most of time, so replace fixture with one that has a switch built into it. If this local switch is off, light will not be on. To turn it on, the other lights would need to be on. There are also automated bulbs that can be remotely controlled. Talk to a clerk at Home Depot in electrical department for more details.
Warnings
- Working with electricity is very dangerous. If you aren't confident that you can do this job safely, call in a professional electrician.⧼thumbs_response⧽
Things You'll Need
- Safety goggles
- Light fixtures
- Screwdriver
- Wire stripper
- Electrical wires
- Light bulbs
References
- ↑ https://www.bobvila.com/articles/consider-before-installing-recessed-lighting/
- ↑ https://www.bobvila.com/articles/consider-before-installing-recessed-lighting/
- ↑ http://www.electrical101.com/dimmer-switches.html#:~:targetText=How%20to%20Determine%20Dimmer%20Switch,sticker%20on%20the%20light%20fixture.
- ↑ https://www.bobvila.com/articles/consider-before-installing-recessed-lighting/
- ↑ https://www.bobvila.com/articles/consider-before-installing-recessed-lighting/
- ↑ https://www.bobvila.com/articles/consider-before-installing-recessed-lighting/
- ↑ https://youtu.be/PXRqaDX7A3A?t=99
- ↑ https://www.hgtv.com/design/decorating/design-101/install-recessed-lighting
- ↑ https://www.hgtv.com/design/decorating/design-101/install-recessed-lighting
- ↑ https://youtu.be/PXRqaDX7A3A?t=128
- ↑ https://www.bobvila.com/articles/consider-before-installing-recessed-lighting/
- ↑ https://youtu.be/PXRqaDX7A3A?t=186
- ↑ https://youtu.be/PXRqaDX7A3A?t=199
- ↑ https://youtu.be/PXRqaDX7A3A?t=466
- ↑ Marvin Woo. Licensed Electrician. Expert Interview. 31 January 2022.
- ↑ Marvin Woo. Licensed Electrician. Expert Interview. 31 January 2022.
- ↑ Marvin Woo. Licensed Electrician. Expert Interview. 31 January 2022.
About This Article
A daisy chain connects multiple lights to the same circuit so you can control them from one place. To make a daisy chain, you’ll need a screwdriver, a light bulb for each fixture, and enough electrical wire to stretch between each of them. To work out how many lights you can daisy chain, check the load marked underneath your light switch plate cover. Then, just divide this by the wattage of each bulb. It’s important to shut off the electricity for the room you’re working on to avoid electrocuting yourself. When you're ready to get started, you'll need to disconnect the hot and neutral wires from each light fixture, then twist them together with your new wire. Then, you can run the wire between each fixture to connect it them. For more tips, including how to install new light fixtures for a daisy chain, read on!
