This article was co-authored by Jeff Huynh. Jeff Huynh is the owner of Moseybolt, a full service solution in home services, renovations, and repair in the Greater Seattle area. He has over five years of handyman experience. He has a BS in Business Administration from the San Francisco State University and his Certificate in Industrial Electronics Technology from North Seattle College.
There are 8 references cited in this article, which can be found at the bottom of the page.
This article has been viewed 400,478 times.
Installing a new light fixture requires careful planning and attention to detail. There's no room for error when it comes to electrical wiring, which means you've got to organize properly and learn the regulations to make sure your project is safe and up to code. You can learn to plan your project and install new wiring to light your home.
Steps
Planning the Project
-
1Check your local wiring codes and schedule inspections. Several inspections and permits are required for most residential construction projects, especially when it involves installing or replacing new wires (simply replacing a fixture usually does not require permits and inspection).[1] To make sure you're up to code, you may need to schedule the following with the Housing Administration in your city or country:
- A Temporary Service Inspection
- Rough-in inspection
- Final inspection
- Even if you're not doing it yourself, any electrical work done by a subcontractor needs to be be inspected (usually both rough in and final inspections); for example, well pumps, or external wood fired furnaces.
-
2Decide what type of fixture will work best in the area you’re trying to illuminate. You wouldn't want to light up a workshop in the same way you'd light up a nursery, or a kitchen the same way you'd light living room. Think about the purpose of the room to determine where and how you'll light it. Is it a place for sitting and reading quietly? A sconce or wall-mounted fixture might be most appropriate. Is it in the kitchen where you need good directed lighting, like over a kitchen island? In this case, pendant lighting would be ideal to highlight your cooking prep.[2]
- For most jobs, you'll be working with one of a few different locations for a new fixture. Typically, you'll install fixtures in the wall, in the ceiling, or in a pole mount.
- If you're undertaking work that requires close examination, like craft or sewing, you'll need to consider having both general (LED can/recessed lighting) and task lighting (pendant fixtures, lamps, etc.); the task lighting focuses directly on your work, while the general good quality lighting helps dispel shadowing and makes the room comfortable to be in.[3]
Advertisement -
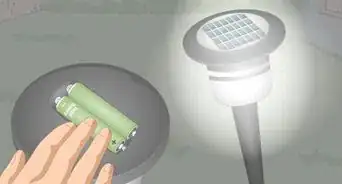
3Decide what kind of bulb you want for your fixture. Incandescent, fluorescent, LED, mercury vapor, high pressure sodium and halogen are among the most common choices, each with its own unique color tone or range of color tones form which to choose.[4] The tones and varieties of bulbs are expressed as a temperature, in degrees Kelvin. Warm tones (yellow -red) have lower temperature (2000°) while cool tones (blue) have higher temperatures (8300°). For reference purposes, daylight is generally accepted to be about 5600°.
- If you're not sure which type to choose, use LED lighting. Although the upfront cost might be slightly higher compared to other options, it will quickly pay for itself. LED lights don't get hot, use less energy, can last 10 or more years, and there are a variety of color temperatures and brightness options.
- If you’re looking for more intimate or relaxing, go for warm white. Around 2700 degrees would be appropriate for the purpose.[5]
- If you're looking for a work light, cool white or daylight is better. These bulbs are around 4000 degrees.
- When changing a bulb, you should obtain one with the same temperature light, otherwise colors in the room will be cooler or warmer depending on the tone of the light source. This is even more noticeable if there are two or more adjacent lamps of different temperatures.
-
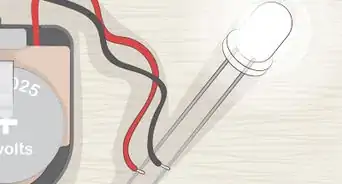
4Determine voltage and current requirements for the fixture. The fixture must operate on a voltage available at the location. Nearly all fixtures available at home centers in North America will be the 120-volt variety or have the ability to choose from two or more voltages by connecting specific wires and leaving others disconnected.
- Current requirements for 120 volt incandescent fixtures (this includes tungsten, quartz, halogen) is .83 amps per 100 watts. A 100 watt fixture can usually be added to existing circuits without incident. Most fixtures will list a wattage or amperage requirement to avoid overloading the circuit.
-
5Locate a suitable power source. Find a nearby outlet or an existing junction box in the ceiling that's close enough to branch out from.[6] If a suitable power source isn't easily available, you might have to run a new branch from the electrical panel.
- It's important to find suitable power sources that are close by. It's unlikely that you'll be able to use the basement electrical source to feed a switch on the third floor to operate a fixture that illuminates the front sidewalk. That's a lot of wiring.
-
6Plan the wiring route.[7] There are three possible ways to wire the circuit for a new installation. Power to switch, power to fixture and installing the power and load point at same switch. The three points, source, switch and fixture need to be connected together all with simple two-wire Romex cable when there is one switch controlling the fixture.
- If you're wiring multiple switches to multiple fixtures, it's important to separate your wring systems to keep them straight. The fixtures need to be wired to each other with a two-wire cable, and the switches need to be wired to each other with a three-wire cable.
- The power source can be brought to either of the three-way switch boxes, or any fixture box with two-wire cable. The cable between the switch and fixture(s) is also 2 wire type, but must be run from either three way switch box to the fixture box that has the power source. Do not deviate from the requirement.


Installing the Fixture
-
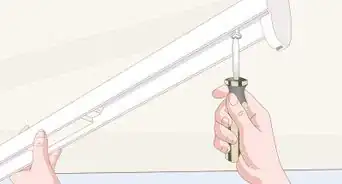
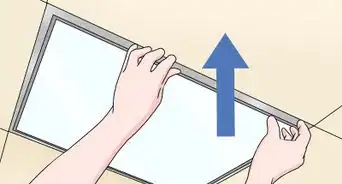
1Cut openings for the wiring. Cut openings into the ceiling, or wall surfaces for the boxes, for the switch(es), and for the fixture support by first tracing around the box on the wall or ceiling surface.[8] Be sure to match the switch box height to those in the rest of your home.
- If a fixture is to be installed in the ceiling, the box should be a 4" octagon box. It is important to note that even if a small light fixture is planned to be installed here, consider installing a fan-rated box, as a paddle fan might be installed here in the future.
- If installing recessed light fixtures, no box is installed as a wiring compartment is provided on the fixture itself. The open to be cut in the ceiling is provided by the template included with the fixture by most manufacturers or by tracing around the rough-in housing opening.
EXPERT TIPJeff Huynh is the owner of Moseybolt, a full service solution in home services, renovations, and repair in the Greater Seattle area. He has over five years of handyman experience. He has a BS in Business Administration from the San Francisco State University and his Certificate in Industrial Electronics Technology from North Seattle College.Professional Handyman Jeff Huynh
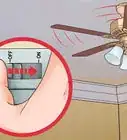
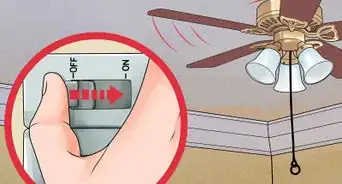
Professional HandymanDon't take chances when working with electricity. Jeff Huynh, the general manager of Handyman Rescue Team, says: "The first thing to do when you're installing a light is to turn off the power. Turn the switch off, and also turn the power off at the breaker. If you're not sure which breaker turns off the power to that room, shut the whole panel off."
-
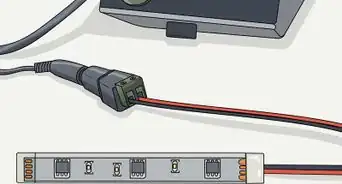
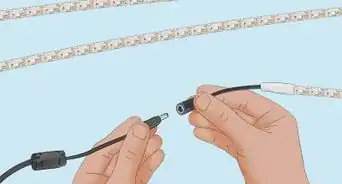
2Install the wiring. Install the Romex or other cable between the power source and boxes in the voids of the walls, ceilings, and floors with a snake or fish tape.[9] After determining there is enough ampacity in the circuit to support the additional load, extend wiring of the same size from the power source to the switch and fixture locations. If running a new circuit directly from the electrical panel, the new wire should be sized according to the fuse or circuit breaker size.
-
3Make sure your wiring is up to code. National Electrical Code Requirements for wiring need to be followed closely when you're installing a new fixture. When you're selecting wire for the job, make sure it fits the following constraints:
- A wire smaller than #14 copper is not permitted for power wiring. Smaller wires (#28 through #16) are permitted for low voltage applications such as thermostats and zone valves in gas & oil fired heating systems, door bells and buttons, alarm systems, telephones, networking, etc. These wires never enter electrical panels.
- A 15 amp circuit breaker or fuse should have no less than a #14 gauge copper wire connected. A 15 amp circuit is designed to safely carry up to 12 amps continuously on a #14 copper wire. Intermittent loads of up to 15 amps can be carrier for up to several hours.[10] If the load of any device or appliance is greater than 12 amps, a larger size wire and circuit breaker is required.
- A 20 amp circuit breaker or fuse should have no less than a #12 gauge copper wire connected. A 20 amp circuit is designed to safely carry up to 16 amps continuously on a #12 copper wire.[11] Intermittent loads of up to 20 amps can be carrier for up to several hours. If the load of any device or appliance is greater than 16 amps, a larger wire and circuit breaker is required.
-
4Connect the devices as shown in the diagram that matches your application. If you'd prefer to follow detailed instructions to wire the fixture to just two 3-way switches, please see the 3-way switch how-to guide.


Warnings
- Shut off power before connecting the new wiring to existing wiring.[12]⧼thumbs_response⧽
Things You'll Need
- Ladder
- Sheet rock saw
- Lineman pliers
- Assorted screwdrivers
- Wirenut assortment
- NM type cable (a.k.a. "Romex")
- Snake or Fish tape
- Switch box(es)
- Switch(es)
- Fixture
- Fasteners
- Spackle or other patching compound
- Putty knife / scraper
- Drill and bits.


References
- ↑ http://www.nojolt.com/residential_electrical_wiring_rough_in_guide.shtml
- ↑ https://www.bhg.com/kitchen/lighting/kitchen-pendant-lighting-tips/
- ↑ https://www.stampnstorage.com/crafted-spaces-illuminating-creativity/
- ↑ https://lifehacker.com/how-to-pick-the-best-light-bulbs-for-every-room-in-your-1713809049
- ↑ https://lifehacker.com/how-to-pick-the-best-light-bulbs-for-every-room-in-your-1713809049
- ↑ https://www.thisoldhouse.com/how-to/how-to-add-overhead-light
- ↑ https://www.familyhandyman.com/electrical/wiring-switches/how-to-install-a-3-way-switch/
- ↑ https://www.homedepot.com/c/ah/how-to-add-a-wall-switch-to-a-ceiling-fixture/9ba683603be9fa5395fab90cccd0361
- ↑ https://www.familyhandyman.com/electrical/wiring-switches/how-to-install-a-3-way-switch/
About This Article
Before you install a light fixture, make sure to contact your local Housing Administration to check the requirements for installing or replacing new wires. Then, determine the voltage for the fixture and locate a suitable power source. You'll also need to check that your wiring is up to code by checking the National Electrical Code Requirements. When you’re ready, cut openings into a ceiling or wall surface for the boxes, switches, and fixture support, install the wiring, and connect the wiring from the power source to the fixture. For more tips, like how to choose a bulb for your fixture, read on!